Showing posts with label Donna. Show all posts

Monday, November 21, 2016

Impossible Turkey Taco Pie

Do you remember when Impossible Pies were a big thing?

I do. I loved them. Or, being honest, I loved some of them. The taco pie was my favorite

The Impossible Pies were magical recipes that made their own "crust" as they baked. And they all used Bisquick to make that magical crust.

I was browsing through some old newspaper and magazine clippings I had saved and scanned, and I found a recipe for the Impossible Taco Pie that I liked so much, so I decided to make it again, to see if I still liked it.

But of course I made some changes.

I used turkey instead of beef, and I have to say that I doubt anyone could tell the difference in this recipe. Which is a good thing.

I didn't have any Bisquick in the house the first time I made this, but there are a lot of "make your own Bisquick" recipes online, so I figured I could do that rather than run to the store.

Nope. It didn't work. Not at all. I made it with Bisquick, and it was perfect. So, although that "make your own" recipe is probably a fine substitution for some recipes, it didn't work for this one. Maybe if I fiddled around with it some more, I could work it out, but that doesn't seem like a good use of my time.

Or my ingredients.

So now I have Bisquick. So it's a pretty sure bet I'll be making this again. Or maybe some other version of it. Because, seriously, this is comfort food, in the best possible way.

Panela cheese is interesting. It's a fresh cheese with a mild flavor. It softens when warm, but it doesn't really melt. So you'll end up with soft pockets of cheese in the pie, but they won't melt and get disappear into the pie.

Impossible Turkey Taco Pie
By Donna Currie, Cookistry

1 Tablespoon olive oil
1/2 large onion, diced
1 pound ground turkey
2 Tablespoons chili powder (or to taste)
1/2 teaspoon cumin
1/4 teaspoon garlic powder
1 teaspoon salt (or to taste)
1 fire-roasted red pepper, diced
4 ounces panela cheese, cut in small cubes
3/4 cup Bisquick
1 1/4 cup milk
3 eggs
1 4-ounce can diced Hatch chiles
4 ounces shredded provolone cheese
Diced tomatoes (as needed for garnish)
Diced avocado (as needed for garnish)
Green salsa (for garnish)

Green Salsa

8 medium tomatillos
1 small green pepper, cored and seeded
1 serrano pepper, cored and seeded
1 small bunch cilantro
1/2 teaspoon salt (or to taste)
2 teaspoons lime juice (or to taste)

Heat your oven to 400°F and have a 9-inch pie plate standing by.

To make the taco pie:
Heat the olive oil in a saute pan. Add the onion, turkey, chili powder, cumin, garlic powder, and salt. Cook, stirring as needed, until the turkey and onion is cooked through. Take it off the heat and add the roasted red pepper and the panela cheese.

Add the meat mixture to the pie plate and level it.

Mix the Bisquick, milk, and eggs in a medium bowl. Pour over the meat in the pan. Sprinkle the chiles on top.

Bake at 400°F for 25 minutes. Sprinkle the provolone cheese on top and return the pie to the oven. Bake for an additional 10 minutes, or until a knife inserted into the center of the pie comes out clean.

Let the pie rest for 5-10 minutes for easier slicing.

Garnish with chopped tomatoes, avocados, green salsa

To make the salsa:
Put all the ingredients in a blender, and blend until smooth.

Monday, November 7, 2016

Self-Crusting Pumpkin Pie

This recipe comes via The Los Angeles Times California Cookbook. Originally published in 1981, it definitely qualifies as retro.

Based on the "Impossible" pies made famous by Bisquick, this pumpkin pie is a little lighter, creamier, and fluffier than the typical super-dense pumpkin pie.

The pie had a few cracks on the top, but that's pretty simple to hide with a dollop of fluffy whipped cream or a scoop of ice cream.

While the recipe claimed that this pie made its own crust, don't be looking for something as thick as a typical crust. But, amazingly, it was enough crust to keep the slices of pie together. While I love flaky pastry crust, I thought this was a nice departure from the usual.

Impossible Pumpkin Pie
Adapted by Donna Currie, Cookistry
From The Los Angeles Times California Cookbook

1 1/3 cups milk
3 Tablespoons butter, softened
4 eggs
1/2 cup sugar
1/2 cup Bisquick
1 cup canned pumpkin
1 teaspoon ground cinnamon
1/4 teaspoon ground allspice
1/8 teaspoon ground cloves
1/2 teaspoon salt

Preheat your oven to 400°F and spray a 9" pie pan with baking spray or oil. Or butter the pan.

Combine all of the pie ingredients in a blender an blend until well-mixed and smooth.

Pour the mixture into the prepared pan and bake at 400°F for about 30 minutes, or until a knife inserted halfway between the edge and center of the pie comes out clean.

Remove the pie from the oven and let the pan cool on a rack until it's room temperature, then refrigerate until fully chilled.

Wednesday, September 14, 2016

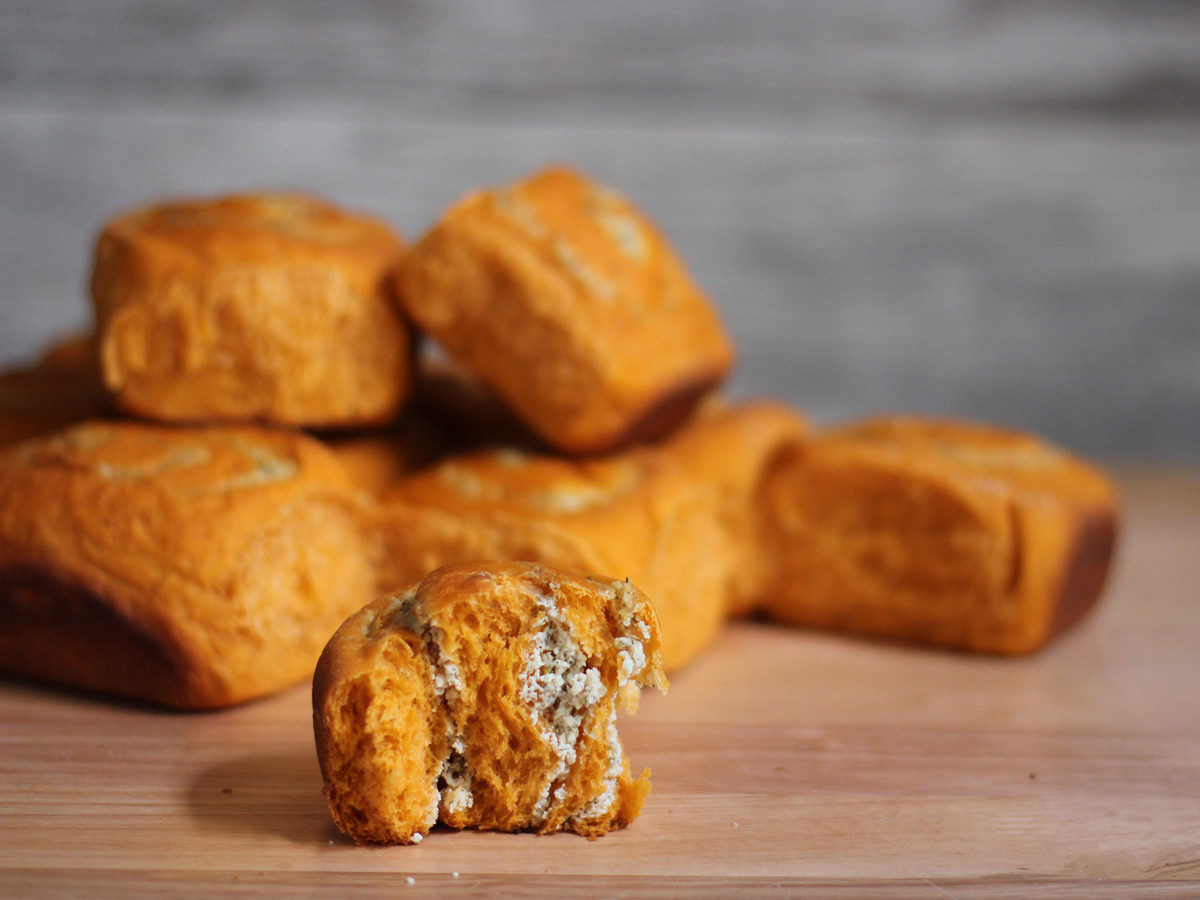
Tomato Rolls with an Herby Cream Cheese Swirl

I don't know what it is about swirl rolls, but I love making them, no matter if they're sweet or savory. They're just fun.

The rolls are pretty much never identical, which I also like. It's not what you want if you're baking for a bakery, but I like the idea that I can have a small roll if that's what I want, or a larger roll. Or one with more or less filling. Because that's how I am. Sort of random and chaotic.

Tomato powder from The Spice House is an awesome ingredient. It adds a punch of tomato flavor without adding extra moisture, which is great for a lot of recipes where you don't want to add liquid. But the powder is also very useful when you want to add some depth of flavor to a tomato sauce or salsa. Or a meatloaf. Or...well, anywhere you might add tomato paste, really.

Besides getting tomato powder and the Sunny Greek seasoning I used for this recipe, I got a whole lot of other great ingredients to work with. Ancho coffee rub and porcini salt were new items for me, but I also stocked up on toasted sesame seeds and refilled my chip dip mix, which is really awesome stuff.

Tomato Rolls with an Herby Cream Cheese Swirl
By Donna Currie, Cookistry

For the filling:
8 ounces cream cheese, at room temperature
1 Tablespoon Spice House Sunny Greek seasoning

For the dough:
1 1/2 cups water
2 1/4 Tablespoons Red Star active dry yeast
1 Tablespoon sugar
13 1/2 ounces bread flour
1 teaspoon salt
4 Tablespoons butter
2 Tablespoons tomato powder
1/2 cup potato flakes (instant mashed potatoes)

To make the filling:
Combine the cream cheese and herbs in a small bowl and mix until well combined. Set aside at room temperature until needed.

To make the dough:
Combine all of the ingredients in the bowl of your stand mixer and knead until the dough is smooth, shiny, and elastic. Cover the bowl and set aside until the dough doubles in size, about an hour.

When the dough has risen, flour your work surface and heat the oven to 350°F. Spray a 9 x 13 inch baking pan with baking spray.

Turn out the dough and roll it into a rectangle about 11 x 16 inches. With one of the long sides of the dough facing you. spread the filling over the top of the dough, leaving about an inch uncovered on the far side. It can be easier to spread the filling with your fingertips rather than using a spatula.

Roll the dough up, jellyroll-style, not too tight, and seal the seam when you reach the far end.

If the roll is very uneven, roll and nudge is so it's a fairly even thickness, then cut the roll into 12 even pieces. Place the pieces, with one of the cut sides up, in the baking pan.

Cover the pan and set aside until the dough has doubles, about 30 minutes.

Bake at 350°F until lightly browned on top - the sides tend to brown more than the top. Remove the pan from the oven and turn the buns out to cool on a rack.

I received products to work with from The Spice House through 37 Cooks.

Thursday, August 18, 2016

Zippy Mustardy Potatoes

I've "known" Jay Ducote for a few years now, although I've never seen him in person. We first "met" when a book publisher chose us - along with quite a few other bloggers - to help promote one of Emeril Lagasse's books.

Later, some of those same bloggers formed a blogging group, and Jay and I got to know each other a little bit better. Then he competed on The Next Food Network Star ... and since then, he's been a busy guy.

To say that I was excited about introducing Jay to my buddies at 37 Cooks is a bit of an understatement. I already had them cheering him on when he was competing, so I knew they'd love to work with his sauces. We each got both his barbecue sauce and his mustard sauce.

I decided to use the mustard sauce in a recipe, and it seemed like it would be the perfect thing to spice up some potatoes. Turns out, I was totally right. And these happened to go perfectly with barbecue ribs. Which just might have been sauced with Jay's barbecue sauce. Funny how that works.

Zippy Mustardy Potatoes
by Donna

1 1/2 to 2 pounds red potatoes. Or yukon golds.
1 large onion
Salt and pepper, to taste
1 cup heavy cream
1/4 cup (or more, to taste) Jay D's Louisiana Molasses Mustard Sauce

Heat the oven to 350°F and have an 8-inch baking dish standing by.

Peel and slice the potatoes about 1/4-inch thick. Peel, halve and slice the onion about the same thickness.

Arrange the onions and potatoes in the prepared pan. Mix the cream and mustard and pour it over the onions and potatoes. Cover the baking dish with aluminum foil. Bake at 350°F for 1 hour, 15 minutes, then uncover the pan and bake another 15 minutes uncovered.

Serve hot.

Thursday, May 5, 2016

Oxtails with Sofrito - A super-simple hurry-up recipe

Oxtails are one of my favorite foods, and a throwback to my childhood. My mom often made them with a tomato sauce with a hint of barbecue, but I've expanded my oxtail repertoire a bit. But still ... I often make them with a red sauce - and this recipe is no exception.

If you've never tried oxtails, they're kind of weird to look at. The flavor is similar to any of the tough cuts of beef like stew meat or short ribs. Give them a try!

Since the whole point of an Instant Pot is to make dinner fast and easy, I decided to create a super-easy recipe. I used a little cheat - a jar of sofrito. While in theory you can make your own sofrito, the one in a jar has a spice that I've never seen anywhere - culantro.

Nope, that's not a misspelling of cilantro. It's a different herb. It's sort of like cilantro, but it's not. Just like marjoram isn't oregano.

Oxtails with Sofrito
By Donna Currie from Cookistry

3 pounds oxtails, trimmed of excess fat
1 onion, diced
1 12-ounce jar Goya sofrito
1/2 cup water
1 teaspoon salt (or to taste)

Place all ingredients in your Instant Pot. Put the cover on and make sure the knob is set for sealing and not for venting.

Press the "meat/stew" button and make sure it's set for 50 minutes.

When the time is up, turn the cooker off (or, if your Instant Pot has the feature, you could simply set it ahead of time to not go to the warm setting) and wait 15 minutes before releasing the remaining pressure.

Serve immediately (skim off any excess fat on top of the sauce, if there's a lot) or transfer to storage containers and refrigerate. I like stewed meats best if they've been chilled and reheated, but it's up to you. If you refrigerate, the fat will rise to the top and harden, making it easier to remove. Just pull that off, reheat, and serve.

I served these with polenta, but they'd be great with rice, potatoes, or noodles to sop up all the extra sauce.

You can follow Instant Pot on Twitter or Facebook. Want to chat with other Instant Pot users? There's a very lively Facebook group dedicated to the pot! 

Tuesday, March 1, 2016

Peanut Butter S'mores Cereal Bars

Cereal is fun to cook with. The funny thing is that I'm not a huge fan of a cereal-and-milk breakfast, but I can find all sorts of ways to use cereal in recipes.

This time, I decided to combine Chocolate Cheerios and Golden Grahams to create something with the flavor of s'mores.

The cereals I received from General Mills are made with natural colors and flavors, which is a good thing, right? But the important thing to me is flavor, and I thought they would work perfectly to make bars that wouldn't be overly sweet.

To help boost the savory flavor, I added just a little peanut butter to the marshmallow. The peanut flavor isn't super-strong, but it adds the savory flavor that I wanted.

Then I started thinking about the toasted flavor you get from heating a regular s'mores over a fire.

The answer was simple. I added more marshmallows to the top of the bars and hit them with my culinary torch. Just like when you're toasted them over the fire, some of them toasted golden brown, and then there were a few that got a bit blackened. Perfect!

To guild the lily a little more, I melted some chocolate and drizzled it on top of the bars. Because more chocolate is always okay.

While these are certainly sweet, they're not crazy sweet. Which makes me happy

Peanut Butter S'mores Bars
Donna Currie from Cookistry

4 Tablespoons butter
2 Tablespoons creamy peanut butter
10 ounces marshmallows, plus more for garnish
Pinch of salt
3 cups Golden Grahams cereal
3 cups Chocolate Cheerios
1/2 cup chocolate chips

Spray a 9x13 pan with cooking spray or butter it.

In a heavy-bottomed saucepan, melt the butter and peanut butter on medium heat. Add the salt, then add the marshmallows, and cook, stirring, just until the marshmallow melt.

Add the cereals and stir to coat all the cereal with the marshmallows.

Turn the mixture out into the prepared baking pan. Wet your hands with cool water and press the mixture down evenly into a pan. Re-wet your hands as needed to keep the marshmallow from sticking. You could also use a spatula, but hands are easier.

Cut one or two large marshmallows into small pieces. Or, if you have mini marshmallows, cut them in half. Arrange the marshmallow bits randomly on top of the bars.

Use a torch to soften the marshmallows, then use a spatula to spread and affix them to the top of the bars. If you have gaps in the bars, you can tuck marshmallow in there. Use the torch again to toast the marshmallows.

Melt the chocolate chips in a microwave-safe measuring cup, heating in 30-second increments and stirring in between heating, until the chocolate is melted and easily pourable.

Drizzle the chocolate over the bars in a random pattern.

Let the bars cool completely (and make sure the chocolate has hardened again) before removing from the pan. Cut into bars.

Monday, February 15, 2016

Touch-of-Grace Biscuits


This recipe is from Food52 Genius Recipes, and was created by Shirley Corriher. You might know her as the cooking expert who sometimes appeared on Good Eats.

I've cooked a number of recipes from this book, including Fried Eggs with Wine Vinegar, Potato Scallion Cakes, Spiced Red Wine, Caesar Salad Dressing, Chickpea Stew with Saffron, Yogurt, and Garlic, Pasta with Yogurt and Caramelized Onions, Broccoli Cooked Forever, and Gratin of Zucchini, Rice & Onions with Cheese, and they've all been winners. This was one of my favorites, though. I've made it three times, each time slightly different. So it behaves well, even if you have to adapt a bit.

I've made some biscuit recipes where the dough was pretty wet. But this dough is much wetter than any of those. The book describes the dough as looking like cottage cheese, and that's exactly what it's like - lumpy bits with a thinner "sauce."

Not only were these biscuits good right after I made them, but they were good the next day, and the day after that. Most biscuits get stale pretty quickly, but these stayed good for a few days - which was all the time it took them to disappear. They were particularly amazing when I heated them for a few seconds in the microwave.

I highly recommend this recipe. And I urge you to NOT be worried about how wet the dough is.

Touch-of-Grace Biscuits
Adapted from Food52 Genius Recipes
Recipe by Shirley Corriher
Adapted by Donna Currie of Cookistry

2 cups (9 ounces) self-rising flour
2 Tablespoons* sugar
1/2 teaspoon salt
1/4 cup shortening
2/3 cup heavy cream
1 cup buttermilk (or enough for the dough to resemble cottage cheese - you might need more or less, depending on the flour you use.)
1 cup all-purpose flour, for shaping
3 Tablespoons unsalted butter, melted, for brushing

Heat the oven to 425°F with the right slightly below the center of the oven. Spray an 8- or 9-inch round cake pan with baking spray. You could also use butter, but I always have that spray on hand because it's always so handy to have.

In a large mixing bowl, combine the flour, sugar, and salt. Work the shortening in with your fingertips until you don't have any large lumps. Don't get carried away.

Gently stir in the cream, then add the buttermilk until the dough resembles cottage cheese - you might need more or less than 1 cup, depending on the flour you use.

Put the all-purpose flour in a plate, shallow bowl, or pie plate. You don't want to use self-rising flour here, or it will be bitter. Use a medium ice cream scoop (about 2 inches in diameter) start portioning the dough and plopping them into the flour. You can make one at a time, or do 2 or 3, as long as you have space to keep them well separated in the flour.

Sprinkle flour on top of the blobs, then flour your hands and grab a blob and gently shape it into a ball, shaking off extra flour as you go. as you finish each biscuit, place it in the prepared pan, scrunched up next to its neighbors. Continue shaping and placing the biscuits until they're all in the pan.

Bake at 425°F until they are lightly browned, about 20-25 minutes. Brush with the melted butter.

Turn the biscuits out onto a plate, then flip again so they're right-side up on another plate. Cut along the seams to separate the biscuits before serving - they don't really pull apart.

*The original recipe calls for 1/4 cup of sugar, but I didn't want them that sweet, so cut back a bit.

Wednesday, February 10, 2016

White Chocolate and Hibiscus Ice Cream


I love making new - and sometimes weird - flavors of ice cream. This time around, I was inspired by hibiscus flowers in syrup. I used the syrup and left the flowers for other uses.

I decided that I wanted something besides hibiscus flavor. I chose white chocolate for its mild flavor, and I added a bit of vanilla for the deepness of flavor it adds.

And ... I decided to make the ice cream eggless, to let the delicate flavors shine through.

The result is a creamy ice cream with a sweet, fruity, floral flavor. The color is a very pale mauve; barely discernible unless you're looking for the color.

For the white chocolate, I used a bar of Lindt white chocolate, which weighed 4.4 ounces. If you buy a different brand that is a little larger or smaller, it's perfectly fine.

White Chocolate and Hibiscus Ice Cream
By Donna Currie, Cookistry

4.4 ounces (a little more or less is fine) white chocolate
1 cup milk
2 cups heavy cream
1/4 teaspoon salt
1/4 cup hibiscus syrup (from hibiscus flowers in syrup)
1 teaspoon lemon juice
2 teaspoons vanilla extract
3/4 cup sugar

Chop the white chocolate into small pieces and place in a microwave safe bowl or measuring cup. Add the milk. Microwave in 30-second increments, stirred after each heating session, until the chocolate melts completely.

Combine all of the ingredients, including the milk and chocolate mixture in a bowl. Stir until the sugar is completely melted. Cover the bowl and refrigerate the mixture until it is completely chilled. I usually mix it up the day before I want to churn it.

When the mixture is fully chilled, churn in your ice cream maker according to the manufacturer's instructions. Transfer to a container and freeze until firm.

Tuesday, November 3, 2015

Chai Ice Cream

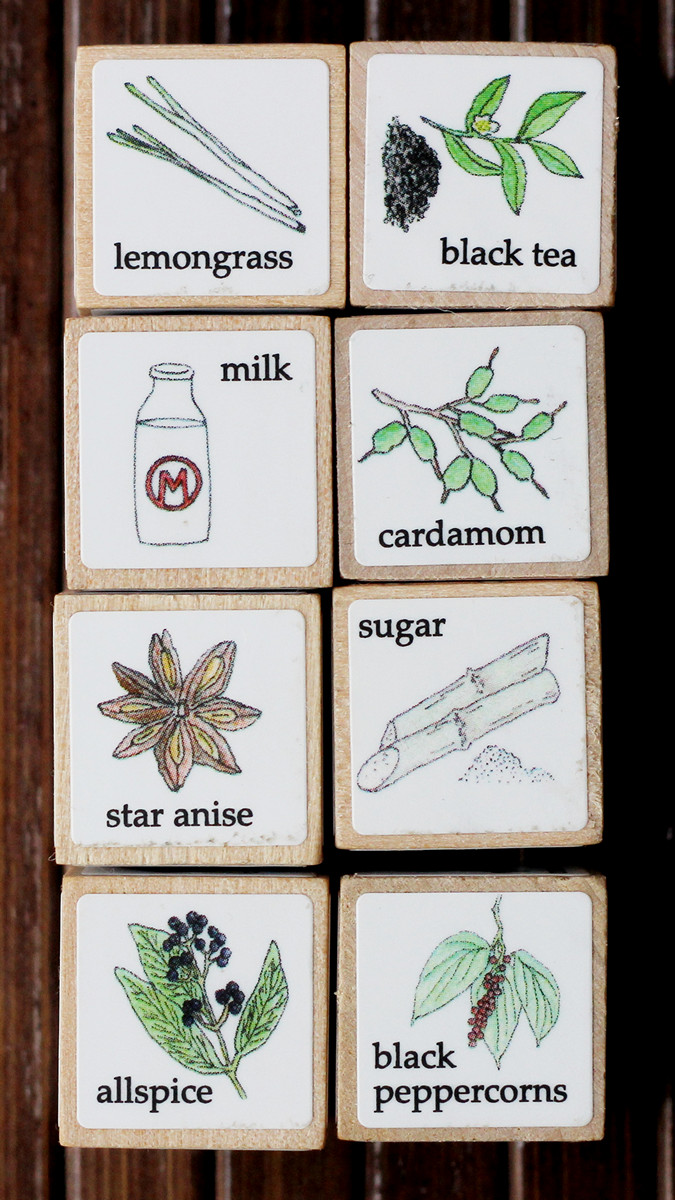
If it seems a little silly to roll dice to choose ingredients for a recipe ... well, it is. In a very fun way. I've been having a blast with the chai, recipe, and cocktail dice from Leafcutter Designs. It's fun to let the dice choose ingredients for me.

Since I'm not an expert in chai, I really haven't experimented with different flavors, so I liked the idea that I could just roll the dice and just go with whatever appeared.

Since I got the chai dice, I've rolled quite a few drinks, but this time around, I decided to give the recipe a bit of a twist and make ice cream. I used the ingredients the dice suggested, and I added a few more, and I think I rolled a winner.

Chai Ice Cream
By Donna Currie, Cookistry

2 cups heavy cream
1 14-ounce can sweetened condensed milk
1 star anise
2 green cardamom pods
2 teaspoons dried lemongrass
2 black tea teabags* (I used a decaf breakfast tea, but use what you like best)
5 allspice berries
5 black peppercorns
1/4 teaspoon salt
1 Tablespoon vanilla extract

Combine the cream, sweetened condensed milk, star anise, cardamom pods, lemongrass, tea bags (tear off the little paper tag - you don't want bits of that in your ice cream. Ick.), allspice berries, peppercorns, and salt in a heavy bottomed saucepan. Bring to a simmer.

Let it simmer gently for just a minute or so. Give it a little stir to make sure all the spices aren't just lazily floating on top.

Turn the heat off, add the vanilla, and transfer all of it to a storage container. Let it come to room temperature (or close enough), then refrigerate until fully chilled.

Strain the mixture through a fine-mesh strainer to remove all the spices and tea and whatnot, and discard the spices and tea and whatnot.

Churn the cream mixture in your ice cream maker according to the manufacturer's instruction. Transfer to a storage container and freeze until firm.

*You don't actually need tea BAGS. If you buy loose tea, use that as-is. No need to put in in a tea strainer or other device - it will get strained out along with all of the other spices.

Friday, October 9, 2015

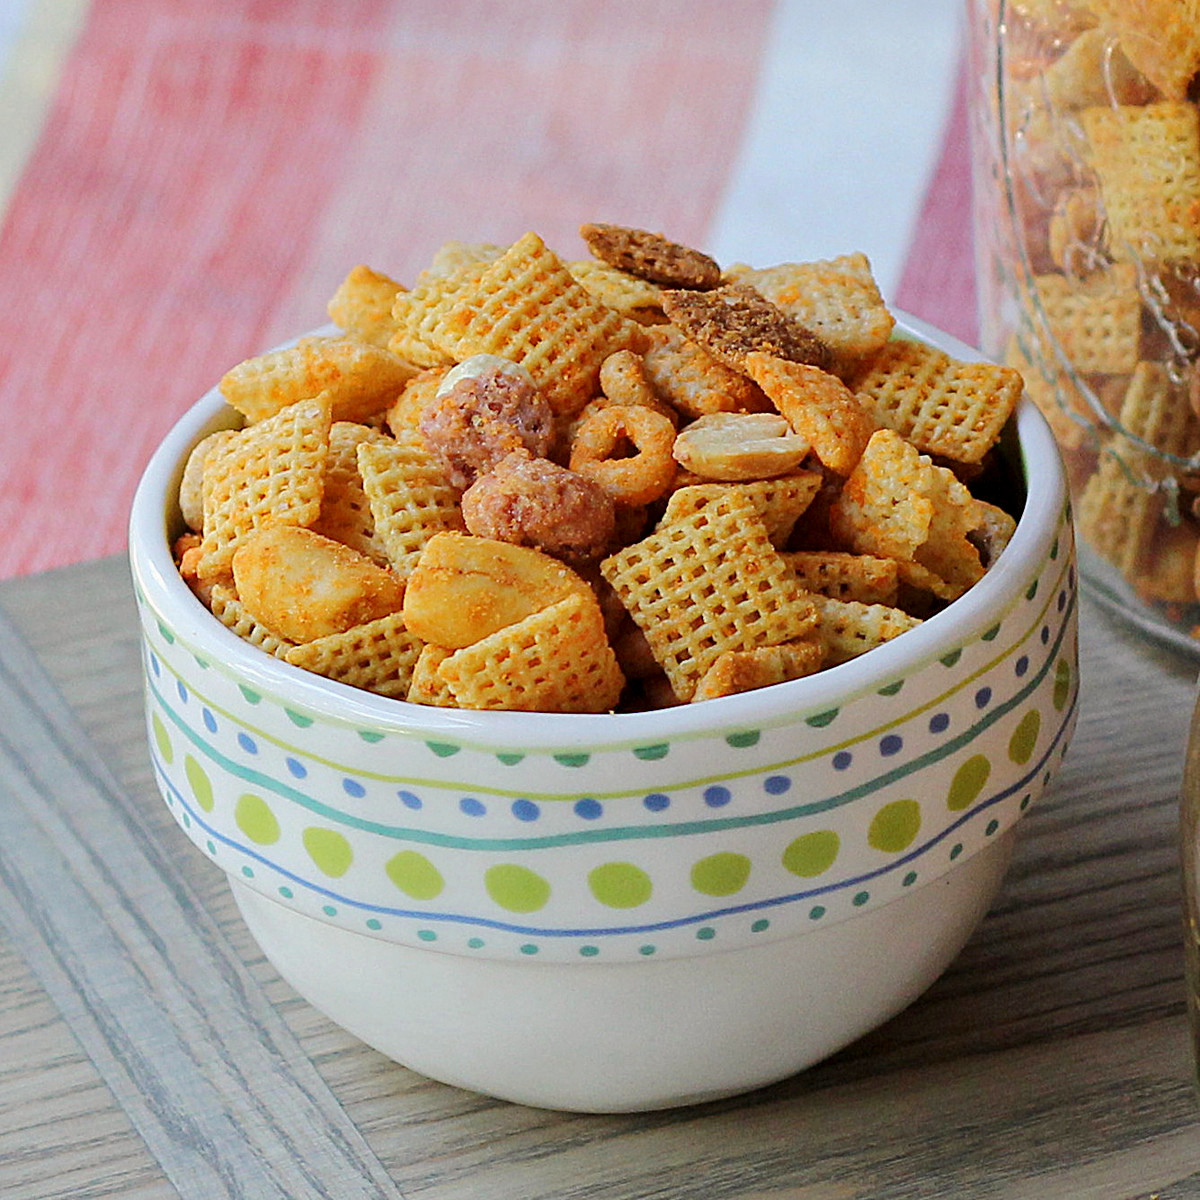
Cheesy, Spicy, Sweet and Nutty Snack Mix

Bring this snack mix to a party and you will be a hero. Make it for a party at your house, and your guests will never want to leave. Or they won't leave until the mix is gone. It's sweet, salty, cheesy, nutty, and spicy. It's like regular snack mix turned up to 11 with the addition of cheese and sweetness. It's irresistible.

Oh, and if you need to boot those guests out of the house, pack up little to-go bags for them to take home after the party. This would be a welcome hostess gift, and a great dorm snack.

Cheese powder can be found online from spice shops, or from companies that sell popcorn supplies. There is also a cheese-flavored popcorn topping that you can find at grocery stores, but I don't recommend it - it can be way too salty, well before you taste enough cheese.

Even so, taste the cheese powder before you start. If it seems salty, you can skip the salt in the recipe and keep the saltiness in mind as you add the cheese powder.

The nuts I used were from Truly Good Foods that were supplied for this challenge.

Cheesy, Spicy, Sweet and Nutty Snack Mix
Donna Currie, Cookistry

3 Tablespoons unsalted butter
2 teaspoons Worcestershire sauce
1/2 teaspoon salt
1/4 teaspoon onion powder
Pinch of garlic salt
5 cups Chex cereal (mixed or all one type)
1 cup Cheerios cereal
1/4 to 1/2 cup cheese powder
1 cup Buffalo Nuts
1 cup Butter Toffee Peanuts

Put the butter on a large sheet pan and place it in the oven while you heat it to 250°F. When the butter is melted, add the Worcestershire sauce. Sprinkle on the salt, onion powder, and garlic powder so it's fairly well evenly distributed.

Add the cereals and stir and toss to coat the cereal with the butter and seasonings.

Place the pan in the oven and cook for 45 minutes, stirring every 15 minutes.

After 45 minutes of baking, add 1/4 cup of cheese powder and stir. The cheese will stick to the cereal. Add more cheese powder, if desired. I added another 2 Tablespoons and I was happy with that, but more would not be terrible, either.

Add the nuts and stir to combine.

Cook an additional 15 minutes, then remove the pan from the oven and let the mix cool before storing.

Monday, September 21, 2015

Pecan Praline Almond Cookies

If you're looking for a cookie that's not the usual - here it is.

There's nothing wrong with the standard chocolate chip cookies, or traditional peanut butter cookies, but if you bring these to a party or potluck or cookie exchange, you won't find another one like it.

These cookies have a buttery flavor with a hint of almond, and the praline pecan adds a second nutty sweet crunch to the cookie.

The cookies themselves are light and a little crumbly, but with some chew. Make them once, and you'll make them again. I promise.

The Praline Pecans I used were from Truly Good Foods, supplied for this challenge.

Pecan Praline Almond Cookies
By Donna Currie, Cookistry

2 cups all purpose flour
1 teaspoon baking soda
1/2 teaspoon salt
1 1/2 sticks unsalted butter at room temperature
1 1/4 cups sugar
1 teaspoon vanilla extract
1/4 teaspoon almond extract
2 Tablespoons vegetable oil
Praline Pecans (one to top each cookie)

Preheat the oven to 350°F and line 2 baking sheets with parchment paper.

Combine the flour, baking soda, and salt in a small bowl and set aside.

Beat the butter, sugar, vanilla extract, and almond at medium speed in a medium bowl with an electric mixer or a stand mixer fitted with the paddle attachment. Beat for a few minutes, until the mixture is fluffy.

Drizzle the oil in while continuing to beat the butter mixer at low speed.

Add the flour mixture in several additions, beating just enough to blend it well.

Use a small scoop to form balls of dough (try for about 24 cookies, but more or less is fine - it just depends on how many cookies you want), and place them on the baking sheets, leaving room between them to spread. Flatten the cookies with the palm of your hand, then place one praline pecan on top of each cookie. The cookies will puff up as they bake.

Bake at 350°F until the cookies are lightly browned, 13-17 minutes, depending on the size of the cookies. If you're baking 2 sheets of cookies at a time, you'll probably want to swap them around after about 10 minutes of baking.

Remove the cookies from the sheets and let them cool completely on a rack. Continue forming and baking cookies until all the dough is used.

Friday, August 21, 2015

Tomato Salad with Honey and Thyme

When I was a kid, my mom made a salad that was incredibly simple: Sliced ripe summer tomatoes, salt, pepper, vinegar and sugar.

It almost sounds too simple, right? But, summer tomatoes don't need a whole lot. And with that salad, every single ingredient served to enhance the tomatoes rather than cover them up.

I usually make that same salad at least once over the summer, sometimes making it more sweet, and other times edging towards the puckery-tart. But this time, I decided to change things up a bit. Instead of using sugar, I decided to use honey. And not just any honey - I used Clover Honey Creme from Honey Ridge Farms.

I wanted to find a way to use the honey in its purest form, not cooked into something. Short of eating it with a spoon (which I might or might not have done - it's really good!) I was stumped.

Well, I could have drizzled it on ice cream or English muffins. Despite those being delicious ideas, they wouldn't have been a very good recipe. But, when I brought tomatoes home from the farmer's market, I had the idea of using the honey with the tomatoes.

Well, then. Salad.

Tomato Salad with Honey and Thyme
By Donna Currie, Cookistry

1/2 large red tomato (beefsteak, if you can find them)
1/2 large green or yellow tomato
Pinch of salt
Several grinds of black pepper
Leaves stripped from 1 spring fresh thyme
Honey Ridge Farms Clover Honey Creme, as needed
Red wine vinegar, as needed

Remove the core from the tomato and slice into thin wedges. Arrange the slices on a plate - I alternated the red and green, but you could put all red on one side of a the plate and all green on the other.

And, of course, you could use just one large tomato. Or use several tomatoes to make a whole platter for a party.

Sprinkle on salt and grind on the pepper, then strew the thyme leaves on top. Drizzle on the honey cream in thin strands. I used a fork to portion the honey.

Drizzle on just a little bit of vinegar. I know you've seen this on TV, where you put your thumb over most of the opening of the bottle and just shake on a small amount here and there.

Serve.

You can refrigerate the leftovers, but the tomatoes tend to get a little soft. They still taste good, but the presentation isn't as nice.

Tuesday, August 11, 2015

Italian Sausage Sandwiches with Honey Balsamic Glazed Onions

As an ex-Chicagoan, I've got a special love for Italian Sausage sandwiches. This isn't quite the traditional version - I've added a secret special ingredient - the Honey Balsamic Glazed Onions.

The onions cook down a lot during cooking, so you'll have enough to top the sandwiches - but probably not much more. I suggest that you just go right ahead and make a double batch - you'll want these for burgers, hot dogs, bratwurst, panini, and pizza.

And maybe just for eating. I...um...sampled a lot of the onions before they ever made it onto sandwiches.

Italian Sausage Sandwiches 
with Honey Balsamic Glazed Onions
By Donna

For the onions:
2 teaspoons olive oil
2 medium onions, sliced into half-moons
Pinch of salt
Several grinds of black pepper
2 tablespoons Honey Ridge Farms Balsamic Honey Vinegar

For the peppers and sauce:
1 Tablespoon olive oil
1 green bell pepper, cored and sliced into strips
1 red bell pepper, cored and sliced into strips
1 Tablespoon dry oregano
Generous pinch of salt
Several grinds of black pepper
1/4 cup red wine
1 15-ounce can tomato sauce

For the sandwiches:
6 Sweet Italian sausages, grilled or pan-cooked
6 Buns

To make the onions:
Heat the olive oil in a medium saute pan. Add the onions, salt and pepper. Cook on medium, stirring as needed, until the onions begin to soften. If they start browning, turn the heat down.

Add the balsamic honey vinegar and continue cooking, stirring once in a while, until the liquid is gone.

To make the peppers and sauce:
Heat the olive oil in a medium saute pan on medium heat. Add the peppers, oregano, salt and pepper. Cook for a minute or two, then add the wine. Let it come to a simmer, then add the tomato sauce.

Cook, stirring as needed, until the peppers are fork tender, but not mushy - or until they're cooked to your liking. If the sauce reduces too much, add water to keep it saucy.

To make the sandwich:
Put the sausage in the bun. Add the peppers and as much sauce as you like. Top with onions.

You should have enough toppings for at least six sandwiches, but it depends on how much you like the toppings. I've been known to make a sandwich with just the toppings, and maybe a bit of melted cheese inside the bun. Yes, I'm serious.

Tuesday, June 30, 2015

Half-Moon Taco Burgers

Ground meat isn't unusual in a taco, but I decided to change things up by making half-moon shaped burgers that would fit neatly inside a tortilla.

I flavored them with peppers and chili powder, melted cheese on top, and served them in warm tortillas with guacamole and pepper.

The result was pretty danged good.

The meat I used was a combination of beef and chicken from a company called Cluck 'n Moo that specializes in...well, clucks and moos.

Because the meat includes chicken, it needs to be cooked to a safe temperature - no rare burgers with this stuff.

You can make these less spicy by using mild pepper and mild chile powder, or make it more spicy by using hotter peppers and chile powder. And of course, you can add extra spice with your choice of condiments, like peppers or salsa.

Half-Moon Taco Burgers
By Donna

1 pound Cluck 'n Moo ground chicken and beef
1 4-ounce can diced Hatch chiles (hot or mild, your choice)
2 teaspoons chili powder (hot or mild, your choice)
1/2 teaspoon salt (or to taste)
1 cup shredded cheese (I used a mix of cheeses, but any good-melting cheese will work)

In a medium bowl, combine the ground meat, chiles and chili powder.

Divide the meat into four portions. Shape each portion into a half-moon shape that will fit into your tortilla. I used 6-inch tortillas and made the burgers slightly smaller that the tortillas - keep in mind that the tortillas need to wrap the meat.

Heat your grill. Sprinkle the burgers with salt as desired and cook, flipping as needed, until just about done. Divide the cheese onto the tops of the four burgers, close the grill and let them cook until the cheese is almost melted.

When the cheese is almost melted, place the tortillas on the grill (on a cooler part of the grill, if possible.) Place the burgers on the tortillas and close the grill again. Cook until the cheese is melted and the tortillas are warmed.


Serve with your favorite taco toppings. I used guacamole and pickled jalapenos. Other options are shredded lettuce, salsa, cilantro, crema or chopped fresh tomatoes.

Thursday, May 21, 2015

Green Olive & Pimento Bread with a Hint of Cheese

It should be pretty obvious that I like baking bread, so when I got a chance to work with a crisping mat from Harold Import Company, you'd better believe I put it through its paces.

The surface of the mat is nonstick, so there's no need for cornmeal under the dough. The mat is actually a very fine mesh, so there are holes that allow air circulation under the baking bread. It's really a great idea.

Even if the bread is a little sticky - like a sweet bread that might ooze sugary stuff - or a cheesy bread like the one I made for this challenge - the bread doesn't stick and the mat is easy to clean. It's dishwasher safe, but things like this are awkward in my dishwasher, so I've only washed it by hand.

If you bake a lot of bread, pastries, cookies, or other baked goods where a crisp, non-soggy bottom is preferred, I suggest you give one of these mats a try. And although I haven't tried it, it should be pretty awesome for reheating things like pizza, where you really do want a non-soggy bottom.

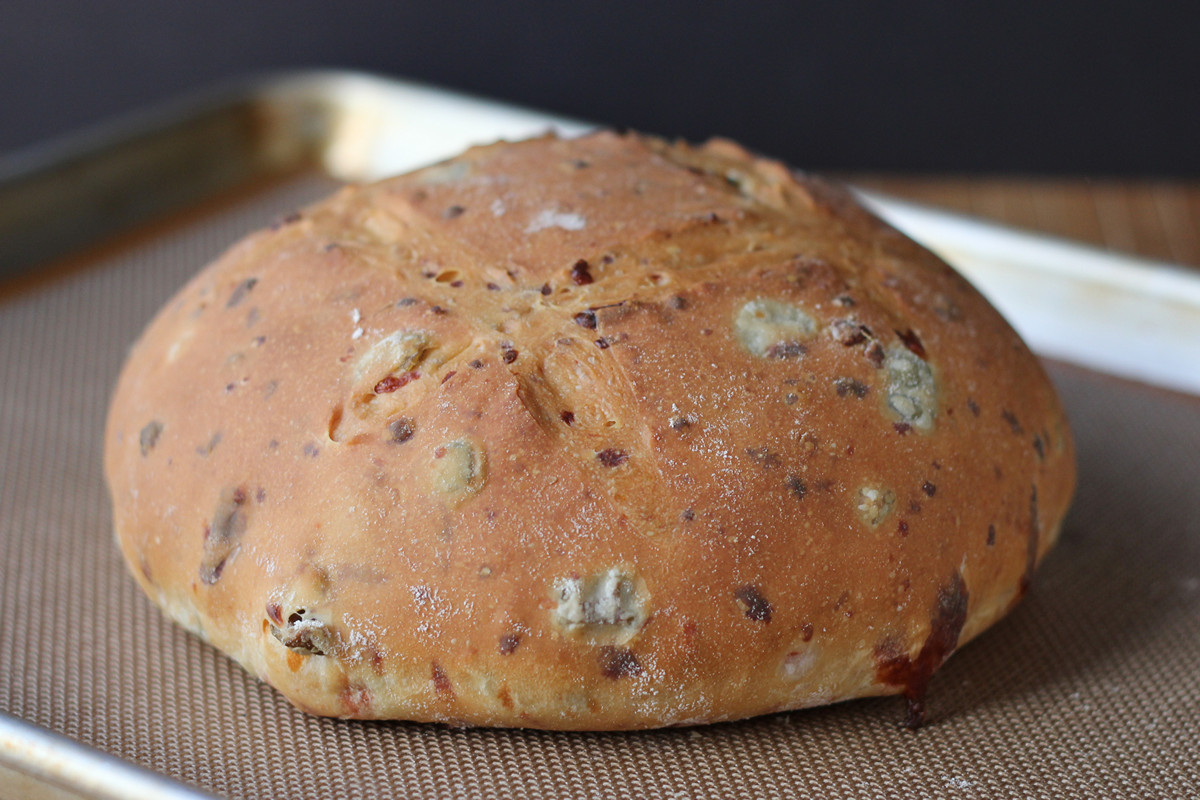
I made a round, free-form loaf studded with bits of green olives (and the pimento stuffing) with a little bit of cheese for added flavor.

Since I used a white cheese, it's not visible inside the bread, but you can see flecks of browned cheese bits where it was close to the surface of the dough. The finished bread is rich and savory, with little bits of salty green olive and sweet pimento.

Green Olive & Pimento Bread with a Hint of Cheese
by Donna

1 cup lukewarm water
2 1/4 teaspoons active dry yeast
1 Tablespoon sugar
2 1/2 cups (11 1/4 ounces) bread flour
1 teaspoon salt
2 Tablespoons olive oil
2 ounces shredded cheese
16 pimento-stuffed well-drained green olives, sliced or roughly chopped

Combine the water, yeast, sugar, bread flour, salt and olive oil in the bowl of your stand mixer fitted with the dough hook. Knead until the dough is smooth and elastic.

Add the cheese and olives and mix until well-combined.

Cover the mixer bowl and set aside until the dough has doubled in size, about an hour.

When the dough has risen, flour your work surface, place the crisping mat on a baking sheet, and heat the oven to 350°F.

Knead the dough briefly, then form it into a tight ball. Place it on the prepared baking sheet and cover with plastic wrap. Or, what I did was use the empty mixing bowl as a cover. Set aside until the dough has doubled in size and if you gently poke the dough with a finger, it leaves an indent or slowly fills in rather than bouncing back quickly.

Slash the dough as desired and bake at 350°F until nicely browned, about 45 minutes.

Let the bread cool completely on a rack before slicing.

I received two baking mats at no cost to me from Harold Import Company.

Tuesday, March 31, 2015

The Gin-a-Rita, a color-changing cocktail

Cocktails these days are a whole lot more interesting than back in the day when it was a shot-and-a-beer or a basic whisky-and-mixer.

Now we've got fancy drinks, mixologists, and flair bartenders who spin and juggle bottles and do all sorts of fancy tricks before handing over your drink.

I like a little show, but there's no way I'm going to be juggling expensive bottles of hootch. Trust me, no one wants to clean up that mess.

This time, the "show" is provided by B'lure cocktail concentrate. It's sort of a like bitters, and it's made from a flower extract, and it's blue.

Or, I should say that it's blue until it meets up with something acidic. Like, let's say ... a drink that has lemon or lime juice.

Now, that's fun, right?

But here's the deal. The color changes pretty quickly, so to have an impact, you need to add the extract while your guests are watching. Otherwise, you're serving them a pink or purple drink - the color you end up with depends on the drink.

So far, I've only poured and mixed - but it would be fun to add the B'lure to ice cubes, or perhaps use them in a layered cocktail, so the guests would do the final mixing to change the colors.

This cocktail is very similar to a margarita, but with gin instead of tequila. It works. Trust me. I've been testing this cocktail for a loooong time.

You might want to adjust the sweetness on this to your liking. The tartness depends, of course, on how tart your lime juice is, but you also need to take into consideration how tart you like your drinks ... so make it more sweet or more sour. If this seems too strong for you, you can also add sparkling water or soda to tame it a bit.

As far as the mixing, you could add the B'lure the way I did, or start with the B'lure in the glass with some water or soda and then add the gin and lime. Either way works. Just have fun with it!

And - hey - if you don't happen to have any B'lure hanging around, this makes a tasty drink without the added color!

Gin-a-Rita
by Donna

1 ounce Tanqueray gin
1 ounce lime juice
1/2 ounce agave syrup
1 dropper-full B-lure mixed with 1 ounce water

Combine the gin, lime juice, and agave in a short squat glass filled with ice. Mix well.

Pour the B-lure mixture into the cocktail while your guests watch. Garnish with something fun. I used a slice of starfruit.

Serve.

Friday, January 9, 2015

And now for a word from the author

Getting a cookbook published is like riding a roller coaster. It's all ups and downs, with short sections to catch one's breath every once in a while.

And then work-work-work-work to get to the top of the next hill.


At the very beginning, before the ride even starts, there's a bit of euphoria at the glimmer of hope that there's enough of an idea to even begin writing the proposal.


Because you can't just approach publishers and say, "I gonna right gud fud recipez 4 U."


No, you need a reason why people will buy the book. And unless you're already a household name, that means a good theme. A hook. A reason for people to pull out a credit card and click a button.


Wednesday, December 24, 2014

Slow Cooker Cheesecake


I love cheesecake, but let's face it, most cheesecake recipes are meant to feed a small army.

Or perhaps it's just that they're scaled to fit a 9-inch springform pan.

This cheesecake is more petite - it fits into a 6-inch springform pan, which happens to fit perfectly into the Hamilton Beach 6-Quart Set  Forget Programmable Slow Cooker.

Not all slow cookers are the same, so if you're using something that's significantly different, you might need to adjust the timing. And, of course, make sure that the 6-inch springform pan fits into your slow cooker!

Slow Cooker Cheesecake
by Donna

For the crust:
1 cup graham cracker crumbs
1 tablespoon sugar
Pinch of salt
2 tablespoons unsalted butter, melted

For the filling:
8 ounces cream cheese, room temperature
1/3 cup sugar
Pinch of salt
1 large egg
1 teaspoon vanilla extract
1/2 cup sour cream

Wrap the bottom and sides of a 6-inch springform pan with aluminum foil. Since the pan doesn't actually sit IN the water, you might not need to do this, but I never trust a springform pan around water - I always wrap, for insurance.

In a medium bowl, mix the graham cracker crumbs with sugar and salt. Or, save a bowl and do the mixing in the same plastic bag where you crushed the crackers. Add the melted butter and stir to combine. Press the crumbs into the bottom and up the sides of the pan. If you want a little less crust, you don't need to use it all - it's up to you.

In the bowl of your stand mixer fitted with the paddle attachment, beat the cream cheese, sugar and salt; beat until combined and the cream cheese is smooth. Beat in the egg and vanilla, scraping down the sides of the bowl as needed, until well blended. Add the sour cream and beat until smooth.

Note: you can do this beating with an electric mixer, but beat slowly - electric mixers tend to beat air into the product, and that's not what you want here.

Pour the cream cheese mixture into the prepared springform pan. This filled my springform pan almost exactly to the top - if your pan is slightly taller or shorter, yours might not fill quite as full, or you might have a little excess.

Put a metal rack in the bottom of the slow cooker and add water just to the bottom of the rack. Place the cheesecake on the rack.

Cover the top of the slow cooker with a clean kitchen towel or a cloth napkin. This will collect the condensation so it doesn't drip onto the top of the cheesecake. Put the lid on top of the towels.

Turn the slow cooker to low and set for 2 hours. DON'T PEEK. When two hours are up, turn the slow cooker off and turn the lid crosswise on top of the slow cooker. Leave the towel in place, just turn the lid so the cheesecake can slowly begin to cool. Since the Hamilton Beach slow cooker is so well insulated, it holds the heat really well, so if you leave the lid on, the cheesecake won't cool off much at all.

 Let the slow cooker cool for one hour with the cheesecake resting inside.

Remove the lid, remove the towel, and remove the cheesecake. Refrigerate until well-chilled, about four hours. Or until tomorrow.

Run a thin-bladed knife between the cheesecake and pan, then release the spring and remove the cheesecake.

Note:
slicing is cleaner if you run the knife blade under hot water then wipe it off after each cut. If it matters. Or not.