Showing posts with label Gluten Free. Show all posts

Thursday, December 18, 2014

Ginger Spiced Applesauce


Applesauce is one of my favorite things to make in a slow cooker. It is so simple and quick to make and you can add whatever flavor enhancers your prefer. I love a nice spiced applesauce in the fall; it works as a side dish, by itself, or on top of some vanilla ice cream (give it a shot…it's delicious.)

This applesauce is a bit different though…instead of using any traditional liquid or sugar, I instead used some Angry Orchard Apple Ginger Hard Cider and, oh boy, is it yummy and it screams fall.

For this applesauce, I used my Hamilton Beach Set & Forget 6 Qt. Programmable Slow Cooker. The Hamilton Beach Set & Forget Slow Cooker, allows me to set a specific cooking time and then it automatically switches to warm, just in case I get busy while this is cooking away. I don’t have to worry about it burning. 

Ginger Spiced Applesauce
by Jenny

6 medium to large apples – I used Granny Smith for the tartness, but you can use either Macintosh, Cortland, or any other apple you prefer.
3/4 cup Angry Orchard Apple Ginger Hard Cider
1/2 teaspoon ground cinnamon
1/2 - 1 teaspoon ground ginger

Peel, core and dice the apples in large pieces – discard the peels and cores.  

Add all ingredients to slow cooker and set on low for about 4 hours*.  

Apples will become extremely soft/mushy. Mash apples with a fork or potato masher and enjoy!  

Keep in an airtight container for up to one week.

Extremely easy to make, throw it all in the slow cooker and come back in a few hours for some very tasty (if I do say so myself) applesauce! Best part – it is naturally gluten-free. If you choose to not use the hard cider, you can substitute that for 1/3 cup of water and 1/4 cup of honey.


*These instructions are specific to the Hamilton Beach Set & Forget 6 Qt. Programmable Slow Cooker, so if you are not using this one, you may need to adjust it slightly.

Buffalo Chicken Dip


I love the holiday season; especially all of the cooking that is involved with it. However, there are days where, if you are like me, get overwhelmed with making sure everything is all set before everyone arrives. This is the perfect time to bring out your slow cooker! I use my HamiltonBeach 6 qt. Set ‘n Forget Programmable Slow Cooker.  I use this slow cooker because of the programming capabilities that it offers. You can set it to program, probe, or manual – I make this recipe using the program mode so I can set the specific time, choose between high and low heat, and when programmed time is up, it automatically switches to warm…which let’s face it = less stress!

This recipe can be adjusted to your level of spice preference, it is super easy to make…simply place all of the ingredients into the slow cooker, Set ‘n Forget! Makes for a delicious appetizer for any holiday party or gathering.

To make sure this is gluten-free, simply read all of the ingredients and allergen warnings. I haven’t tried it yet, but if you wanted to make a dairy free version, simply substitute out dairy free versions of the ingredients listed below.

Buffalo Chicken Dip
By Jenny

2 ½- 3 cups shredded cooked chicken breast (either boiled chicken breast, store-bought rotisserie, or even canned chicken will work well)
16 ounces 1/3 fat cream cheese
2 ½ cups shredded cheddar cheese
1 cup shredded Mozzarella cheese
2 cups ranch dressing (try to avoid the low fat or fat free – it separates too much)
1 – 1 ½ cups hot sauce (Franks is my favorite for this)

Red Bell Pepper Strips
Celery Strips
Tortilla Chips

Prepare chicken – boil until cooked throughout and shred, or shred a rotisserie chicken. Set aside. Cube the cream cheese
Place all ingredients into the slow cooker in layers (cream cheese, cheddar cheese, mozzarella cheese, ranch dressing, hot sauce, chicken, and then repeat). Cover the slow cooker and set it to cook for 2 hours on low.* Open, and stir dip well.
To serve, either place the dip in a large bowl, or leave in the slow cooker. Enjoy with vegetable strips such as peppers and celery or with tortilla chips.

*These instructions are specific to the Hamilton Beach 6 qt. Set ‘n Forget Programmable Slow Cooker, so if you are not using this one, you may need to adjust it slightly.

Monday, September 1, 2014

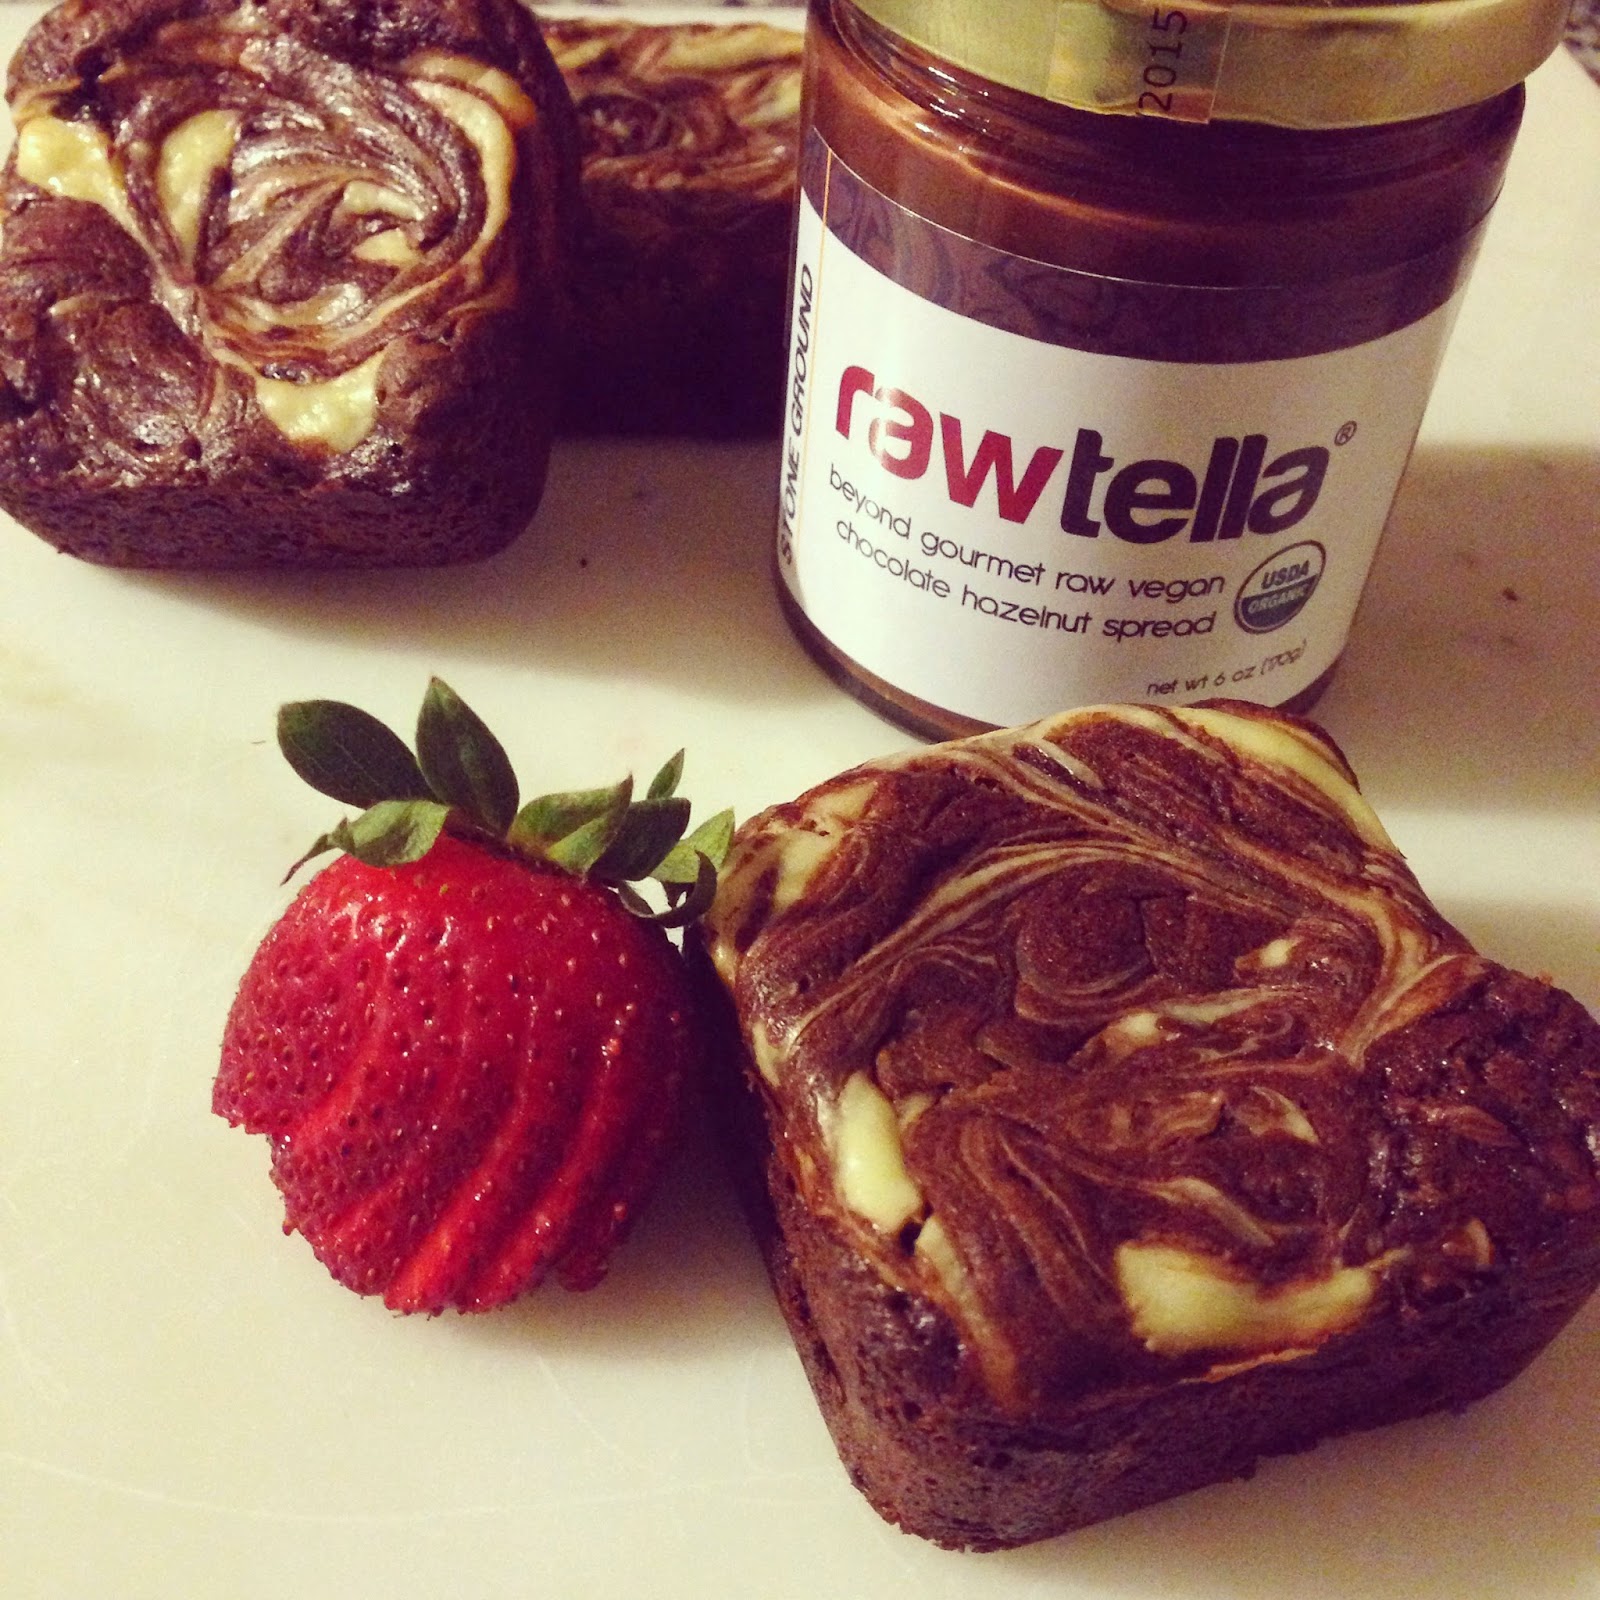
Rawtella "Cheesecake" Brownies

I love being a part of 37Cooks – even with my beyond busy schedule this year and turning a few submissions in late (sorry guys!), challenges like this help keep me on my toes and my creativity flowing. This challenge wasn't for a sponsor, but instead a fun little “Surprise Food Exchange” between the bloggers. We were asked to some something(s) from our state…I was chosen to send items from RI (or close by) to Donna of Cookistry. Sadly, however, her first box is M.I.A. so I sent her a second one which I hope was equally as good. I received some awesome gluten-free goodies from Linda…seriously these items were perfect and right up my alley. I received two bottles of Ginger People Hot Ginger Jalapeno Sauce and a jar of Rawtella.

Our challenge was to come up with a recipe using at least one of the products we received. At first I was pretty torn on which one to use. I had made a delicious burger with a bit of the Hot Ginger Jalapeno Sauce mixed into the meat, and topped with a Hot Ginger Jalapeno Aoli and avocado, and don’t get me wrong…it was delicious, however I forgot to actually get a good picture of it. Seeing as money is, lets say…tight right now, I couldn't actually recreate the recipe just yet, so I went through my pantry to see what I had on hand. Turns out I had everything to make some delicious brownies…using a box mix, of course. I have a great recipe for homemade brownies, but I had a box of the Stonewall Kitchen Gluten-Free Brownie Mix, which I LOVE. It has such a great flavor (which is thanks to the coffee that is in it!) I’m not a huge chocolate person…I like it a lot better when it is mixed with something else, like nuts. I knew that I was going to use the Rawtella (obviously!) in this recipe, but I was trying to think of something to break up all the chocolate. When walking through the grocery store this morning I saw some beautiful brownies with cream cheese swirls running through them and a light bulb went off, “I have that at home too!!”

I have to say, these are pretty easy and quick to make, especially if you are using a box mix. However, you do not have to…use whatever your favorite recipe is and even though the Rawtella is vegan, this recipe is not. I couldn't afford to buy the alternative ingredients to make it that way, so if you want to make it vegan, simply follow your favorite vegan brownie recipe, use the Rawtella and then use a vegan cream cheese. If anyone tries this…please let me know how it turns out.

Thank you Linda for the awesome, delicious ingredients to play around with. Hope you all enjoy the recipe!

Rawtella "Cheesecake" Brownies
by Jenny

1 package of gluten-free brownie mix or your favorite homemade gluten-free brownie recipe
4 ounces 1/3 fat cream cheese, softened 
1 large egg (separated)
1 1/2 Tablespoons powdered sugar, sifted
1/4 cup Rawtella

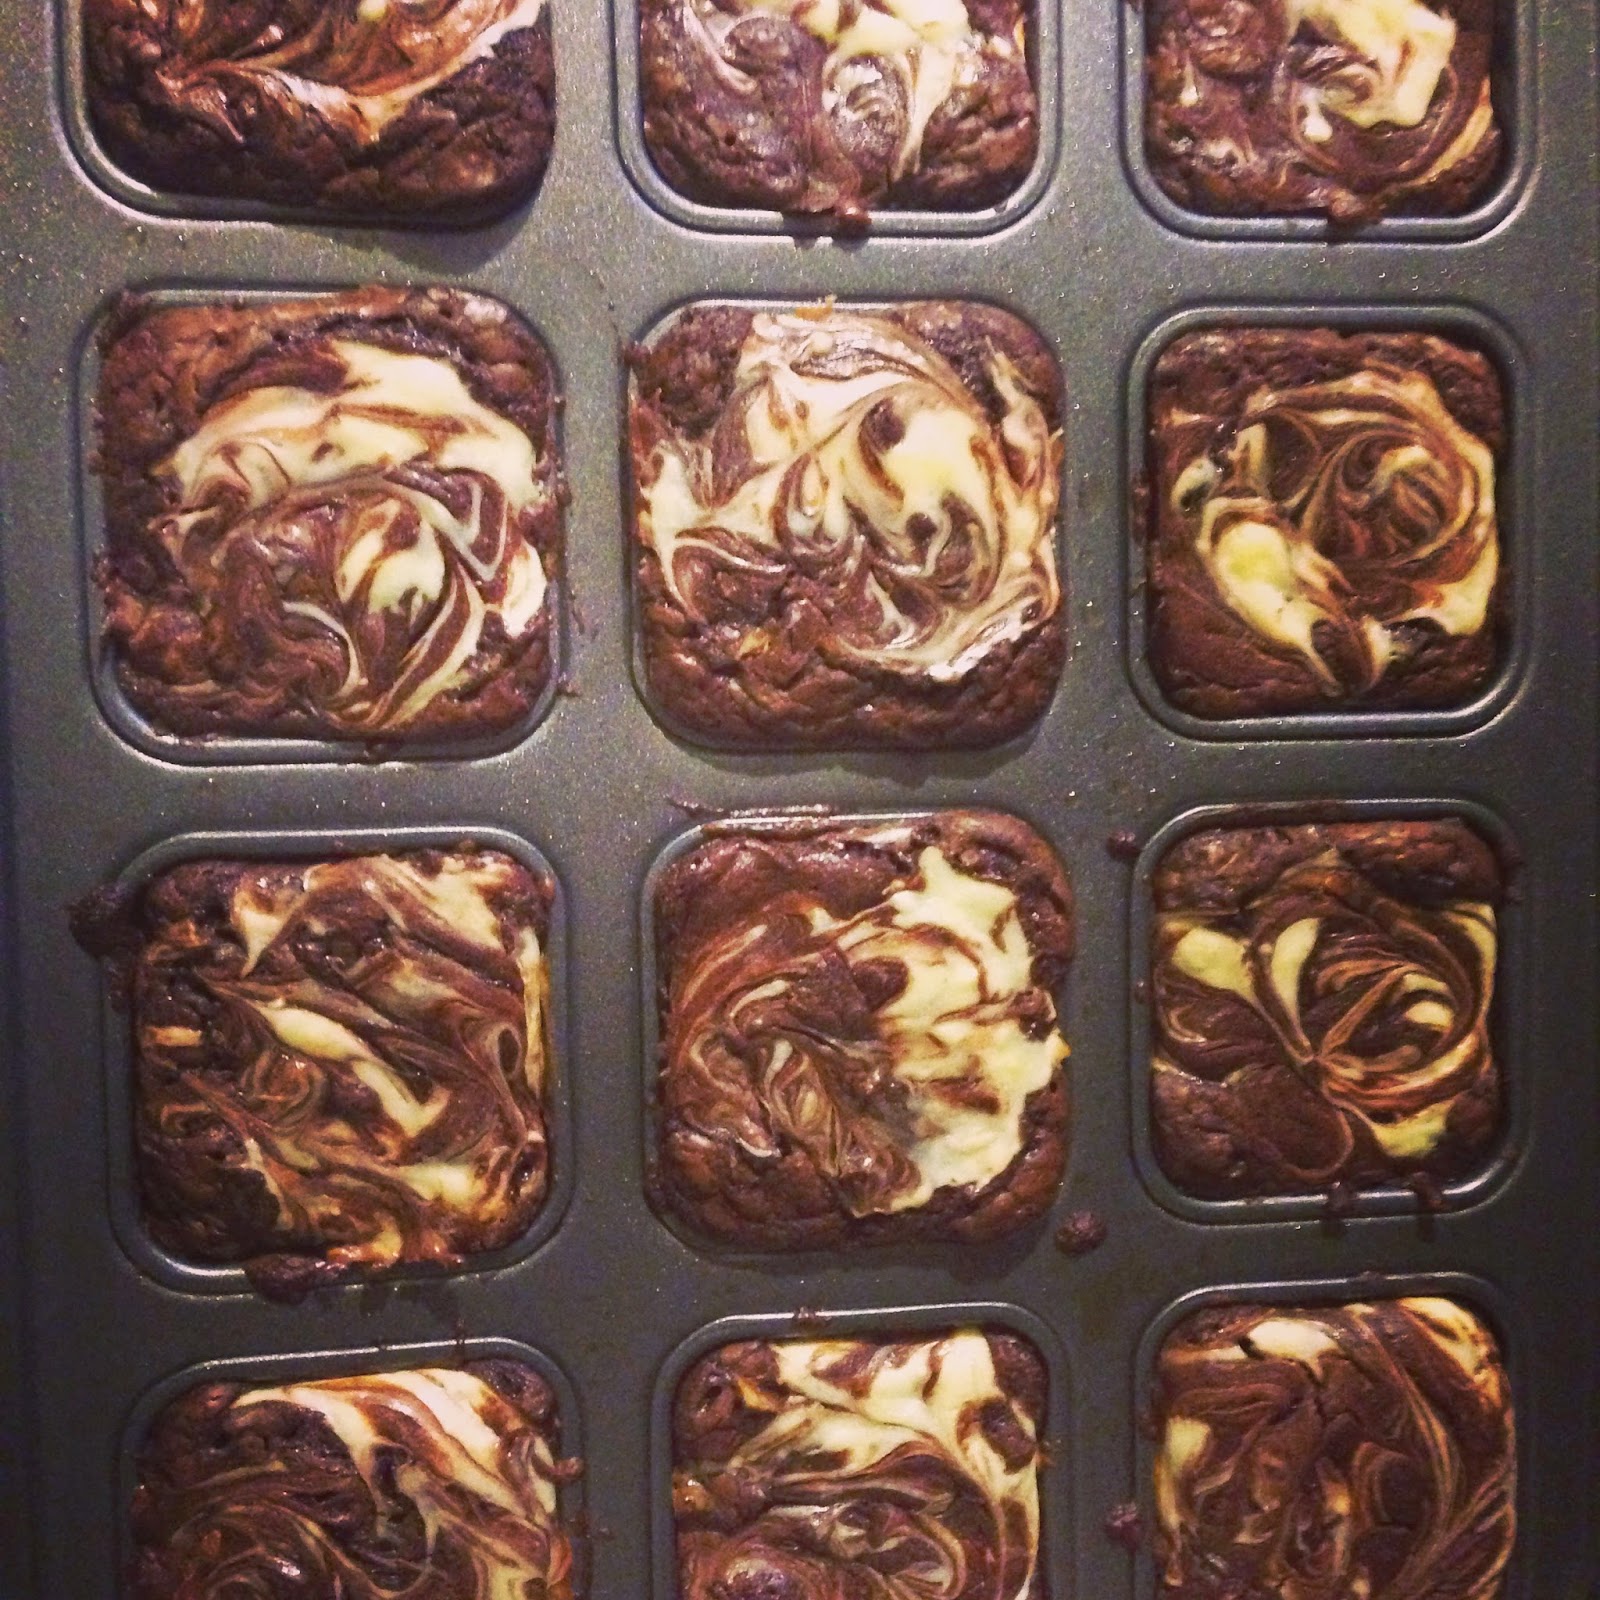
Preheat oven according to directions on package or recipe. Prepare brownie mix according to package or recipe. Pour prepared brownie batter into an 8 × 8 inch baking dish that has been lined with parchment paper, or to make individual brownies use the Good Cook Dessert Bar Pan.

In a small bowl, add the softened 1/3 fat cream cheese and the yolk from the egg. Mix with a spoon until completely incorporated and there are no lumps. Add the sifted powdered sugar and mix well. 

In a second small bowl combine the Rawtella and egg white, mix until evenly incorporated. 

Place 1-2 teaspoons each of the cream cheese mixture and the Rawtella mixture of top of each brownie (if using the dessert pan) or evenly distribute globs of each on top of the brownie mixture in the 8 × 8 inch pan. 
With either a toothpick or knife, swirl the cream cheese and Rawtella mixtures together. 

Bake according to package or recipe. 

Cool completely, remove from pan and serve with fresh strawberries.

Thursday, July 24, 2014

Sunflower Buttercup Brownies

I've recently done some vegan cooking, but I've never done any gluten-free and allergy-free baking so I was not surprised to find some ingredients in this cookbook that I'd never heard of. I am always up for a challenge and I am so glad I took this one! I now love coconut nectar, which I did not find to taste like coconut at all. It has the same consistency as honey or molasses, is mildly sweet, but has some extra depth to it. I used Pamela's Artisan Flour Blend (gluten-free) but there is a recipe in Sweet Debbie's cookbook so you can make your own if you want. I made this recipe twice. The first time I omitted the guar gum just to see what would happen. Guar gum is expensive and I was trying to save a little money. Sweet Debbie also has a recipe for sunflower seed butter and chocolate chips in her book. I bought both at the grocery store and my chocolate chips were dairy, nut, and soy free and they were mighty tasty!

So which version did we enjoy more, with guar gum or without? They were both a good treat for someone with food limitations who wants a sweet treat. We enjoyed the version with the guar gum a little more, though. My guess is if you are cooking from this book, having guar gum on hand is a necessity anyway and I recommend taking Sweet Debbie's advice on ingredients. She's done all of the research and the trial and error. Why not follow her lead?

As I read through the cookbook I found that two things stood out. Love for her son (he's the reason she started on this allergy-free, vegan, gluten-free, sugar-free, soy-free, and nut-free journey) and some delicious sounding recipes. The next time I have a house guest with any of these culinary restrictions, I will most certainly cook from this book!

Sunflower Buttercup Brownies

by Sandra
Adapted from Sweet Debbie's Organic Treats

48 mini paper baking cups
2 cups all-purpose gluten free flour
2 1/2 teaspoons sodium-free baking powder
1/2 teaspoon guar gum
1/2 teaspoon fine sea salt
1/3 cup grapeseed oil
1/2 cup unsweetened applesauce
1/3 cup coconut nectar
1 teaspoon vanilla extract
3/8 teaspoon stevia powder (I omitted)
1 cup sunflower seed butter
1 1/4 cups chocolate chips

Preheat the oven to 325°F. Add the paper cups to your mini muffin baking pan(s). Whisk the dry ingredients (flour, baking powder, salt) together. Whisk the wet ingredients (oil, applesauce, nectar, vanilla) together. Add the wet ingredients to the dry ingredients and stir until combined. Add the sunflower seed butter and stir until combined and then do the same with 1 cup of the chocolate chips. Fill the paper cups 2/3 of the way full with brownie batter and top with a sprinkle of chocolate chips. Bake for 18 minutes. Cool completely. Enjoy!

P.S. I started a group on Facebook called "Leftovers!" for my neighbors. Because of all of the recipe developing my husband and I are involved in, we often cannot eat all of what we cook and I don't like to waste food! I had some leftover Sunflower Buttercup Brownies and also had some leftover dough, so I posted them in the group. This was actually the first post in the group and I wondered, would I have any takers? Well, I did! And not only did my neighbor come and pick up these treats and the dough in seconds flat, but I ended up getting texts about how great they are! The following day I got texts with photos of the newly baked treats with the dough I sent. And accolades galore! Honestly, it might have been just as much fun for me to hear about the leftovers as it was to cook in the first place! So if you are wondering if these treats are delicious - my neighbor says, absolutely!


Mini Pineapple Upside Down Cakes

I love being a part of both 37 Cooks and Good Cook Blogger/Kitchen Experts – and I love that they have combined forces for this event.

This was no ordinary challenge, though – this was the Good Cook Potluck Pantry Challenge. The key word in that name is PANTRY, meaning we had to cook or bake with whatever we had in our pantry (including fridge) and not buy anything at the store. Thankfully my pantry is pretty well stocked and happened to have a fresh pineapple on hand! We had to use two of the Good Cook items – one from the core items received and the second item was whichever pan we choose.

I knew right away that I wanted to make pineapple upside down cakes – this was my favorite cake growing up because it did not have frosting on it! I kid you not…to this day I still do not really like frosting unless it’s my own frosting, which I do not sweeten much. My sweet tooth is not that strong I guess. This goes perfectly with a little dollop of lightly sweetened fresh whipped cream. Even though I chose to do a sweet recipe, this pan can be used for so much more than desserts – you can bake cornbread, risotto (yes risotto squares!), meatloaf, etc. The possibilities are pretty endless – you just need to be creative.

I used the following items to create my Mini Pineapple Upside Down Cakes: Pineapple Corer/Slicer, Silicone Spatula, Chopping Mats, and Dessert Bar Pan. I loved using the pineapple corer/slicer – super easy to use, say good-bye to canned pineapple rings!

The recipe is below, however, here are a few substitutions that can be made:
If you are not gluten-free, feel free to use a “regular” cake mix
The recipe is gluten-free, dairy-free, soy-free, and nut-free – the picture does show whipped cream, but you can omit that.
Don’t like pineapple? Use a different fruit…raspberries, cherries, etc.
I used Earth Balance sticks – feel free to use whatever butter or butter alternative you want…I haven’t tried anything besides this and butter so I can not guarantee any results


Mini Pineapple Upside Down Cakes
by Jenny

1 package of gluten-free white cake mix (follow package instructions*)
2-3 Tablespoons Earth Balance baking sticks (this is in addition to whatever your box mix calls for)
1/4 cup dark brown sugar (Wholesome Sweeteners) 
1 small-medium pineapple, cored and sliced, and cut into 1/2 chunks – reserve any juice
12 natural maraschino cherries without stems, drained

Preheat oven to 350°F.

Prepare cake mix according to package instructions (use the spatula to scrape down the sides of the bowl every so often if using a stand mixer.)

Evenly divide up the 2-3 Tablespoons of earth balance into the 12 wells of the dessert pan. Place pan in preheated oven to melt the butter – once melted, remove from oven and sprinkle the brown sugar evenly into the wells of the pan.

Top the brown sugar and melted butter with one 1/2 chunk of pineapple and 1 natural maraschino cherry (halved or whole is fine.)
 
Pour prepared cake batter evenly into wells of pan – leave about 1/4-inch room to let the cake rise in the oven.

Bake for 25-30 minutes or until golden brown and a toothpick comes out clean. 

Remove from oven and using a heatproof serving plate or cutting board upside down onto pan, turn plate and pan over. 

Leave pan over cake 5 minutes so brown sugar topping can drizzle over cake; remove pan. 

Cool 30 minutes. 

Can be served either warm or cool with either ice cream (dairy free alternatives available), or whipped cream (or coconut cream.)
 
Store covered in refrigerator.

Good Cook provided us with these products free of charge – all opinions are 100% my own.

Monday, July 14, 2014

Oatmeal Fudge Chocolate Chip Cookies


Besides focusing on organic, the recipes in the book Sweet Debbie's Organic Treats are also allergen-free and vegan.

So, no gluten, nuts, dairy ... all those things that are so common in baked goods.

To get around the "no dairy" issue, there's a lot of coconut oil used in these recipes, and coconut nectar is used for a sweetener.

I didn't have any coconut nectar, and after some shopping, I couldn't find it anywhere.

After some research, I found that agave nectar and honey were both acceptable substitutes from a cooking standpoint, so I used honey.

Later, I remembered that honey isn't a vegan product. But I wasn't planning on feeding any vegans, so I figured it would be fine. Use the coconut nectar or agave, if you need to keep these vegan.
The recipe also called for 3/8 teaspoon of stevia powder, which I also didn't have. Stevia is a sweetener, and since many sources said that honey was sweeter than coconut nectar, I decided to skip the stevia.

I didn't have guar gum and couldn't find it when I went shopping (although I know I've seen it at the grocery store before!), but the book suggested that xanthan gum is an acceptable alternative, so I used that.

I'm not a big fan of coconut, so I wasn't shoveling these into my mouth with wild abandon, but the chocolate flavor was definitely prominent.

For the gluten-free flour mix, I used the mix from King Arthur Flour; the book also has a recipe from making your own flour mix.

For the chips, I used Nestle's. If you're feeding vegans or folks with allergies, make sure you read the label on the chips you choose to make sure you're not inadvertently including things they can't have. The book has recipes for making your own dark chocolate chips, if you prefer to do that.

Oatmeal Fudge Chocolate Chip Cookies
by Donna
adapted from Sweet Debbie's Organic Treats by Debbie Adler

1 cup all-purpose gluten-free flour mix
1 cup cocoa powder
1/2 teaspoon baking soda
1/2 teaspoon xanthan gum
1/4 teaspoon salt
1/4 cup coconut oil
1/4 cup coconut nectar (I used honey)
2 teaspoons vanilla extract
3/8 teaspoon stevia powder (I omitted this)
1/2 cup water
1 1/4 cups gluten-free rolled oats 3/4 cups chocolate chips

Preheat the oven to 325 degrees and line one or two baking sheets with parchment paper. These don't spread much, so you might be able to squeeze all the cookies on one sheet, but I found it was easier to just use a second sheet.

In a medium bowl, whisk together the flour mix, cocoa powder, baking soda, xanthan gum, and salt.

Put the coconut oil and nectar (or honey or agave) in a microwave-safe measuring cup or small bowl and heat for 20-30 seconds. Add the vanilla extract and the stevia (if you're using it) and stir well. The coconut oil should melt.

Add the coconut oil mixture to the flour mixture, along with the water. Stir until all the liquid is absorbed and the mixture is evenly wet.

Add the oats and the chocolate chips and stir to combine.

Portion the cookie dough onto the prepared baking sheets. I made about 20 cookies.

Flatten the cookies with your palm or with the bottom of a measuring cup or glass. Bake at 325 degrees until the cookies are set and the oats look dry, about 13 minutes.

If you're baking more than one sheet at a time, or if your oven doesn't bake evenly, rotate the pans in the oven partway through the baking time.

Transfer the pan to a cooling rack and let the cookies cool for about 10 mintues before removing them from the pan and letting them cool completely on a rack.

Disclaimer: I received this book from the publisher.

Tuesday, July 1, 2014

Persian Green Frittata with Raita

What a surprise when we were contacted to try out this wonderful cookbook. As a true carnivore, I was absolutely surprised that there were many, many recipes that I could relate to and truly enjoy. I love vegetables any way you want to serve them up. There are so many to choose from that I chose two. I thought they would compliment each other and I was right. I hope you enjoy these and encourage you to seek out this cookbook. You won't be sorry on either count.

This is a two-part recipe, but not difficult. We are going to make a frittata that is green! Yep, green. We will then split it and slather on some raita in between to make a great finger food. Perfect for a garden party, buffet, or a brunch. We will make the raita first, so we can put it aside to rest and let the flavors blend together. Then we will get to the frittata.

Persian Green Frittata with Raita
by Traci
adapted from Silk Road Vegetarian by Dahlia Abraham-Klein

For the Raita:
2 cucumbers, peeled and finely chopped
1/2 teaspoon ground cumin
2 cups whole milk yogurt
2 green onions, sliced (use the green also)
1 Tablespoon lemon juice
1 Tablespoon finely ground garlic
Salt to taste

To remove the excess water out of the cucumbers, line a sieve with some cheesecloth. Place the cucumber in there and sprinkle some salt. Let the cucumbers drain while you assemble and mix the rest of your ingredients into a medium bowl. Squeeze out all the water that you can from the cucumbers. Gently fold them into your bowl. Cover with plastic wrap and place into the refrigerator.

For the frittata:
4 eggs
3 Tablespoons olive oil
1 cup thawed hash browns (or 1 medium cooked and shredded potato)
4 green onions, sliced (save a little for garnish)
1 cup shredded zucchini
1/2 cup chopped cilantro
1 Tablespoon fresh dill, chopped
1 teaspoon ground cumin
1 teaspoon salt
1 teaspoon black pepper

In a medium bowl, add eggs and beat well. Add olive oil to a medium skillet and heat to medium low. Add the rest of your ingredients into the bowl and combine together. Pour your mixture into the pan. Cover and cook for about 20 minutes. Uncover and use a spatula to check doneness. If it still jiggles in the middle, cover and continue cooking. You may need to turn your temperature down a little so it is gently browned on the bottom. When it is done, use your spatula and turn it out onto a cutting board. We want it to set up a bit. Get your raita out of the refrigerator. Remix it and taste to see if you need to add a pinch of salt. I bet not!

When your frittata is cooled, cut it into quarters. Then cut the quarters in half. Now split top and bottoms apart. Using a small spoon, spread a bit of the raita onto the bottom half and place the top on. Continue until all are done. Assemble onto a platter, garnish with some green onion. Serve with the remaining raita. Warm, room temperature or cold, it is a complete palate pleaser!

Tuesday, April 29, 2014

Savory Rolls and Feta Spread

Have you heard of Dorot before? I’ve been using them for years. They are awesome little cubes of tasty goodness. So easy to use and perfect for a quick meal loaded with flavor. We over at 37 Cooks had the privilege of having them as our latest sponsor. They sent us each a few coupons to pick up a variety of their products to work with and create a recipe. As with all sponsored posts and reviews these opinions are 100% my own.

Monday, April 28, 2014

Dorot Basil & Garlic Cultured Compound Butter

I was reading the March issue of Food & Wine magazine a week or so ago and I saw an article on cultured butter. I was so intrigued. I've been making compound butters for years - sweet, buttery spreads and savory ones as well. But I’ve never tried to “culture” butter before. My first attempt at cultured butter yielded a log of creamy and tangy deliciousness that was perfect for anything calling for butter. When the Dorot Challenge came-a-knockin’ I thought I’d make a “cultured” compound butter using their product. The Dorot garlic and basil was so easy to use and is so fresh tasting it’s like I picked it from my own garden. The bright and sweet basil, mild but spicy garlic, and the tangy cultured butter produced a concoction that is absolutely mouthwatering.

Friday, February 7, 2014

Kadhi Pakora

I am a huge fan of Indian food. One of my favorite dishes is Kadhi Pakora. I never really knew what "Kadhi Pakora" meant, I just knew that I liked it. My friend, Seema, explained that pakoras are the fritters made from chickpea flour (AKA Besan or Gram Flour) that usually have vegetables in them, and the kadhi is the sauce or gravy that they sit in. Kadhi is apparently also served as is with rice or roti (a type of Indian wheat flatbread).


Thursday, January 30, 2014

Kabocha Squash Puree with Seared Sea Scallops

Kabocha Squash Puree with Seared Sea Scallops
by Jenny

8 sea scallops
2 1/2 Tablespoons olive oil - divided
1/2 cup white onion - rough chop
2 celery stalks - rough chop
2 Tablespoons garlic - rough chop
1 Tablespoon ginger - rough chop
1/3 cup green apple - peeled, cored and chopped
1/4 teaspoon red pepper flakes
1/2 teaspoon The Spice House Fleur de Sel de Noirmoutier Malandel French Sea Salt
2 cups kabocha squash - peeled, seeded and cubed
1/2 - 3/4 cup low sodium chicken stock
1/3 cup of sliced baby bella mushrooms
2 - 3 Tablespoons The Spice House Spicy Sesame Seasoning
1 Tablespoon pure maple syrup


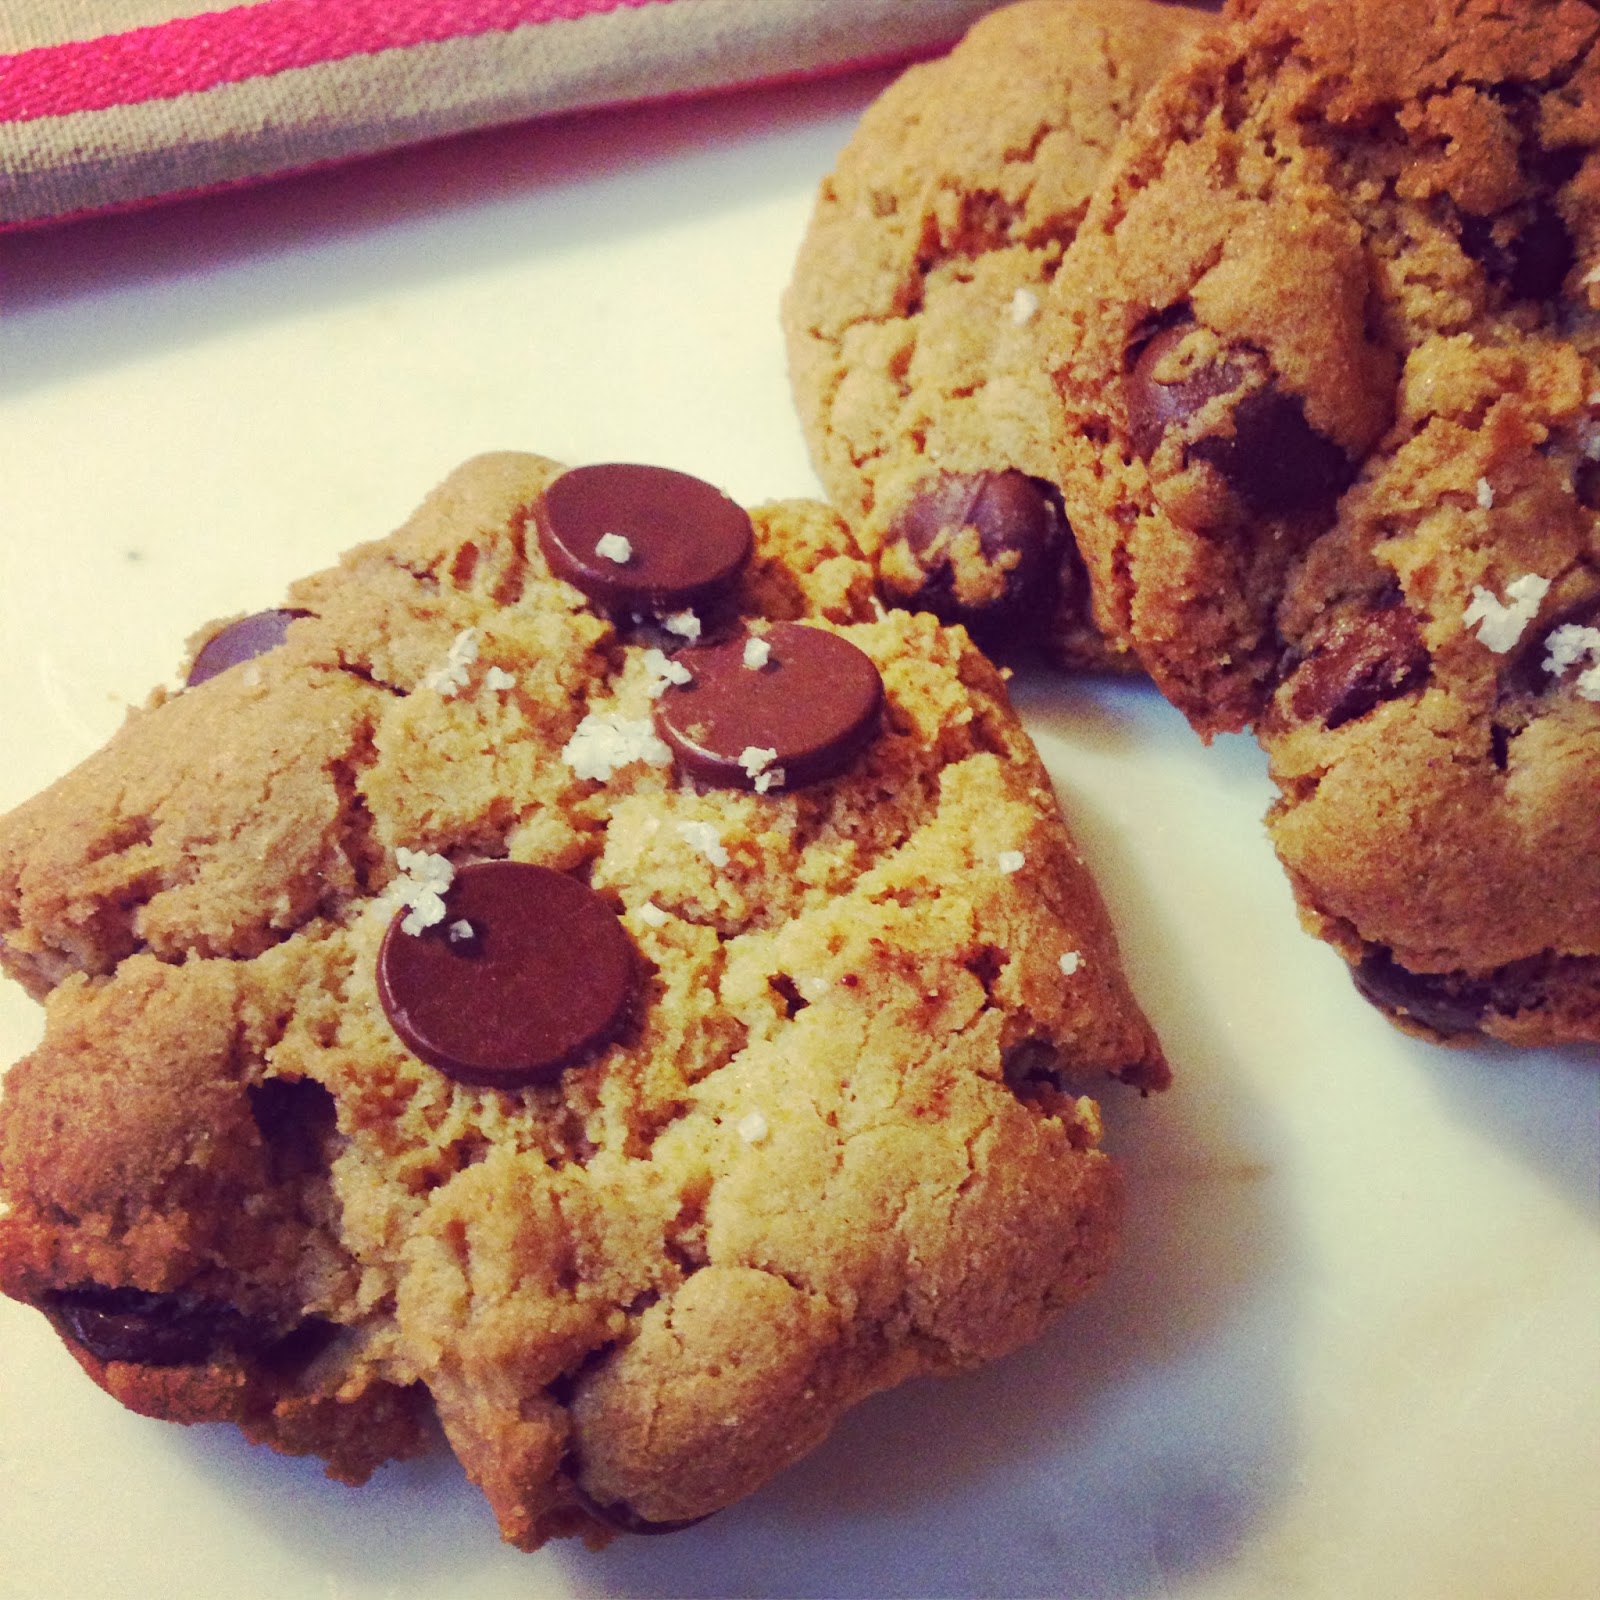
Gluten-Free Chocolate Chip and Sea Salt Cookies

Gluten-Free Chocolate Chip and Sea Salt Cookies
by Jenny

adapted from this recipe from Jacques Torres

8 1/2 ounces sweet sorghum flour
8 1/2 ounces super fine brown rice flour
2 teaspoons xanthan gum
1 1/4 teaspoons gluten-free baking soda
1 1/2 teaspoons gluten-free baking powder
1 1/2 teaspoons kosher salt
2 1/2 sticks unsalted butter
1 1/4 cups light brown sugar
1 cup granulated sugar
2 large eggs
2 teaspoons gluten-free natural vanilla extract
1 12-ounce package of bittersweet chocolate chips, disks, chunks,
The Spice House Fleur de Sel de Noirmoutier Malandel French Sea Salt


Friday, November 15, 2013

Pumpkin Cheesecake Cupcakes

Thanksgiving is one of my favorite holidays. There is something about the crispness in the air on Thanksgiving, the beautiful colors and pleasant aromas of fall that make my little heart happy. To me, this dessert embraces fall and I look forward to making it every year.

Monday, November 4, 2013

A Note from Jenny

About two months ago, I was asked permission by NFCA (National Foundation for Celiac Awareness) if they could submit one of my recipes among others, which were created with a gluten-free fall-inspired recipes download, to be published by Ahold USA, (the company behind the grocery stores Giant and Stop & Shop.) The NFCA chose my Zucchini Muffins recipe! If you click the "gluten-free recipes" image on the top right on this page and go to the last recipe you'll see mine :)

Wednesday, October 23, 2013

Egg Drop Soup with Diced Tomatoes and Green Onions

Egg Drop Soup with Diced Tomatoes and Green Onions
by Jenny

1 Tablespoon arrowroot powder
2 Tablespoons cold water
2 cups chicken broth (homemade or store bought)
1/8 teaspoon turmeric
1/8 teaspoon white pepper
1/4 teaspoon salt or to taste
1/4 teaspoon sesame oil
2 large Davidson's Safest Choice Eggs, lightly beaten
1/4 cup diced tomatoes
2 Tablespoons sliced green onions

Monday, August 19, 2013

Coconut Almond Cups

37 Cooks is at it again with another challenge. This challenge is with a company that I happen to love very much, Tropical Traditions. I love their coconut flour and oil very much and use it often, but sadly not often enough. I am working on trying to incorporate more of these great products into my CCGF recipes. Tropical Traditions is America's source for coconut oil.  Their products are all organic and Non-GMO! You can read more about Tropical Traditions and all of their great products on their website.

Thursday, August 8, 2013

Sweet Potato Tamales

Texas is tamale country. I've eaten them my whole life and made them a few times as well. So, when a fellow cook suggested making a batch of “sweet” tamales with my Tropical Traditions coconut oil, I couldn't get past the idea. I was hooked. Immediately.


I’m not going to lie. These were a challenge. But, they were also pretty fun to play around with and the results were delicious! I've done all of the research and trials, now all that YOU have to do is give them a shot. But remember - they DO take some time and patience, even for the 15-20 that you will get out of this recipe. And by the way, the Tropical Traditions Gold Label Virgin Coconut Oil (Tropical Traditions IS America’s source for coconut oil!) REALLY does make a huge difference in the final product. I played around with a local grocery store purchase before using the Tropical Traditions coconut oil, and it was apples and oranges! Yes, quality does count, and Tropical Traditions delivers!!! Get yours here: Tropical Traditions Gold Label Virgin Coconut Oil.

Tuesday, July 16, 2013

Have a Happy National Corn Fritters Day!

This recipe (flour, baking powder, eggs, and milk) is a basic fritter recipe - you can add any number of ingredients such as crab (which would work great with the Chesapeake Bay Rub, also from Feiny's Fine Foods), diced apples with a little bit of cinnamon and sugar instead of the salt and pepper, etc.

Thursday, July 11, 2013

Have a Happy National Blueberry Muffin Day with Berry Cornbread Muffins!

Berry Cornbread Muffins

by Jenny

1 cup gluten-free all-purpose flour
1/2 cup corn flour
3/4 cup cornmeal
1/2 teaspoon xanthan gum (only if your mix does not have it already)
4 teaspoons of baking powder (make sure it is gluten-free)
1/4 teaspoon of salt
zest of one orange (reserve some to sprinkle on top after removed from the oven) – you could also use lemon zest
1/4 cup Egg Beaters (or 1 large egg)
1 cup soy milk (almond or other nut milk would work just fine)
1/4 cup canola oil
1 teaspoon vanilla extract (pure if possible)
1 cup of frozen or fresh blueberries (raspberries, blackberries, or a combination of berries, etc.)

Tuesday, July 2, 2013

Crust-less Quiche

Crust-less Quiche
by Jenny

serves 4-8

1 Tablespoon garlic, minced
1 cup baby spinach, chiffonade 
1/2 cup zucchini, 1/4 inch dice
1/4 cup white onion, 1/4 inch dice
1/4 cup orange bell pepper, diced
salt and pepper to taste
1 Tablespoon cilantro, fine chop
1 cup low-fat mozzarella cheese
2 cups Egg Beaters