Showing posts with label Kate. Show all posts

Monday, May 16, 2016

Vegetable Insta-Stock

​I live in Colorado, where farmers markets abound, and cook with a lot of fresh produce, but I've never quite known how to make the most out of my kitchen scraps. All those herb stalks, onion ends, celery leaves, mushroom stems, carrot tops and ginger peels add up to a lot of organic waste in the trash. Now, if I gardened or was allowed to compost (bears abound in Colorado, too), that would solve the issue, but my thumb is black. 

Homemade stock, on the other hand, now that's something I've always aspired to make because it not only makes use of something I'd otherwise toss, the flavor of homemade stock can also make a huge difference to the quality of your cooking. Now, I say I aspired to make stock, because while it's not perhaps difficult, the process can be an undertaking, with many hours spent watching a pot. And, well, I never got around to it, until...

Until there was a shortcut in the form of my new Instapot IP-DUO60 Series pressure cooker, which made stock so easy. I'll never again throw all those precious organic scraps away. Instead, I save all those tops and ends and stems in the freezer in a gallon-sized freezer bag. When the bag is full, I make a new batch of stock, and I always have bright, flavor-packed stock on hand to elevate any dish I make to another level. 

Notes: Avoid or minimize bell pepper scraps, which tend to overwhelm in flavor. For a clearer stock, avoid onion skins. Otherwise, feel free to experiment with which veggies' flavors you enjoy in your stock. While this recipe is for a purely vegetarian stock, feel free to add meat scraps and/or pieces (for example, chicken trimmings or wings) alongside your produce scraps. 

Vegetable Insta-Stock
​By Kate J.

1 - 1 1/2 gallon bags of frozen vegetable scraps (see above)
2 teaspoons sea salt (or to taste)
6 peppercorns
2 bay leaves

Place directly into the Instant Pot, no need to thaw. The Instant Pot's preheat will handle the cold vegetables without a problem. 

Fill the pot with water to maximum, 6 quarts. Add salt, peppercorns and bay leaves. Give the mixture a quick stir. 

Check the seal, securely close the lid, set valve to SEAL, and select the SOUP function. Set the time to 22 minutes and allow the cycle to begin. 

When the cycle is complete, cancel the KEEP WARM. Allow the pot to return to normal pressure on its own — though you can begin to release it after 10 minutes if you're in a hurry. 

Once the stock is completely cool, strain the stock through a mesh colander to remove all the scraps and spices. Then transfer the stock to airtight containers. 

Keeps 7-10 days in the fridge and several months in the freezer. 

Monday, April 4, 2016

S'more Log

​Campfire s'mores and chocolate breakfast cereal? Two of childhood's favorite treats rolled into one delicious and easy recipe.

S'more Log
by Kate J.

5 cups Chocolate Cheerios
1 10-ounce bag mini marshmallows
3 Tablespoons butter
1 7-ounce jar marshmallow fluff
1 cup mini chocolate chips, preferably mini​

Equipment:
Jelly roll/baking sheet, parchment paper, knife, cutting board

Dump the cereal into a large bowl and set aside. Line a baking sheet with greased parchment paper and set aside.
In a large saucepan, melt the butter over medium heat and then add the marshmallows, stirring constantly, but gently, to combine into a smooth, voluminous liquid. Remove from heat and allow to cool just slightly.
Working in batches, dump the thick liquid over the cereal, using gloved hands to mix the cereal in. Try not to break the Cheerios! Continue until all the butter/marshmallow is used and the mixture is consistent.
Pour the cereal mixture onto the prepared baking sheet, pressing gently with gloved hands until the cereal creates a very thin sheet, less than a centimeter thick. Again, try not to break the Cheerios. Set aside and let set up for at least 20 minutes but not until completely firm.
Using the parchment paper, remove the cereal sheet from the baking sheet and onto a counter top. Spread the entire jar of marshmallow fluff over the sheet, sprinkle with chocolate chips. Starting at one short edge, begin to roll the sheet and its goodies into a log, using the parchment paper to keep everything to together.
Once the log is complete, wrap it in parchment paper and secure with several rubber bands. Now allow the treat to set up completely, either at room temperature or in the fridge. (A cold log will be easier to slice.)
When ready to serve, use a sharp knife and a cutting board to slice the log into circles. Enjoy!

Tuesday, October 20, 2015

Curried Chicken Salad with Grapes and Seeds

This is one of my favorite recipes to use after I make a roast chicken (recipe here). The smoke of the pumpkin seeds and the spice of the curry is an excellent match. If you're not in the mood for an entree salad, the chicken salad, greens and sprouts are also tasty in wraps/tortillas.

Curried Chicken Salad with Grapes and Seeds
by Kate Jonuska

2 cups cooked chicken, chopped
1 cup plain Greek yogurt
1 Tablespoon mango chutney
1 Tablespoon curry powder
3 ribs celery, finely diced
1/2 white onion, finely diced
2 cups red, seedless grapes, halved
1/4 cup Truly Good Food's Blackened Pumpkin Seeds, plus more for garnish
Mixed greens of your choice
Sprouts

In a large bowl, stir together chicken, yogurt, chutney and curry powder until well combined. Then add the celery, onion, grapes and pumpkin seeds.

Divide greens between four bowls. Add a layer of sprouts. Place a scoop of chicken salad atop the greens. Garnish with additional pumpkin seeds.

Monday, September 28, 2015

Nut-Crusted Buffalo Tofu (Vegan)

Why should wings have all the fun? Take your favorite buffalo flavors vegan with this quick and easy recipe, seen here with maple carrots and red beans and rice.

Nut-Crusted Buffalo Tofu (Vegan)
by Kate Jonuska

1 (16-ounce) package extra-firm tofu
1/2 cup all-purpose flour
Salt and pepper
1/2 cup vegan egg substitute (such as Ener-G Egg Replacement or Neat Egg)
1 cup panko breadcrumbs
Vegetable oil for frying
Hot sauce (optional)
Special equipment: food processor

Drain the tofu. Place the brick between two paper-towel-lined plates to press out excess moisture for at least 15 minutes and up to an hour.
Slice the tofu in half lengthwise, then slice each rectangle into bite-sized squares.

Season the flour with salt and pepper. Finely chop the nuts in food processor. Set up an assembly line with 1) flour, 2) egg mixture and 3) chopped nuts combined with panko breadcrumbs.

Toss each piece of tofu in the seasoned flour, then dredge it in the egg. Shake off excess egg, then drop the tofu into the nut mixture. Press into all six sides. Set aside.

Place a frying pan over medium-high heat. Add vegetable oil. Fry off the tofu in batches, making sure to brown all six sides. Remove to a paper-towel-lined plate.

Serve sprinkled with hot sauce. Seen here with red beans and rice, and maple carrots.

Wednesday, August 26, 2015

Cinnamon Ice Cream with Salted Honey-Caramel Shell

This delicate, delectable ice cream is restaurant quality. Whether you say it tastes of fresh sopapillas or a cinnamon flan, it will knock your socks right off! The secret is the smooth honey of Honey Ridge Farms Clover Honey Crème - whose leftovers can be poured over any of your favorite desserts!

Cinnamon Ice Cream with Salted Honey-Caramel Shell
by Kate J.

For the ice cream:
2 cups ​whole milk
2 cups heavy cream
1​-2​ medium ​cinnamon sticks​, broken into pieces (not crushed)
​3/4 teaspoon vanilla
8 egg yolks
3/4 cup ​sugar
1/​4​ teaspoon ground cinnamon
1/4 teaspoon kosher salt

​For the honey-caramel shell:
4 Tablespoons unsalted butter
1/4 cup Honey Ridge Farms Clover Honey Crème
1/2-1 teaspoon sea salt, to taste

Special Equipment:
Ice cream maker, mesh colander

Add the milk and cream to a medium saucepan along with the cinnamon-stick pieces​ and vanilla. On medium-high, heat the mixture until steaming, but not boiling, and remove from heat. Allow the milks and spice to steep for about 60 minutes. Meanwhile, whisk the yolks in a bowl along with the sugar.

After steeping, return the milk mixture to medium-high until steaming again. Then add a small amount of the warm mixture to the yolks, mixing constantly, to temper the yolks. Repeat several times until all the milk has been incorporated.

Pour the custard base back into the saucepan. On medium, cook - stirring constantly - until the mixture has thickened enough to coat the back of a spoon. Remove from heat.

Strain the custard through a mesh colander, add the ground cinnamon and salt and place in a covered container. Cool in the fridge for at least 2 hours or up to all night.

When cold, place into your ice cream maker and use according to your machine's instructions. Once churned, return the custard to a covered container and freeze until set, at least 2 hours.

Meanwhile, make the honey-caramel shell.

​Melt the butter in a small saucepan over medium heat. Add the honey and salt, stirring constantly, and continue to heat until the mixture bubbles and thickens slightly. It may turn a mildly toasted color, but should be allowed to caramelize no further. Pour mixture into a sealable container and allow to cool at room temperature.

​To serve: If too cool to pour, heat the honey-caramel for 15-20 seconds in the microwave - but not hot enough to melt the ice cream. Drizzle the caramel in the serving ​dish, then scoop in the ice cream. Top with more caramel, which should harden to a delicious, chewy consistency. Enjoy!

Thursday, June 11, 2015

Almond Sugar Chews

This is my go-to cookie recipe for unexpected sweet cravings. Unlike most sugar cookies, the dough doesn't require rest in the refrigerator and therefore cooks up quick. Plus, most kitchens have all the ingredients on hand without special shopping. (You can also omit the almonds and/or switch the almond extract for vanilla.)

Despite being dead simple, the texture is unlike traditional sugar cookies, too. They're crisp, but chewy, melt-in-mouth and completely addictive. You've been warned!

Almond Sugar Chews
by Kate
Adapted from Serious Eats Easy Chewy Sugar Cookies

14 Tablespoons unsalted butter, melted
1 1/2 cups sugar
3/4 teaspoon sea salt
1 egg
1 Tablespoon pure almond extract
2 1/4 cups bread flour
2 teaspoons baking powder
1/4 teaspoon baking soda
1/3 cup turbinado sugar
1/3 cup pulverized almonds (in chopper or food processor), preferably toasted

Tools:
Mrs Anderson's Non-Stick Baking Mats
Cookie sheets

Preheat oven to 375°F with racks in middle positions. Place Mrs Anderson's Non-Stick Baking Mats atop cookie sheets.

In the bowl of a mixer (or using a handheld mixer), combine butter, sugar and salt and mix until combined. Add egg and almond extract and mix again until combined.

Now add the flour, baking powder and baking soda to the bowl; mix once more.

In a separate bowl, combine the turbinado sugar and pulverized almonds.

Divide the dough into about 24 balls. Roll each ball in the almond sugar and place on the baking mat. Note: These cookies tend to spread. Eight per cookie sheet is recommended.

Once all the balls are on the mats, use the bottom of a measuring cup or a glass to press on each ball, flattening each into a disc about 1-inch thick.

Place your cookie sheets in the oven, and bake for four minutes. Then rotate the pans (top to bottom and front to back.)

Bake another 4-5 minutes or until the tops of the cookies are puffed and the edges look solid. The entire cookie may still be white rather than having golden edges, but they are cooked through.


Immediately, but gently, tap the pans on the range or counter to deflate the cookies. Let them cool for at least five minutes before transferring to a wire rack.

Once cookies are cool, immediately store in an air-tight container to preserve texture.

Monday, March 23, 2015

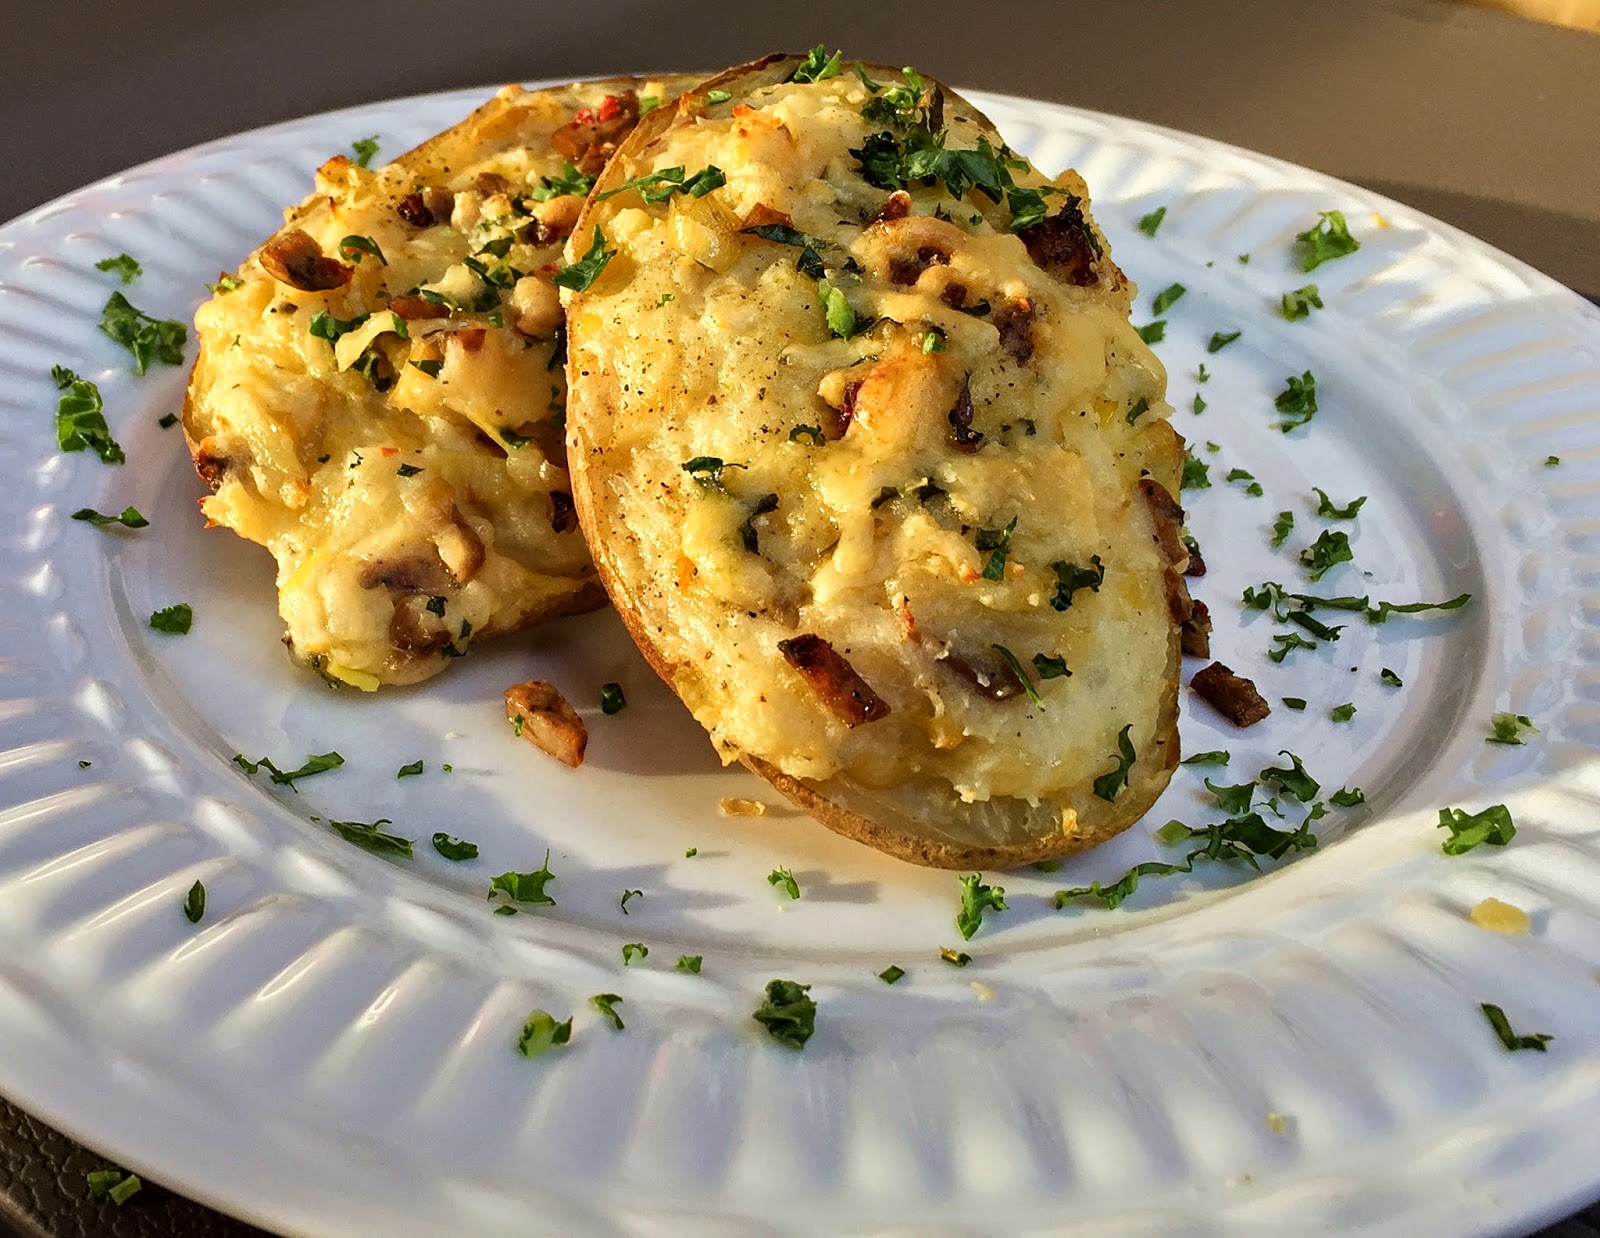
Plumber's Twice-Baked Potatoes

Like many avid cooks, I have a very genial relationship with several people who work in the produce department of my regular grocery store. I often ask them to slice a cabbage in half or when certain things are in season. Shopping for the Bilinski's ​Healthy Kale ​Balsamic Chicken Sausage Challenge, however, one of these genial gentleman helped me name these tasty twice-baked potatoes.

See, I was looking for leeks. Finding none, I approached him to ask, "Do you guys have any leeks today?"

"Thank God," he said, looking relieved. "Are you the plumber? We've been waiting for you for hours!"

It took me a beat to understand the pun, and it took him only moments to locate some of the delicious veggies for me. But since these twice-baked potatoes are full of leeks (leaks!) and kale (which is good for your, ahem, plumbing) the dish's title was born!

Serve these potatoes as a light main dish or a delicious side with the protein of your choice.

Plumber's Twice-Baked Potatoes


by Kate
Inspired by Smitten Kitchen
Serves four as a main course, up to eight as a side

​4 medium russet potatoes
1 Tablespoon butter
1 Tablespoon olive oil
2-3 leeks (halved, sliced thin and rinsed well)
Salt and pepper to taste
​2 Bilinski's Kale Balsamic Chicken Sausages, diced
1 cup white cheddar cheese, divided
1 cup light sour cream
Several ribbons of fresh kale to garnish (optional)
Special equipment: Aluminum foil, mixer (optional)

​Preheat your oven to 400°F in order to bake the potatoes the first time. After washing them well, pierce each potato all over with a fork, then wrap the spuds in aluminum foil. Bake for about 90 minutes, or until the potatoes are tender to the touch. Set aside and allow to cool enough to handle.

Meanwhile, set a medium sauce pan on the stove over medium heat. Add your butter and olive oil, and once melted, stir in your leeks. Season with salt and pepper, and saute the leeks for about 10 minutes until they're tender, but not brown, turning down the heat to medium-low if necessary.

Add the Bilinski's Kale Balsamic Chicken Sausages, ​stirring the meat into the leeks and cooking until edges are crisp, about 3-5 minutes longer. Scoop leak and sausage mixture into the bowl of your mixer - if you have one. If not, transfer to a bowl in which you can use a masher.

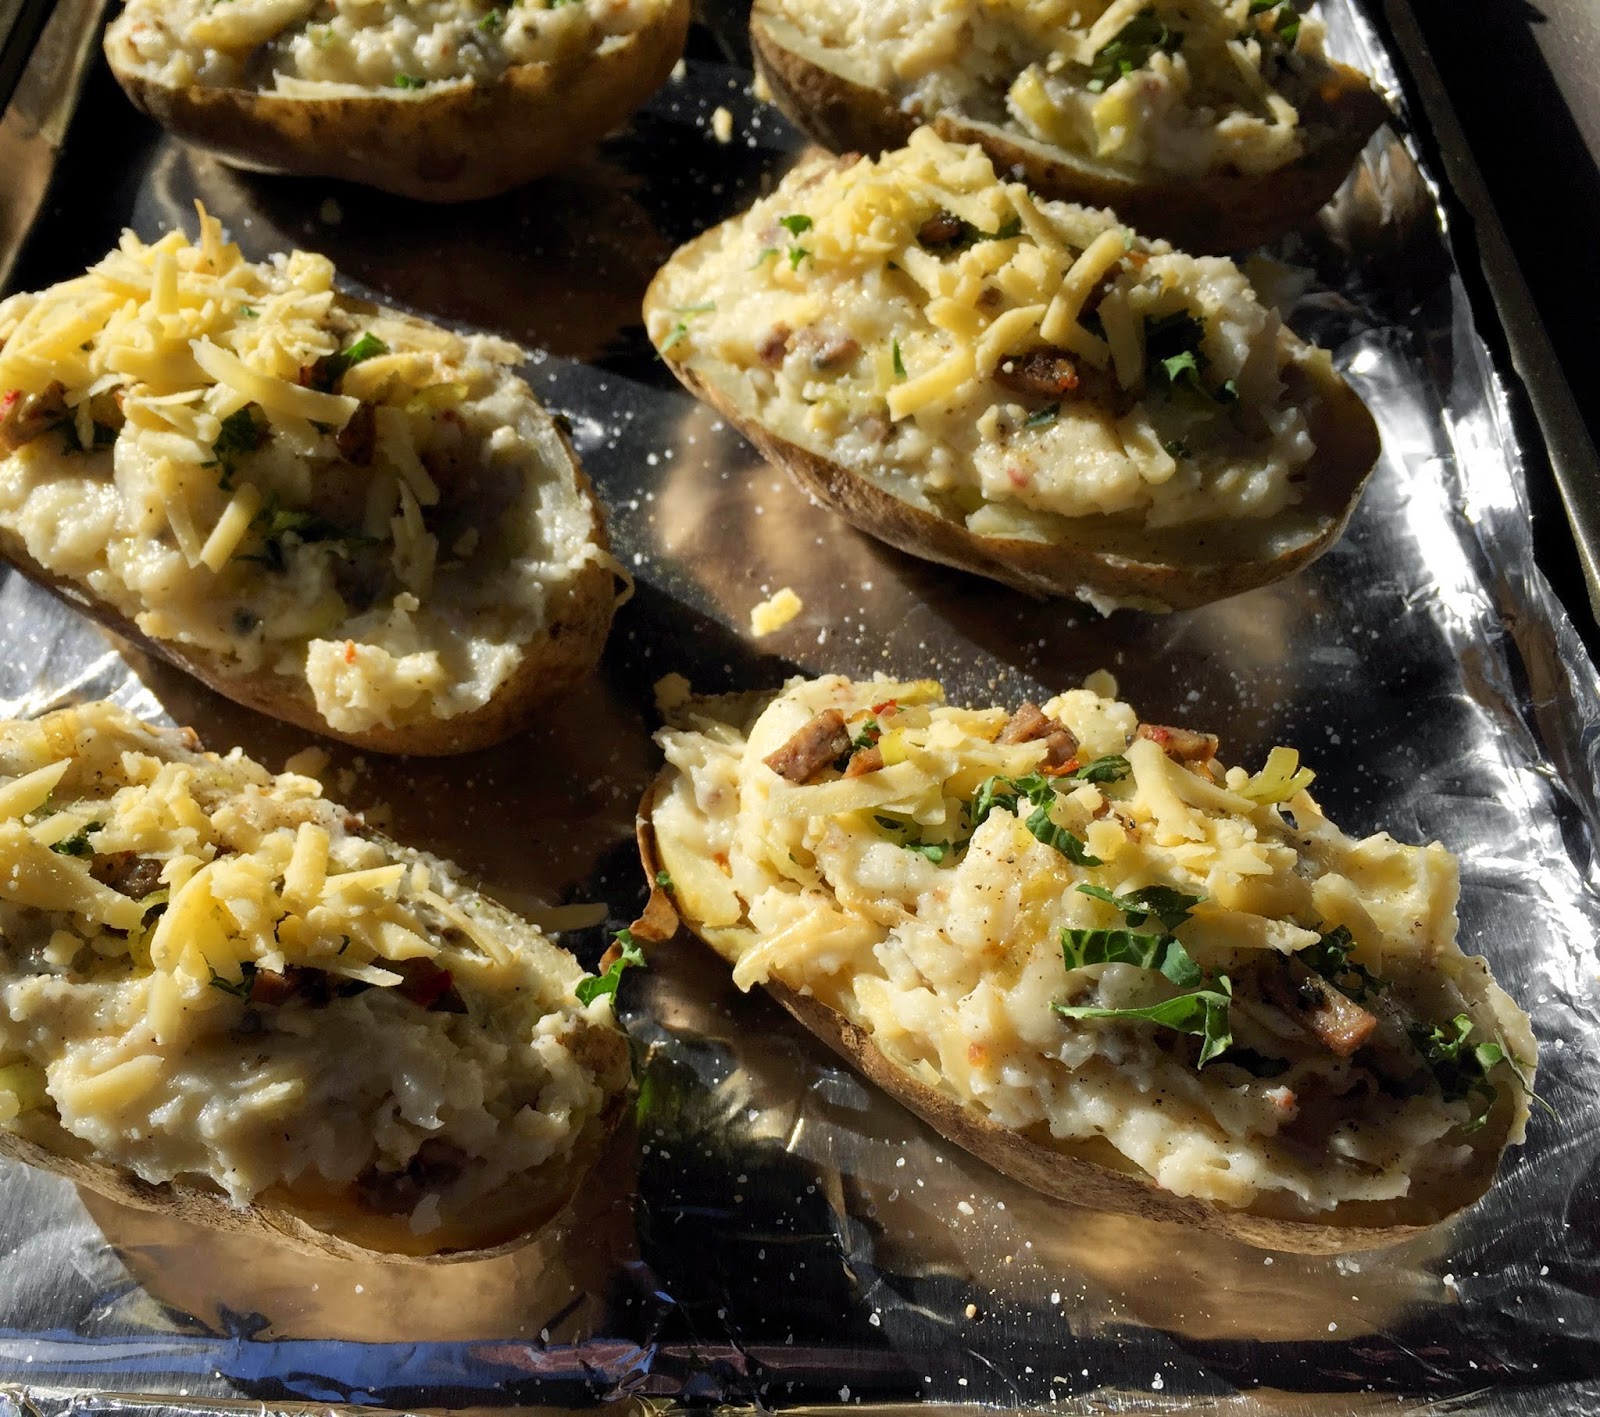
Once the potatoes are cool enough to handle, slice them carefully in half lengthwise. Using a spoon or a melon baller, scoop out the tender interior of the potato, leaving only a shell of intact potato near the skin. Cover a cookie sheet with foil and place the shells upon it.

Place the scooped potato into the bowl with your leeks and sausage. Turn the mixer on low - do not over mix or you risk gummy potatoes - and gently mash everything together. Add 3/4 cup of the cheese to the bowl along with the sour cream. Season well with salt and pepper, salting aggressively. Gently mix again.

Spoon your filling into the prepared potato shells. Top with the remaining 1/4 cup of cheese and ribbons of kale, if desired. In your still 400°F oven, bake the potatoes again for about 25-30 minutes, or until the filling is crisp and golden brown.

Friday, December 12, 2014

No-Fail Slow-Cooker Roasted Chicken

One of my best kitchen tricks when life gets hectic around the holidays - or when the kitchen is the last place I want to be - is slow-cooker roasted chicken. The slow cooker makes it a hands-off recipe, and the use of whole chicken is an inexpensive way to yield a large quantity of moist, delicious chicken, almost everyone's favorite protein.

The Hamilton Beach Set & Forget 6 Quart Programmable Slow Cooker, however, takes my favorite kitchen hack to a new level of ease with its temperature probe. Instead of forcing me to use my sloppy mental calculations of time-per-pound and check the temperature by hand, the probe simply shuts off the whole cooker when the meat reaches the desired temperature, so the chicken is perfectly moist. Everything with even less effort than before.

One your chicken is fully roasted, you can serve the bird along with picnic sides, like macaroni salad, coleslaw and biscuits. However - here's the second part of this awesome trick - one whole chicken roasted in the slow cooker will usually create two complete dinners for my small family. I've collected a list of recipes that use this precooked chicken meat as the base protein for several tasty meals like:

Curried Chicken Salad Wraps
Chicken and Black Bean Taquitos
Chicken Tortilla Soup
Chicken Caesar Salad
Chicken Fried Rice

Plus, once you learn the technique for slow-cooker chicken, you can mix up the preparation. Add new potatoes to the bottom of the cooker. Use lemon zest and/or lemon pepper in the stuffing, or try glazing the skin in teriyaki or hot sauce.

No-Fail Slow-Cooker Roasted Chicken
by Kate

1 whole chicken (4-6 pounds), giblets removed
Sea salt and freshly ground pepper
1 large yellow onion, roughly chopped
3 cloves garlic, skinned and roughly chopped
2 bay leaves
1 teaspoon Herbs de Provence, or your favorite leafy spice mixture
Special equipment: Hamilton Beach Set & Forget 6 Quart Programmable Slow Cooker and kitchen twine

Rinse the chicken inside and out. Pat dry with paper towels.

Sprinkle interior cavity with salt and pepper, then fill with onion, garlic and bay leaves.

Truss the chicken with kitchen twine - making sure the wings will stay close to the body and the interior cavity sealed - and sprinkle the breast side of the bird with 1/2 teaspoon Herbs de Provence, salt and pepper.

Place the chicken breast-side down in your Set & Forget Slow Cooker. Sprinkle the back side of the bird with 1/2 teaspoon Herbs de Provence, salt and pepper.

Secure the lid on your slow cooker and insert the thermometer probe into the chicken, making sure the probe lies deep in the meat rather than near bone or in the interior cavity. Plug the thermometer probe in its designated jack on the side of the cooker.

To program the slow cooker, press the ON button and then press PROBE. The "Heat Setting" light should be illuminated. Choose whether you'd like to cook use the high or low setting. Press ENTER.

Now the "Desired Temp" light will be illuminated. Use the arrows to select a temperature of 170° (which is safe for poultry, though you can select as high as 180°.) Press ENTER. The machine will read COOK and sound a 3-second beep to signal it's beginning the cook cycle.

While the chicken is cooking, the cooker's display will alternate between the actual temperature and the goal temperature. A whole bird will cook on high in about 3 1/2 - 4 hours and on low in about 6 hours.

Note: The slow cooker will beep when the cycle is complete and without user interruption, will switch to warm mode until you're ready to serve.

Thursday, September 18, 2014

Cherry Pie Bars

Pie may be more celebrated, but bars are handheld! Try these Cherry Pie Bars at your next potluck and watch them disappear. In a bar recipe like this, however, the thicker crust plays a big part in the overall flavor, so make sure to use high quality flour. I've long preferred certified-organic Bob's Red Mill.

Cherry Pie Bars
by Kate
Adapted from Joy the Baker

For the crust:
3/4 cup unsalted butter, room temperature
3/4 cup powdered sugar
1 1/2 cups quality flour, such as Bob's Red Mill Organic Unbleached White Flour
1/4 teaspoon salt
Zest of one lemon
1/4 cup oats, old-fashioned, not quick-cook

For the "pie" filling:
2 eggs
3/4 cup sugar
1/3 cup quality flour, such as Bob's Red Mill Organic Unbleached White Flour
2 Tablespoons lemon juice, fresh
1/2 cup sour cream
1/4 teaspoon sea salt
1 1/2 cups cherries (either fresh, pitted and halved; or if frozen, thawed, drained and halved)

Preheat the oven to 350°F with its rack in the top third. Grease a 9-by-9-inch baking pan and line it with parchment paper (one strip each direction of the pan, overlapping). Then grease the parchment paper.

Start with the crust. Combine the butter, powdered sugar, flour, salt and zest in a medium to large bowl. Use a pastry cutter, a big fork or your fingers to work the ingredients into a shaggy dough. Don't worry if it's not super smooth or incorporated.

Take 1/2 cup of the dough, put it in a separate smaller bowl and add the oats, stirring to combine and create a crumble. Set that bowl aside for later.

Back to the rest of the dough, stir again until it's relatively smooth and soft, and can form a ball. Then break that ball into smaller chunks, which you'll press into the bottom of your greased pan. Use extra flour if it's sticky, and press until it's even.

Bake for about 15 minutes, or until the dough is browned around its edges. Meanwhile, start the filling.

Whisk the eggs, sugar, flour, lemon juice, sour cream and salt together until incorporated in a medium bowl (even the same bowl, if you'd like).

Place the cherries on the baked crust. If using frozen cherries, make sure they're well-drained before adding. Pour the filling over the cherries, then sprinkle with the reserved oat crumble.

Bake the bars for about 30 minutes or until set. A little jiggle in the center is OK, but the bars should be relatively set. Cool the pan to room temperature and then chill for at least 60 minutes before slicing. Serve chilled or at room temp -- and add ice cream for an a la mode version, if you're feeling fancy.

The bars keep well in the fridge for up to four days.

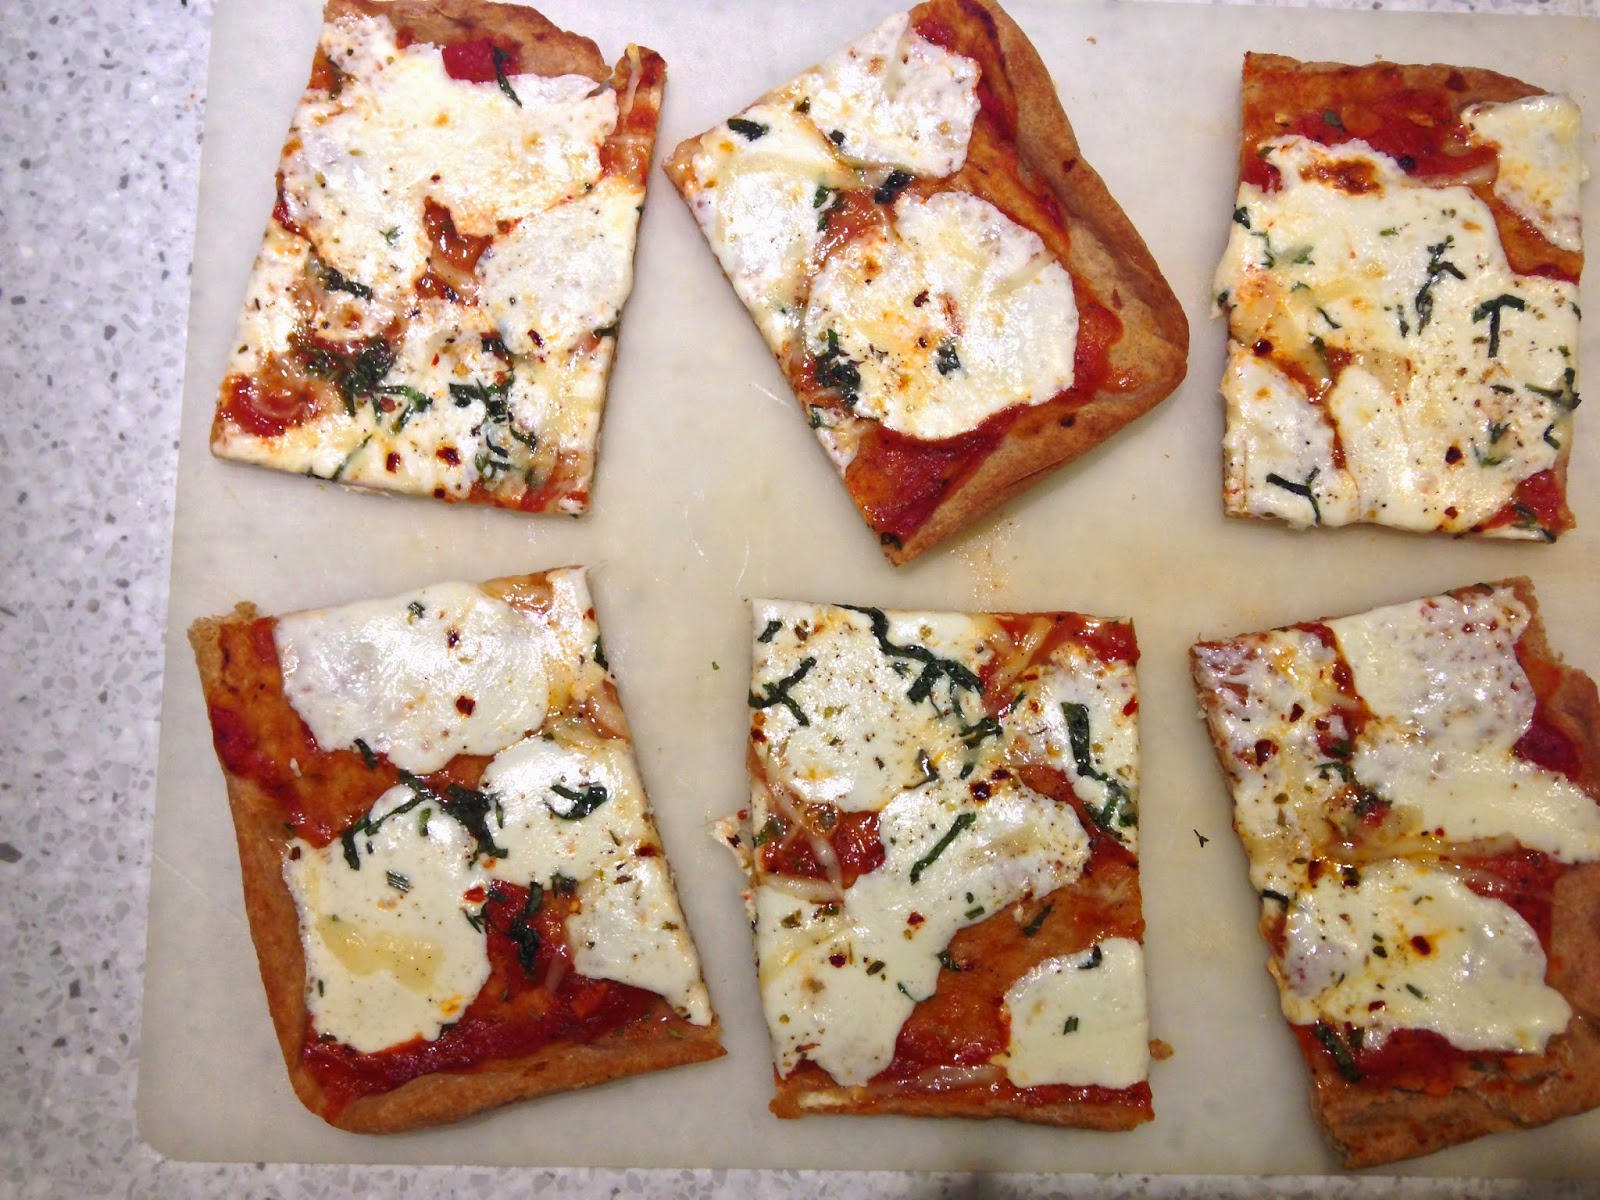
Lazy (Wheat) Pizza Dough

Lesson No. 1 of making pizza at home: It's not hard to make pizza dough.

Lesson No. 2 of making pizza at home: The hard part is finding your perfect dough recipe.

And after years of experimenting with different ratios and methods — including pizza dough in the bread machine, which I now think silly — I have found my dough with Smitten Kitchen's Lazy Pizza Dough! It's excellent if making traditional-crust pizza, meaning made with white flour, but it holds up well when you mix in some wheat flour for heft and health. Note: With these measurements, DO NOT PACK YOUR FLOUR. These are "fluff and level" cups, which should weigh about 125 grams if you have a kitchen scale.

The "lazy" part of the recipe comes from its flexibility. There are three yeast options depending on when you plan to eat your pizza. For the overnight option, start the dough after dinner to serve the next night for dinner (about 22 hours.) For the all-day option, start in the morning before the planned pizza dinner (about 12 hours.) For the part-day option, start your dough at noon for dinner that night (about 6 hours.) Whichever way works for you, the recipe yields enough for two thinner-crust pizzas, perfect for two 9-by-11-inch cookie sheets.

Oh, but I almost forgot. Lesson No. 3 of making pizza at home: Use a quality flour. You pay attention to the quality of your sauce, cheese and other toppings; pay as much attention to your flour's quality by using a top-notch product like Bob's Red Mill.

Lazy (Wheat) Pizza Dough
by Kate
Adapted from Smitten Kitchen and Jim Lahey's "My Pizza"

1 1/3 cups warm water
2 cups all-purpose flour, such as Bob's Red Mill Organic Unbleached White Flour
1 cup wheat flour, such as Bob's Red Mill Organic Whole Wheat Flour
Either 1/8 teaspoon (for overnight option), 1/4 teaspoon (for all-day option) or 1/2 teaspoon (for part-day option) active dry yeast
1 1/2 teaspoons sea salt

For the pizza:
Sauce, cheese and your choice of toppings

Mix all the ingredients together in a large bowl using a spoon. The dough will be very rough and craggy usually, but add a spoonful of water if it seems too much so. Cover your still-craggy dough with plastic wrap and keep at room temp for the 22/12/6 hours of your dough schedule. See above.

Thirty minutes before the dough is ready, grease your pizza pans. Preheat your oven to HOT (450°F or even 500°F if you live dangerously.)

Scrape the dough out onto a floured counter top. It should now be loose, soft and stretchy. Divide the dough in half and form into two balls. One by one, stretch the ball by letting it fall from your hands a few times before placing it on the prepared baking sheet. Only then use your floured fingers to stretch it further to fit.

Note: If the dough is getting unmanageable, walk away for 10 minutes. The gluten in the dough will rest and become more pliable again.

Add your sauce, cheese and toppings. Bake the pizza for 10-15 minutes, rotating halfway through if cooking both at once. The top should be blistered and the crust golden.

Allow the pizza to rest for about three minutes, then slice and enjoy!

Thursday, July 31, 2014

Fried Avocado Quesadillas with Sweetest Pico de Gallo

Frying avocado? Crisping up the delicious, rich green-fleshed fruit with oil might seem like gilding the lily, a cooking act similar to wrapping bacon around rich shrimp or deep-frying cheese. Such were my thoughts when perusing the new cookbook, The New Southwest: Classic Flavors with a Modern Twist by Meagan Micozzi of Scarletta Bakes, which includes this lovely recipe for Fried Avocado Quesadillas.

Since both fried cheese and bacon-wrapped shrimp are downright delicious, frying avocado like hash to create the filling of a meatless quesadilla seemed like a straight-forward slamdunk of decadence. And yep. Oh, yes. Indeed. These were rich, cheesy, tasty decadence.

While the recipe makes two quesadillas, those will be thick and filling beasts. Feel free to make three quesadillas with the filling and pico if you'd like to stretch the meal.

Fried Avocado Quesadillas with Sweetest Pico de Gallo
Yield: 2 very large quesadillas, 8 wedges

For the sweetest pico de gallo:
1 cup quartered seedless green grapes
1 cup quartered grape tomatoes
1/2 cup diced sweet onion
1 large jalapeno, minced (seeded or not, your choice)
2 stems parsley, minced
2 Tablespoons freshly squeezed orange juice

For the quesadillas:
6 large avocados, peeled and pitted
1/4 cup freshly squeezed lime juice
2/3 cup plain, dry breadcrumbs
2 teaspoons salt
2 teaspoons ground white pepper
Canola oil
4 (9 or 10-inch) flour tortillas (or 6, see note above)
2 cups shredded Chihuahua cheese (or mild Cheddar)

To make the salsa: 
Mix all the ingredients together in a large bowl. Set aside.

To prepare the filling: 
Place the avocados in a large bowl and mash into chunks. (Over-mashing the avocados makes the frying more difficult. Think about it like frying a hash, which always has a chunky consistency.)
Stir in the lime juice, breadcrumbs, salt and pepper until evenly distributed. Heat 1 Tablespoon of canola oil over medium heat in a 10-inch, heavy-bottomed skillet, preferably cast iron. Once the oil is hot, add about half of the avocado mixture and spread loosely over the bottom. Cook for 2-3 minutes, until the underside of the avocado is crisp and golden. Flip the avocado and cook for another 2-3 minutes. Remove fried avocado to a paper towel-lined plate or baking sheet. Repeat with the second half of the mixture.

To assemble and cook: 
Remove the skillet from heat and line with a tortilla. Top with even layers of half the avocado mixture, half of the salsa and half the cheese. Top with a second tortilla. Using a sharp knife, carefully slice the quesadilla through into quarters. (This great technique really helps with flipping.) Return the skillet to the stove and cook over medium heat, pressing on the top of the quesadilla a bit as it cooks. Fry until the edges of the tortilla are crisp and golden, about 3-4 minutes. Flip each quarter and cook for approximately 4 more minutes. Remove cooked the wedges and repeat with remaining ingredients.

Serve immediately and enjoy!

Monday, July 28, 2014

Magic Cake

Pantry cooking may seem simple. There's no need to go to the store, after all, if you cook with whatever you have on hand. This cake recipe, however, is far, far, far from simple. In fact, it's a miniature chemistry experiment, though it's way more fun to think of it as MAGIC than science. Calling it magic makes it way more fun to clean up the mess, because wow, I went through four mixing bowls. (Don't be like me!)

Using the power of butter, eggs and sugar, this slowly baked cake cooks firm on the top and bottom but remains custardy in the center -- meaning it's certain to impress, even if you didn't need to grocery shop.

Tuesday, June 3, 2014

Slap Ya Mama Cajun Meatball Sandwiches

Just as gumbo is a dish that can be made with many meats -- or combinations of meats -- these meatballs could be created with almost any ground meat you desire. Rather than beef and pork, perhaps throw in veal, bison, chicken or even shrimp! The resulting meatball is as warm, sloppy and delicious as a meatball sub from your favorite deli or concession stand, but the unconventional use of the Slap Ya Mama Cajun Gumbo Dinner Mix gives them a LOT of flavor with little effort. (Shh! Don't tell.)

I particularly enjoyed the tomato sauce/unpickled giardiniera, though. Sweet and hot, cooked into a thick and chunky paste, it could be an ideal condiment for almost any hot sandwich.

Note: Instead of in sandwiches, the meatballs and vegetables can also be served alone or over another starch, such as rice or orzo pasta.

Friday, May 9, 2014

Hoisin-Glazed Pork Chops

Hoisin-Glazed Pork Chops
by Kate
adapted from Serious Eats 

1/2 cup hoisin sauce
1 Tablespoon five-spice powder
2 Tablespoons soy sauce
1/4 cup honey
1 Tablespoon Sriracha (or other hot sauce of choice)
1 cube Dorot Crushed Garlic, thawed (or 1 clove garlic, minced)
4 pork chops, about 2 1/2 pounds total

Preheat oven to 400°F. Stir together all ingredients, except for pork, in a small bowl. Place the pork chops on a baking sheet lined with foil, and generously brush all sides (including the edges) with the sauce.

Place the pork in the oven, and bake for about 5 minutes. Baste with more glaze and return pork to the oven.

Bake for an additional 10 minutes; glaze with remaining sauce mixture.

Thursday, April 24, 2014

Garlic and Basil Black-Bean Eggplant

Garlic and Basil Black-Bean Eggplant
by Kate
adapted from The Bitten Word

1 1/2 to 2 pounds eggplant, halved and then sliced into 1-inch pieces
2 Tablespoons peanut oil 
dash of salt and pepper
4 cubes Dorot Crushed Garlic (or 4 cloves garlic, minced)
4 cubes Dorot Crushed Ginger (or 4 teaspoons minced ginger)
2 Tablespoons black-bean sauce (available in the Asian section of many supermarkets)
2 teaspoons Sriracha (or other hot sauce of choice)
2 teaspoons oyster sauce
1/2 cup water
2 cubes Dorot Chopped Basil (or 2 teaspoons fresh minced basil)
4 green onions, sliced

Heat a wok or a large, heavy skillet over high heat. Once the pan is screaming hot, add the oil and reduce the heat to medium. Add the eggplant (add a dash of salt and pepper) and fry it until browned and soft - about 10 minutes.

Move the eggplant to the edges of the pan, leaving the middle clear. In the center, throw in the garlic, ginger, black-bean sauce, Sriracha, oyster sauce and water. Once heated, stir to evenly distribute the ingredients. Cook for 2-3 minutes, until fragrant.

Turn the heat back to high, and add the water and basil cubes. Cook until the water is mostly evaporated, about 3-5 minutes longer.

Sprinkle with green onions and serve.

Thursday, January 2, 2014

Spicy Tofu with Beef and Szechuan Peppercorns

Magic beans. I think that's what I thought of Szechuan (also spelled Sichuan) peppercorns. They were mythical spices from faraway lands that only food magazines and fancy food bloggers somehow managed to acquire. I pictured having to secret some of them through customs. Which of course, first requires a trip to China, which I have been lucky enough to visit, but am still paying my bank account back a year and a half later. So yes, magic beans, something in my fantasies but out of my depth.


Green-Chile Bacon Burger

Usually a green-chile burger relies on external ingredients to impart the chile flavor. It's smothered in green-chile sauce or features strips of the roasted chiles as a topping. These are both tasty options. However, I think the best burgers are those in which the patty itself is the wow factor.


Thursday, November 21, 2013

Tomtastic Spatchcocked Turkey

How to cook a turkey is a serious matter, usually one of family tradition. Most people have chosen a camp in the stuffed-versus-unstuffed or breast-up-versus-breast-down war. They have schedules of how early to get up to put the turkey in or how often to baste. There are cherished recipes for herb butters and gravies and you do...not...deviate from the cherished recipe.

Tuesday, September 10, 2013

Roasted-Chile Peppercorn Steak Sauce

I wanted to take the Cajun inspiration of Kary's "Original" Roux and bring it into my wheelhouse. Out in Colorado and the American Southwest, it's all about the spice -- both kinds, meaning spiced and spicy. This sauce covers both bases with peppercorns and roasted chiles. For a smoother sauce, puree all the ingredients before adding the peppercorns. One batch will make enough sauce for several meals, so feel free to halve the recipe or plan on freezing half for another day.

Spaghetti with Garlic-Herb Gravy, Lemon-Marinated Chicken and Tomatoes

Like many American kids, I grew up thinking that spaghetti meant long, thin noodles covered with a tomato-based sauce, usually spooned out of a jar. That brand of pasta is still served around my house, usually when the cupboard is getting bare and I'm putting off grocery shopping, so I'm not knocking that suburban classic.