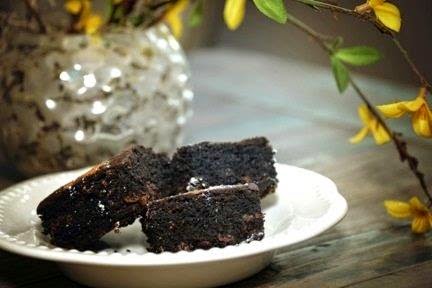
Saigon Cinnamon Ancho Chile Brownies
by Debbie
Adapted from the Whole Foods Market Cinnamon Chile Chocolate Brownies
1 cup salted butter
5 ounces dark cocoa powder (I used a Black Onyx Cocoa Powder from Savory Spice Shop)
1 teaspoon baking powder
2 teaspoons ancho chile powder* (I used Ground Ancho Chiles from Savory Spice Shop)
2 teaspoons ground cinnamon, plus more for dusting (I used Ground Saigon Cassia Cinnamon from Savory Spice Shop)
2 teaspoons ancho chile powder* (I used Ground Ancho Chiles from Savory Spice Shop)
2 teaspoons ground cinnamon, plus more for dusting (I used Ground Saigon Cassia Cinnamon from Savory Spice Shop)
1/2 teaspoon sea salt
1 cup chocolate chips
5 large eggs
2 teaspoons pure vanilla
Powdered sugar for dusting on tops of brownie
Preheat oven to 350°F. Grease a 13” x 9” glass pan.
Place butter, cocoa powder and sugar in a medium sauce pan. Cook over medium heat and stir continuously until butter is melted and cocoa and sugar are well-blended.
Remove from heat and let cool for approximately 5 minutes.
In a large mixing bowl, mix together the flour, baking powder, chile powder, cinnamon and salt. Mix well.
Add the chocolate mixture to the dry ingredients and mix well. Incorporate the chocolate chips into the mixture.
Add the eggs and vanilla. Mix well. (I actually use a hand mixer on this.)
Pour into the 13” x 9” baking pan and spread evenly.
Bake for 35 minutes. Remove from oven and cool for 30 minutes. Cut into squares and sprinkle powdered sugar and cinnamon on tops of brownies.
*I learned that chile powder is pure, ground chiles. Chili powder has other spices mixed in. Make sure you use the chile powder for this recipe.