Showing posts with label Susan W. Show all posts

Tuesday, November 1, 2016

Danish Meatballs


When I was little, my mom had a set of 18 McCall's cookbooks. I adored thumbing through each and every one. I loved the pictures, especially in the cookie, cake and dessert books. That same set of books is mine now. They're like old friends. They're tattered and worn, but I still love thumbing through them.

When I was in junior high school, my mom went back to work. I suddenly found myself in charge of making dinner one or two nights a week, but I had very little cooking experience. One of my first cooking attempts was Danish Meatballs from volume 6 of that old McCall's set...the "Book of Marvelous Meats". It seemed like an easy enough recipe at the time, but I quickly found out that my lack of cooking expertise was a bit of a problem. Browning meatballs in a skillet turned out to be much harder than I anticipated. The meatballs fell apart, so I scrambled the hamburger mixture together instead. The gravy ended up as a lumpy, doughy, salty mess. And I served this disastrous meal to my poor parents. My dad, I'm sure not wanting to hurt my feelings, managed to eat this awful concoction, but my mom just couldn't do it, and who could blame her? I remember how upset I was that I had made such a terrible meal, but now it's a story that makes my mom and I laugh when it comes up.

Fast forward to present day. I'm happy to report that I am a much better cook than back then (fortunately for my husband). I still can't fry a meatball in a skillet worth a darn (hey, we all have our issues), but baking meatballs works out just fine and dandy.

When our Retro Recipe Redo challenge came up, I decided it was time to redeem myself. So I made that old Danish Meatball recipe and it turned out great. This is what I would call a "comfort food" recipe, especially when served along with some good ol' mashed potatoes and a veggie.

Danish Meatballs
by Susan W.
Adapted from McCall's Book of Marvelous Meats (1965)
Makes approximately 18 meatballs

For the meatballs:
2 pounds ground chuck
1/3 cup finely chopped Italian parsley
1 cup finely chopped onion
1 1/2 teaspoons kosher salt
3/4 teaspoon ground black pepper
1/2 teaspoon mace (nutmeg is a good substitute)
3/4 cup all-purpose flour, divided
3/4 cup milk
1 egg
2 Tablespoons butter

For the sauce:
2 teaspoons beef flavored Better Than Bouillon (equal to 2 cubes regular bouillon)
2 Tablespoons drippings from meatballs
2 Tablespoons all-purpose flour
2 cups boiling water
Salt and pepper to taste

2 Tablespoons finely chopped Italian parsley for garnish.

For the meatballs:
In a large bowl, combine together the ground chuck, Italian parsley, chopped onion, salt, pepper, mace (or nutmeg) and 1/4 cup of the flour. Add the milk and egg and mix well. Refrigerate for one hour.

One the mixture has chilled, preheat your oven to 375°F. Form the meat mixture into 18 equal sized meatballs. Roll each meatball in the remaining 1/2 cup of flour and set aside on a plate.

On a large baking sheet lined with foil, place the 2 Tablespoons of butter and put into the preheated oven to melt. Once the butter has melted, remove the baking sheet from the oven. Distribute melted butter evenly and place the meatballs on the baking sheet, spacing them evenly. Bake meatballs for 35 minutes, or until done, turning once halfway through. When they are done, remove to a heat-proof dish and keep warm.

For the sauce:
In a bowl, stir together the Better Than Bouillon, 2 Tablespoons of the meatball drippings, and the flour. Gradually whisk in 2 cups of boiling water. Pour into a saucepan and heat until smooth and thickened. Add salt and pepper to taste. The Better Than Bouillon (or regular bouillon also, for that matter) already tends to be a bit salty, so be careful how much extra salt you add.

Spoon some of the sauce over the meatballs, sprinkle on some parsley for garnish and have the remaining sauce on the table for spooning over the meatballs or even over mashed potatoes!


Monday, October 3, 2016

Peach Blackberry Crisp


This dessert is super easy and quick to prepare. I can think of all sorts of wonderful fruit combinations for this crisp, but I decided to use fresh peaches and blackberries from our local farmer's market. The Cake Spice from The Spice House adds just a little something extra special that you won't get from just plain cinnamon. It's a wonderful combination of Chinese cassia cinnamon, star-anise, nutmeg, allspice, ginger and cloves. The La Baleine French Sea Salt (fine) is perfect for all your baking needs. And the Vanilla Sugar from the Spice House is incredible in all sorts of things. Be sure to visit The Spice House website! They have wonderful customer service and so many different spices to choose from!

Peach Blackberry Crisp
by Susan Whempner

7 Tablespoons cold, unsalted butter, divided
1/4 cup all-purpose flour
1/2 cup rolled oats
1/2 cup packed brown sugar
1/2 teaspoon The Spice House Cake Spice
1/4 teaspoon La Baleine French Sea Salt (fine)
4 cups fresh peaches, peeled, pits removed, cut into 1-inch cubes (about 4 large peaches)
1/2 cup The Spice House Vanilla Sugar
1 heaping cup fresh blackberries, rinsed and dried
Vanilla ice cream

Preheat oven to 375°F. Grease an 8 x 8-inch baking dish with 1 Tablespoon of the butter. Set aside.

In food processor, add flour, rolled oats, brown sugar, cake spice and salt. Pulse 2 to 3 times to mix. Cut remaining butter (6 Tablespoons) into 1/2-inch cubes and add to flour/oat mixture. Pulse until mixture comes together in small crumbles. Set aside.

In a large bowl, combine peaches and vanilla sugar. Pour into prepared baking dish. Scatter blackberries over top and sprinkle on the crumbly oat mixture.

Bake for 45 minutes, or until bubbly. Serve hot or at room temperature and don't forget the ice cream!

Thursday, September 15, 2016

Hickory Smoke Salt and Browned Butter Chocolate Chunk Cookies


Chocolate chip cookies! When The Spice House Baking Challenge was announced, I knew I wanted to bake some, but I also knew I wanted to do something a little different. I started poking around online and I ran across a recipe that called for smoked salt and dark chocolate in chocolate chip cookies. Smoked salt AND dark chocolate together?? Hello!!! I was instantly intrigued! My husband was skeptical, but I had an inkling these cookies were going to be something really special. And they were! Who would have thought that smoked salt would ever go in a cookie? But it did, and these were insanely good!

The Spice House's Hickory Smoke Salt was the perfect addition to these cookies. The aroma of smoke when you open the jar is heavenly. I can't wait to try it in other recipes. I have been a huge fan of The Spice House's Vanilla Sugar ever since our first Spice House sponsored challenge. I use it in whipped cream, I've sprinkled it on oatmeal, on top of biscuits before baking, incorporated it into an apple cake and I've even used it in my coffee. I just knew it would be perfect in these cookies. I hope you love them as much as we did!

Hickory Smoke Salt and Browned Butter Chocolate Chunk Cookies
by Susan W.
Adapted from The Baking Fairy’s Smoked Salt Browned Butter Chocolate Chip Cookies
Makes approximately 32 cookies

2 1/4 cups all-purpose flour
1/2 teaspoon baking soda
1/2 teaspoon The Spice House Hickory Smoke Salt, plus more for sprinkling on top of cookies
3/4 cup unsalted browned butter, room temperature (see “Tips” below)
1/2 cup The Spice House Vanilla Sugar
1 cup packed brown sugar
1 egg plus 1 egg yolk, room temperature
2 cups (approximately 10 ounces) dark chocolate, chopped (I used a half and half mix of 78% and 85% dark)

In a medium bowl, combine the flour, baking soda and smoked salt and whisk together. Set aside.

Using the paddle attachment that goes with your stand mixer, combine the browned butter, vanilla sugar and brown sugar. Beat until combined well.

Add the egg and egg yolk and beat well, until it's light and fluffy. Add in the dry ingredients, in thirds, and mix until combined. Fold in the chopped chocolate with a spatula.

Preheat oven to 325°F. Using a cookie scoop (or a regular teaspoon), drop uniform balls of dough onto a cookie sheet that has been lined with parchment paper or a silicone sheet. Sprinkle a little more smoked salt on top (or a little more than a little more, like I did).

Bake until golden, about 10-13 minutes (depending on your oven). Let cool for a minute or two on the cookie sheet, then move to a wire rack to finish cooling completely.

Now go pour yourself a big glass of ice cold milk and grab a few of these delicious cookies.

Tips:
For a great how-to on browning butter, check out these directions on the Serious Eats website. And when the directions say watch closely after the butter starts to foam, they’re not kidding!

For 3/4 cup of browned butter, you will need two sticks.


Tuesday, July 12, 2016

Southwestern Grilled Chicken Salad


My husband and I love salads, especially during the hot summer months. The beauty of this salad is that you can prepare most of the ingredients earlier in the day (while it's still cool), and then simply assemble right before serving.

We enjoy Mexican, Tex-Mex and Southwestern style dishes. One of my favorite seasonings is a chile lime seasoning that I came across a few years ago. And now I have a new favorite seasoning in my spice cabinet from our newest sponsor, Chicken Salt. Their new Lime Chicken Salt was fantastic on the grilled chicken and sprinkled on the sauteed corn. Give it, and their other delicious flavors of Chicken Salt, a try!

Southwestern Grilled Chicken Salad
by Susan W.
Makes 4 entree-sized salads

1 large boneless, skinless chicken breast
Lime Chicken Salt
2-3 hearts of romaine lettuce
1 package grape tomatoes
1 can black beans, rinsed
1 Tablespoon butter
1 cup frozen corn, thawed (or the kernels cut off a fresh ear of corn if it's in season)
2 avocados, diced right before serving
1 lime
1 cup shredded Monterey Jack cheese
Crushed tortilla chips
Your favorite Southwestern style salad dressing (our favorite is Cardini’s Red Jalapeno Caesar)

Fire up your indoor or outdoor grill. Sprinkle Lime Chicken Salt all over both sides of chicken breast. Grill the breast until done. Remove to a plate, cover with foil and let rest for 10 minutes. Slice thinly, sprinkle on a little more of the Lime Chicken Salt to taste, if desired, and refrigerate.

Chop the romaine lettuce and rinse and dry using a salad spinner. Slice in half cross-wise as many grape tomatoes as you desire to add to your salads. Rinse and drain black beans. Refrigerate all until you're ready to assemble the salads. Now it's time to saute your corn...

Melt butter in a skillet over medium-high heat and add corn. Sprinkle in some of the Lime Chicken Salt and saute until the corn starts to turn golden. Remove to a bowl, let cool and refrigerate until it's salad time.

Just before you’re ready to assemble the salads, dice the avocados, squeeze on some lime juice and toss around.

Now you're finally ready for dinner! Divide the romaine between 4 plates. Top romaine with corn, tomatoes, black beans and avocado. Drizzle the desired amount of dressing on top, add the crushed tortilla chips, shredded cheese and chicken. Pour a nice glass of chilled white wine and you're all set!

Thursday, April 14, 2016

Three Chip Chocolate Cheerio Treats


Wow, what an honor it is for 37 Cooks to have such a huge sponsor, General Mills! They are so well known for their iconic cereals, such as Cheerios, Wheaties, Chex and Total, as well as many others. They have now updated several of their cereals to include no artificial flavors or colors from artificial sources. Nowadays, people have become much more health conscious than ever, so this is great news!

When this latest challenge was announced, I wished, hoped and prayed for Chocolate Cheerios. I knew exactly what recipe I would make (I had made these before and my family loved them). And one day, there they were...Chocolate Cheerios delivered to my doorstep in all their chocolatly goodness!

The chocolate lovers in your life will love these! My husband calls them "the perfect kiddo treat" but grown ups will enjoy them, too. Three different kinds of chocolate chips, chocolate hazelnut spread, marshmallows and, of course, Chocolate Cheerios! What could be better? 

Three Chip Chocolate Cheerio Treats

by Susan W.
Adapted from Quick'n Easy Recipes Peanut Butter Cheerios Treats

6 cups General Mills Chocolate Cheerios
2 Tablespoons butter, plus more for buttering parchment
1/3 cup chocolate hazelnut spread
1/2 teaspoon vanilla extract
10-ounce package mini marshmallows
1/3 cup each white, dark and semi-sweet chocolate chips
Cooking spray

Spray a 9" x 13" dish with cooking spray. Line with parchment paper and butter the parchment. Set aside.

Spray a non-stick pot with cooking spray (also spray your spatula or spoon...trust me on this). Over medium-high, heat melt the butter and chocolate hazelnut spread. When melted, add vanilla and then add the marshmallows. Keep cooking and stirring until marshmallows are melted and mixture is smooth.

Turn the heat off and stir in Chocolate Cheerios, being careful not to crush them (make sure all of the cereal is coated…this will be really sticky and gooey).

Press cereal mixture into the prepared dish. While it’s still warm, sprinkle the chocolate chips on top and press in lightly. It’s a good idea to spray all of your cooking tools and even your hands a little while doing this part (did I mention it's sticky and gooey?)

Let cool, remove from pan and cut into squares.


Tuesday, February 2, 2016

Glazed Hibiscus Lime Mini Muffins


Pretty, springy and light, these little muffins would be a lovely addition to a special breakfast or brunch (think Valentine's Day, Easter or Mother's Day). They would also be wonderful for a springtime bridal or baby shower. The Wild Hibiscus Flowers in Syrup are sweet, delicious and definitely add a fun and different twist to any dish!

Glazed Hibiscus Lime Mini Muffins
by Susan Whempner
Makes approximately 60 mini muffins

For Mini Muffins:
3 Tablespoons syrup from jar of Wild Hibiscus Flowers in Syrup
1 Tablespoon fresh lime juice
2 1/2 cups all-purpose flour
1 1/2 teaspoons baking powder
1/2 teaspoon baking soda
3/4 teaspoon salt
6 Tablespoons softened butter (unsalted)
1/4 cup vegetable oil
1 cup sugar
3 large eggs, room temperature
3/4 cup whole milk, room temperature
2 teaspoons vanilla
6 Wild Hibiscus flowers from jar of Wild Hibiscus Flowers in Syrup

Preheat oven to 350°F. Spray mini muffin pan with baking spray and set aside.

Whisk together hibiscus syrup and lime juice in small bowl and set aside.

In medium bowl, whisk together flour, baking powder, baking soda and salt and set aside.

In the bowl of a stand mixer with the paddle attachment, beat butter on medium speed until creamy. Add oil and sugar and continue to beat on medium until light and fluffy. Add eggs, one at a time, and continue to beat until completely incorporated.

Decrease mixer speed to low and add flour mixture in thirds, alternately with milk. Scrape sides and bottom of bowl with rubber spatula as needed. Increase speed to medium and beat mixture just until combined. Add vanilla, chopped hibiscus flowers and hibiscus syrup/lime juice mixture. Beat once more on low until just combined.

Pour batter into prepared mini muffin pan. Bake for 12-15 minutes, rotating pan once halfway through, until cake tester inserted in center of a mini muffin comes out clean. Remove from oven and cool in pan for 5 minutes. Transfer muffins from pan to a cooling rack and cool completely. Drizzle with Hibiscus Lime Glaze (recipe follows).

Hibiscus Lime Glaze:
3 1/4 cups powdered sugar
6 Tablespoons fresh lime juice (about 4-5 limes)
2 Tablespoons Wild Hibiscus syrup

Sift powdered sugar into a medium bowl. Add lime juice and whisk until smooth. Stir in lime zest. Use glaze immediately.

For Garnish:
Freshly grated lime zest from about 3 limes
5 Wild Hibiscus flowers, finely minced (press between layers of paper towels first to remove excess syrup before mincing)

Top each glazed mini muffin with a sprinkling of lime zest and a pinch of minced hibiscus flowers.


Monday, October 26, 2015

Praline Pecan Bundt Cake with Chocolate Rum Sauce


Praline Pecans. Sound like something you could eat by the handful? The Praline Pecans from the nice folks at Truly Good Foods are just that...something I could eat by the handful. They are SO good! But, "eat Praline Pecans by the handful" doesn't make for a very good recipe. While happily munching away on them and trying to restrain myself from eating every last one and not leaving any for a recipe, I had a brainstorm. They would be perfect to use in a cake. With chocolate sauce. With more Praline Pecans sprinkled on top. Oh, my! So, here's my creation. My husband loved it, my son and daughter-in-law loved it and I loved it. I hope you love it, too!

Praline Pecan Bundt Cake with Chocolate Rum Sauce
by Susan W.
Adapted from Carlsbad Cravings Toffee Pecan Caramel Pound Cake

3 cups all-purpose flour
1 teaspoon baking powder
1/2 teaspoon salt
1 1/2 cups unsalted butter, softened
2 cups light brown sugar, packed
1 cup granulated sugar
2 teaspoons vanilla
5 large eggs, room temperature
1 cup milk
2 cups toasted and chopped Truly Good Foods Praline Pecans, divided
Non-stick cooking spray
Chocolate glaze (recipe below)

Preheat oven to 325°F. On a parchment-lined baking sheet, toast 2 cups of Truly Good Foods Praline Pecans for just 5 minutes, stirring once halfway through. Remove from oven and set aside to cool. Spray bundt pan with non-stick cooking spray and then generously flour the inside. Set aside.

In a medium bowl, whisk together the flour, baking powder and salt. Set aside.

In a stand mixer or in a large mixing bowl, beat the butter and sugars until light and fluffy. Add vanilla and start adding eggs, one at a time, beating just until each egg is incorporated.

Gradually add the flour mixture to the butter/sugar mixture alternately with milk, beating until each addition is just combined. Fold in 1 1/2 cups chopped praline pecans then spoon batter into prepared bundt pan.

Bake until a cake tester or toothpick inserted near the center of cake comes out clean, about 60 to 75 minutes. If cake is browning too much on top, but isn’t quite done yet, cover top with foil.

Let cake cool in the pan for 10 minutes. Remove from pan and let cool completely on a wire rack. Make your Chocolate Rum Sauce.

Chocolate Rum Sauce
by Susan W.
Adapted from allrecipes.com Easy Homemade Chocolate Sauce

6 Tablespoons sugar
2 1/4 teaspoons all-purpose flour
1/4 cup unsweetened cocoa powder
1/2 cup plus 2 Tablespoons half and half, plus a little more for thinning (if needed)
1 Tablespoon butter
1 teaspoon vanilla extract
1 1/2 teaspoons rum
Tiny pinch of salt

In a small bowl, whisk together sugar, flour and cocoa powder, making sure to get rid of any lumps.

In a saucepan heat half and half, butter and vanilla over medium heat until butter is completely melted. Stir in rum.

Whisk sugar mixture into the half and half mixture, a little bit at a time. Increase heat to medium-high until mixture comes to a simmer. Stirring constantly, cook for 5 minutes. If needed, you can whisk in a little more half and half if the sauce is a little too thick (I added 1 teaspoon at a time. It took 2 extra teaspoons to reach the consistency I was happy with.) After sauce has cooked for 5 minutes, turn off heat and whisk in a pinch of salt.

Drizzle warm Chocolate Rum Sauce over top of bundt cake and sprinkle with extra chopped Praline Pecans. Serve and enjoy!


Thursday, October 1, 2015

Buffalo Wings with Honey Garlic Glaze


Fall...it's my favorite season. Cooler weather, changing leaves and football games. And what's Sunday football without yummy snacks? When I tasted the Buffalo Nuts from Truly Good Foods, right away I thought of Buffalo wings. Wings are a perfect snack while watching the big game. This version is a little different from what someone might normally expect from a Buffalo wing. These wings actually get their spice from the Buffalo nuts, plus they're baked and not fried. The combination of spicy from the nut coating and sweet from the honey glaze go really great together. This recipe could easily be doubled if you have a bigger crowd.

Buffalo Wings with Honey Garlic Glaze
by Susan W.

Wings:
1 1/4 cups Truly Good Foods Buffalo Nuts
2 Tablespoons all-purpose flour
2 pounds chicken wings
4 Tablespoons butter

Preheat oven to 400°F.

Place Buffalo Nuts in food processor and process until finely ground. Add 2 Tablespoons of flour and pulse a couple more times. Pour the ground nuts into a shallow dish.

Rinse and dry wings thoroughly. Melt butter in a shallow microwave-safe dish (I used a glass pie plate). Toss wings around in melted butter, coating thoroughly.

Roll butter-coated wings in the ground nuts, coating thoroughly (I had just enough ground nuts for my wings). Place a flat baking rack on a foil-lined baking sheet and spray well with non-stick cooking spray. Carefully place wings on rack (don't let them touch one another). Bake wings for 35 minutes (after this point, you'll start glazing). While they're cooking during the 35 minutes, make your glaze.

Honey Garlic Glaze
by Susan W.

2 Tablespoons butter
2 cloves garlic, minced fine
1 1/4 cups honey
3 teaspoons soy sauce

Melt butter over medium heat. When sizzling a little, add minced garlic and cook for about 20 to 30 seconds (don't let the garlic brown). Remove from heat and quickly whisk in honey and soy sauce. Warm for 2 minutes over simmer. Remove from heat to cool while the wings finish baking

After the wings are done at the 35 minute mark, drizzle a quarter of the glaze over the wings and return to the oven for 5 minutes. Repeat one more time with another quarter of the glaze. The wings will have baked for a total of 45 minutes.

Pull the wings out of the oven and carefully move to a serving plate. At this point, you can either serve the remaining glaze on the side for dipping, or you can use my preferred way to eat them...just pour glaze all over the wings, get a few extra napkins and get your fingers messy! Enjoy!

Wednesday, August 5, 2015

Cluck 'n Moo Grilled Meatloaf


I have a confession. I originally intended for this to be a grilling recipe, but the day I had set aside to make my recipe, it rained. A lot. A rare rainy day in May in California. Well alrighty then, change of plans. I baked my loaves in the oven instead. And they were delicious. That being said, let me tell you this…if you've never had a meatloaf grilled outside you MUST try it (I've included grilling instructions below.) The loaves get a wonderful crust all around the outside and during the hot summer months you can still have meatloaf without turning on the oven and heating up the inside of your nice, cool house. Add some baked potatoes that you've cooked on the grill and some lovely sliced cold tomatoes and there’s nothing better!

The ground chicken and beef blend from Cluck 'n Moo is lower in fat than just plain ground beef, so its healthier. It's hormone and antibiotic free and from humanely raised chickens and grass-fed cows (aka clucks and moos.) Keep in mind, part of the Cluck 'n Moo blend is poultry, so it's very important to cook it to a safe temperature (165°F.) It made quite a tasty meatloaf! Enjoy!

Cluck 'n Moo Grilled Meatloaf
by Susan W
Adapted from Barbecued Meat Loaf in Weber's Way to Grill by Jamie Purviance

2 Tablespoons extra virgin olive oil        
1/2 cup shallot, finely chopped
1 cup sweet onion, chopped
3/4 cup green bell pepper, chopped
1 teaspoon garlic, minced
2 pounds Cluck 'n Moo Ground chicken and beef blend
2 eggs, beaten
2 cups panko bread crumbs
1 teaspoon Worcestershire sauce
8-ounce can tomato sauce
1 teaspoon fresh parsley, minced
2 teaspoons kosher salt
1 teaspoon black pepper
3/4 cup of your favorite BBQ sauce, plus more for serving (my favorite is a homemade spicy sauce, but any sauce will work!)

Warm olive oil in a skillet over medium heat. Sauté shallot, onion, bell pepper and garlic for 8 minutes. Transfer to a plate and set aside to cool.

Place the 2 pounds of Cluck 'n Moo in a large bowl. Add beaten egg, panko crumbs, Worcestershire sauce, tomato sauce, parsley, salt and pepper and gently mix together. Add cooled sautéed veggies and mix all together.

Divide mixture in half and form 2 loaves. They will cook much better and faster as two 1-pound loaves than if you made one big 2-pound loaf.

This is how I prepare my pan for
baking meatloaf
To bake in the oven: Preheat oven to 350°F. Get a baking pan and a rack and cover both in foil for easy clean-up. Poke several holes in the foil covering the rack, so any juices will run through. It’s a personal thing, but I’ve never been a fan of meatloaf that cooks in a loaf pan full of drippings, so I started doing it this way and it’s been great. This method allows for more of a crusty surface all around and not just on top. Place your two loaves on the rack and brush all over with your favorite BBQ sauce. Basting with BBQ sauce every 20 minutes, bake loaves until internal temperature reaches 165°F (mine took 1 hour, 40 minutes.) Remove from oven, cover with foil and let rest for 10 minutes. Slice and serve with more BBQ sauce on the side.

Grilling instructions (Definitely try this! You won’t be sorry!): Make your two loaves as directed
Two happy little loaves
above and place on a baking sheet or large plate to carry out to grill. With a large spatula, gently place loaves directly on rack in a heated grill (yep, no pan…directly on the rack.) Following the basting instructions above, grill loaves over indirect medium-low heat with lid closed (unless you are basting) until internal temperature reaches 165°F (time will depend on your grill.) You won't even need to turn them! Remove loaves from grill onto a baking sheet and cover with foil and let rest for 10 minutes. Slice and serve with more BBQ sauce on the side.


Wednesday, March 4, 2015

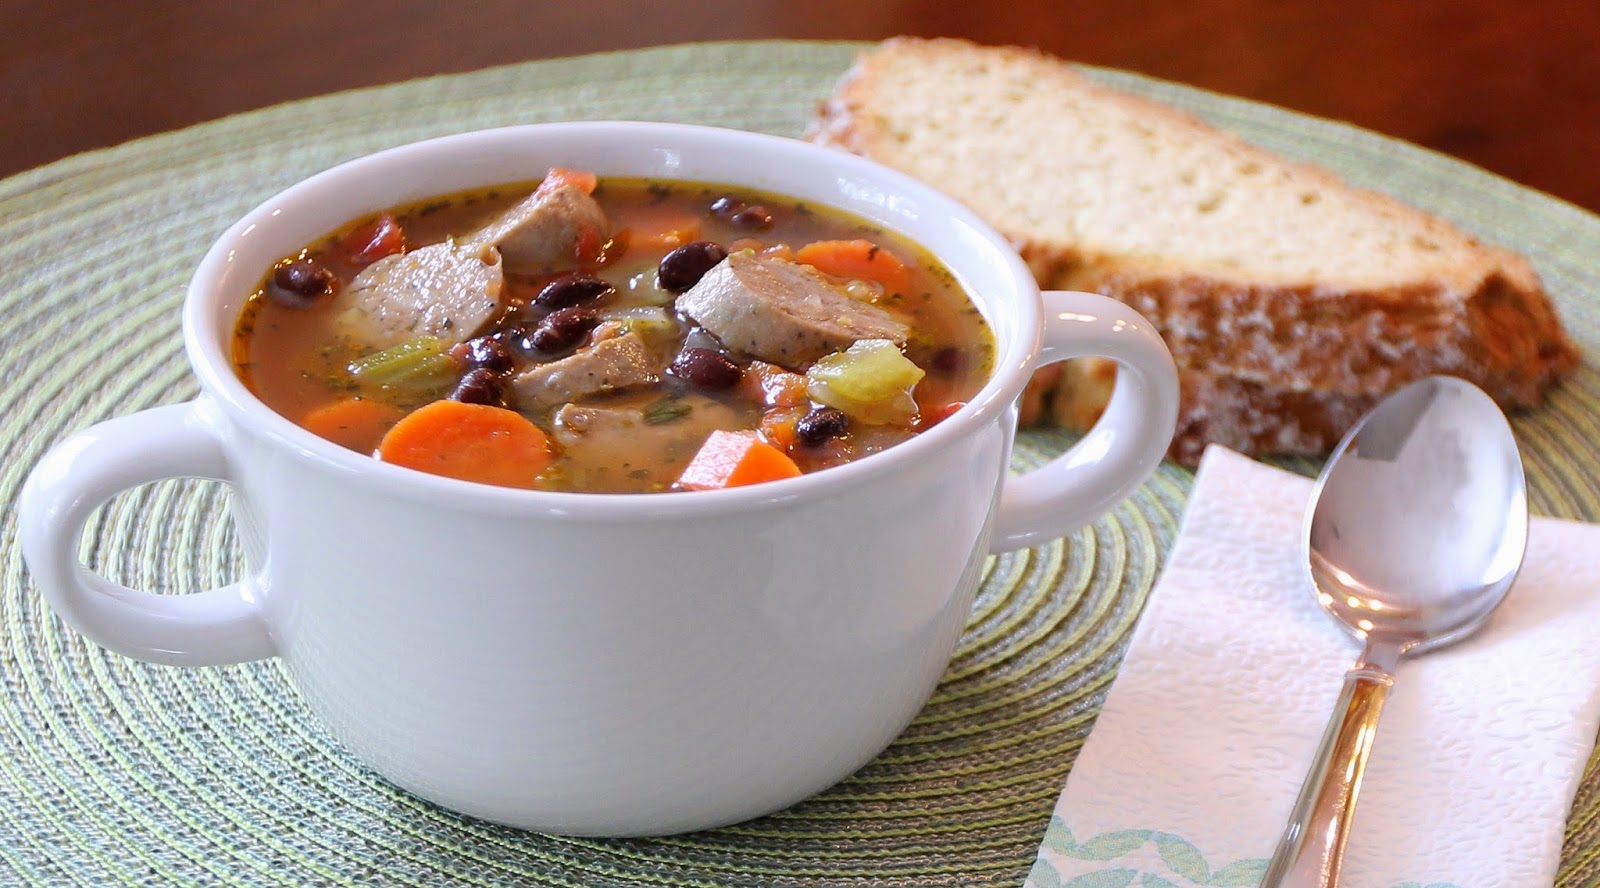
Kale Balsamic Chicken Sausage and Black Bean Soup

One of the things I love most about being a part of 37 Cooks (besides the great friends I've made) is the opportunity to cook with some wonderful products, and this challenge did not disappoint! When the generous folks at Bilinski's sent each of us a package of their Kale Balsamic Chicken Sausage, I knew immediately that I wanted to incorporate it into a warm, cozy and healthy soup. I don't normally cook with a lot of sausage because it can be so rich and heavy. I can say without hesitation that I really loved Bilinski's sausage. It was mild, yet so full of great flavor. It's organic, low in fat, light and healthy. It was a perfect addition to this soup! Be sure to check out Bilinski's website...you won't believe all of the delicious sounding products they offer!

Kale Balsamic Chicken Sausage and Black Bean Soup
by Susan

1 1/2 Tablespoons olive oil
1 medium onion, chopped
1 cup celery, diced (about 3-4 stalks)
1 1/2 cups carrots, sliced (about 3-4)
1/2 cup red bell pepper, diced
3 cloves garlic, minced fine
4 cups chicken stock
1 can petite diced tomatoes with juice
2 cans black beans, drained and rinsed well
1 teaspoon dried basil
1 teaspoon dried oregano
1 1/2 teaspoons Italian parsley, minced
1/2 teaspoon kosher salt
1/4 teaspoon fresh ground black pepper
1/2 teaspoon sugar
1 bay leaf
1 package Bilinski's Kale Balsamic Chicken Sausage

In a large pot or Dutch oven heat olive oil over medium-high heat. Add onion, celery and carrots. Saute about 7 minutes. Add red bell pepper and garlic to pot. Saute about 2 more minutes. Add stock, tomatoes, black beans and spices, stirring well. Bring to a slow boil. Cover, reduce heat and simmer until veggies are tender (about 45 minutes.) Taste and adjust seasonings if needed.

Slice chicken sausage into 1/4-inch slices and add to soup. Keeping soup on simmer, heat through (about 15 minutes.) Since the sausage is already cooked right out of the package, it's very important not to add it to the soup until the end. You don't want it to over-cook.

Serve with a nice crusty bread and enjoy!

Tuesday, February 3, 2015

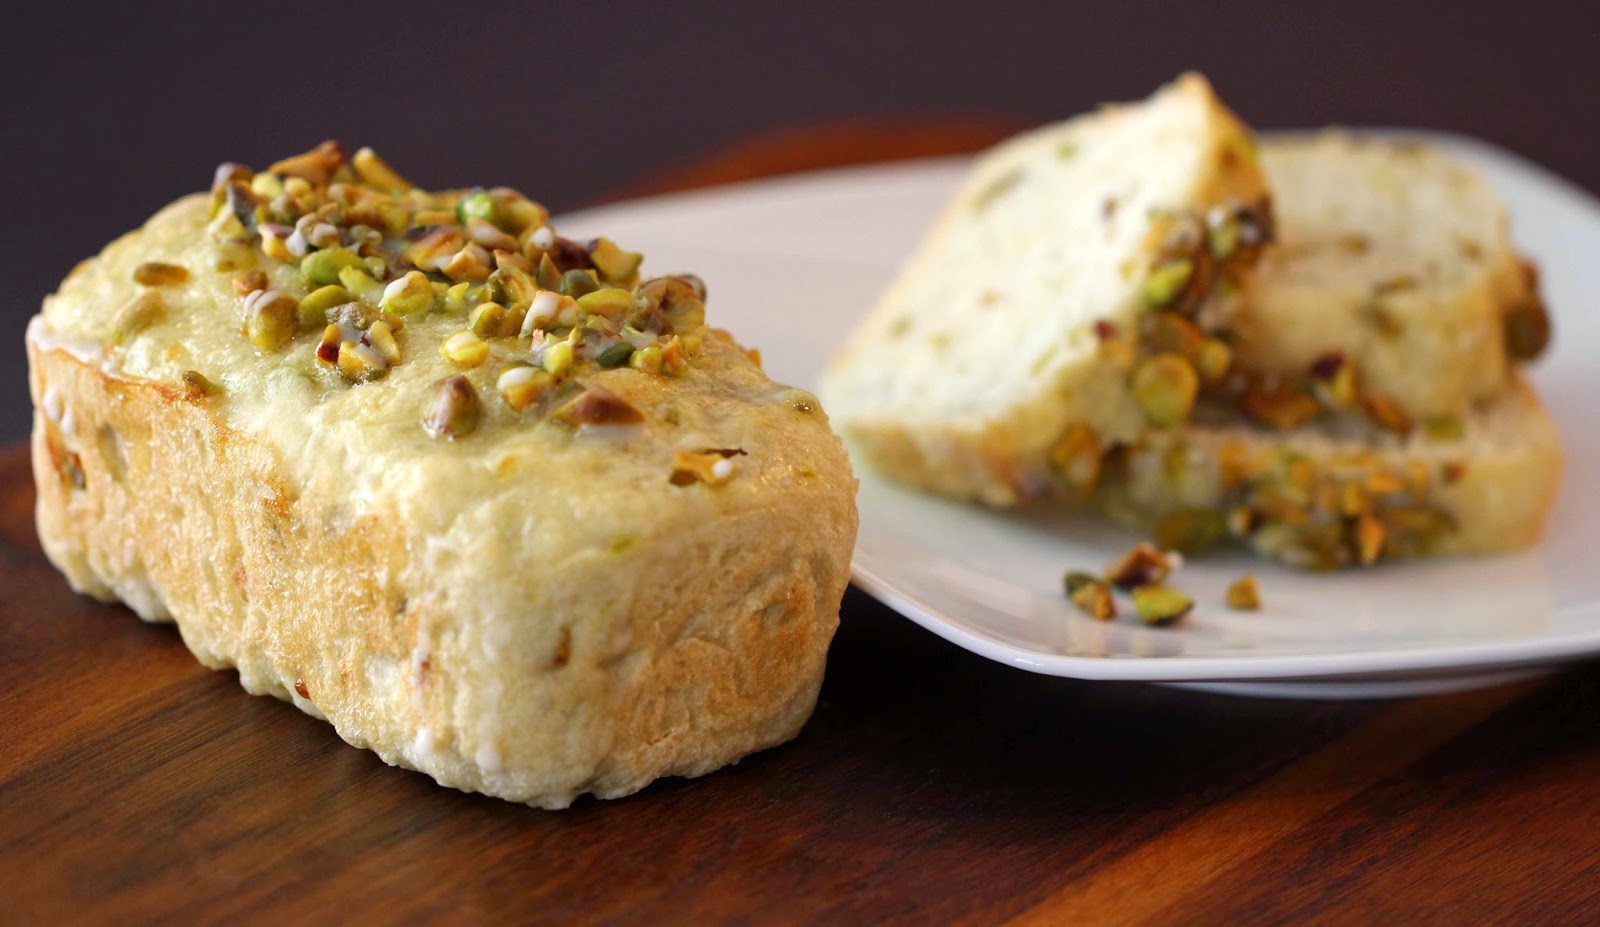
Lemon Glazed Mini Pistachio Loaves

We had a great surprise here at 37 Cooks! One of our own, Donna Currie, has a great new cookbook coming out soon, Make Ahead Bread: 100 Recipes for Melt-Your-Mouth Fresh Bread Every Day, and her publisher generously allowed us a sneak peak at ten of her wonderful bread recipes! She has an awesome, easy method for making bread...make up the dough one day and bake the next. I loved this! Our challenge was to put our own spin on these recipes. I chose Donna’s Mini Sunflower Seed Loaves. Right away pistachios popped into my head, so here is my twist…Lemon Glazed Mini Pistachio Loaves. Enjoy!

Lemon Glazed Mini Pistachio Loaves
by Susan W.
Adapted from Mini Sunflower Seed Loaves in Make Ahead Bread: 100 Recipes for Melt-Your-Mouth Fresh Bread Every Day by Donna Currie

1 1⁄4 cups water, room temperature
2 1⁄4 teaspoons active dry yeast
2 Tablespoons sugar
3 cups (14 1⁄4 ounces) all-purpose flour, plus more for kneading
1 teaspoon kosher salt
1 Tablespoon canola oil
3⁄4 cup chopped pistachios, divided
Nonstick baking spray
1 egg beaten
1 Tablespoon water
Lemon Glaze (recipe below)

The day before baking:

In a large bowl, combine water, yeast, sugar, flour, kosher salt, canola oil and 1/2 cup of the chopped pistachios (reserving the remaining 1/4 cup for baking day.) Turn out onto a lightly floured surface and knead by hand until the dough is elastic. Cover the bowl with plastic wrap and let the dough rise in a warm place until it has doubled in size, (about 1 hour.)

After the dough has risen, spray four mini loaf pans with nonstick baking spray and set aside. Turn the dough out onto a lightly floured surface and divide it into 4 equal pieces. Working with one piece at a time, pat each into about a 5-inch square. Roll each dough-square jellyroll style into a log. Pinch the seam and the ends closed. Place the dough loaves, seam side down, into each of the mini loaf pans. Cover the pans with plastic wrap and refrigerate overnight (and no more than 24 hours.)

The next day (baking day):

Preheat the oven to 350°F. Make the egg wash by whisking the egg with 1 Tablespoon of water.

Take each mini loaf pan out of the refrigerator and remove the plastic. Brush the tops with your egg wash and sprinkle the tops with the reserved 1⁄4 cup of chopped pistachios. Bake the mini loaves approximately 25 minutes, until they are golden (if you wish, you can also check the internal temperature, which is a cool new trick I learned from Donna’s book…it should reach 195°F.) Remove from oven and let loaves sit for about 5 minutes and then remove the loaves from the pans and cool completely on a cooling rack.

Once cooled, make your lemon glaze and drizzle over the tops. They are also delicious without the glaze!

Lemon Glaze
1/2 cup powdered sugar
1 Tablespoon plus 1/2 teaspoon fresh squeezed lemon juice
1/2 teaspoon half and half

Whisk ingredients together in a small bowl, making sure to whisk out any lumps. Drizzle over pistachio loaves.

Monday, December 22, 2014

Slow Cooker Albondigas


Years ago, a co-worker of mine shared her recipe for Albondigas with me. Over the years, I've tweaked the original recipe here and there and it's become a favorite of ours on chilly autumn and winter evenings. I've made it over and over and over, but never in a slow cooker. Well, when Hamilton Beach came along as one of our sponsors here at 37 Cooks, I immediately thought to myself, "why not try slow cooking my Albondigas?" The Hamilton Beach Set & Forget 6 Quart Programmable Slow Cooker is great! It's so big and I love that I can program it for a set time and it automatically switches to the "warm" setting when the time is up, keeping the soup nice and warm until we're ready to eat. This is a great feature, especially during the busy holiday season when we don't always have time to fuss with dinner late in the day. I'm happy to say that the soup turned out great (it's been husband and neighbor approved.) I will definitely be making my Albondigas in the slow cooker from now on!

Slow Cooker Albondigas
by Susan W.

For the meatballs:
1/4 cup long grain rice (not instant rice)
1/2 cup boiling water
1 1/2 pounds lean ground beef
1 egg
1/3 15-ounce can tomato sauce (reserve the rest for the soup)
1/2 onion, finely chopped
1 large clove garlic, minced
1 teaspoon cumin
1/2 teaspoon kosher salt
1/4 teaspoon freshly ground black pepper

For the soup:
2 quarts beef stock
2/3 15-ounce can tomato sauce
1 onion, chopped
4 carrots, peeled and sliced
2 stalks celery, sliced
2 potatoes, peeled and diced
2 Anaheim chiles, roasted*, peeled, seeds removed and chopped
1 teaspoon oregano
1 large clove garlic, minced
1 teaspoon cumin
1 1/2 teaspoons kosher salt
3/4 teaspoon freshly ground black pepper

For the meatballs, place 1/4 cup rice in 1/2 cup boiling water and set aside for a few minutes while you chop onions and mince the garlic. In a large mixing bowl, combine ground beef, egg, tomato sauce, onion, garlic, cumin, kosher salt and ground pepper. Drain rice really well and add to bowl. Gently mix ingredients together with your hands and then form into 1 1/2-inch meatballs, setting each meatball aside on a plate.

For the soup, first prepare your chiles (directions below.) Combine all of the soup ingredients in the slow cooker and stir well.

Gently place the meatballs into the soup (don't stir.) Set slow cooker to "low" setting and cook for 7 hours (the Hamilton Beach Set & Forget slow cooker will automatically switch to the warm setting when the time is up.) Serve with flour tortillas and butter or some crusty bread. Enjoy and have a great holiday season!

*To roast chiles: Rinse and pat chiles dry. May them on a baking sheet and place baking sheet under broiler. Watch the chiles very closely while broiling. When the skin turns black, turn and continue broiling until the skin on each chile is black on all sides. Remove to a glass bowl, cover with plastic wrap and allow to sit for about 15 minutes. Peel, remove seeds and chop.

Tuesday, December 16, 2014

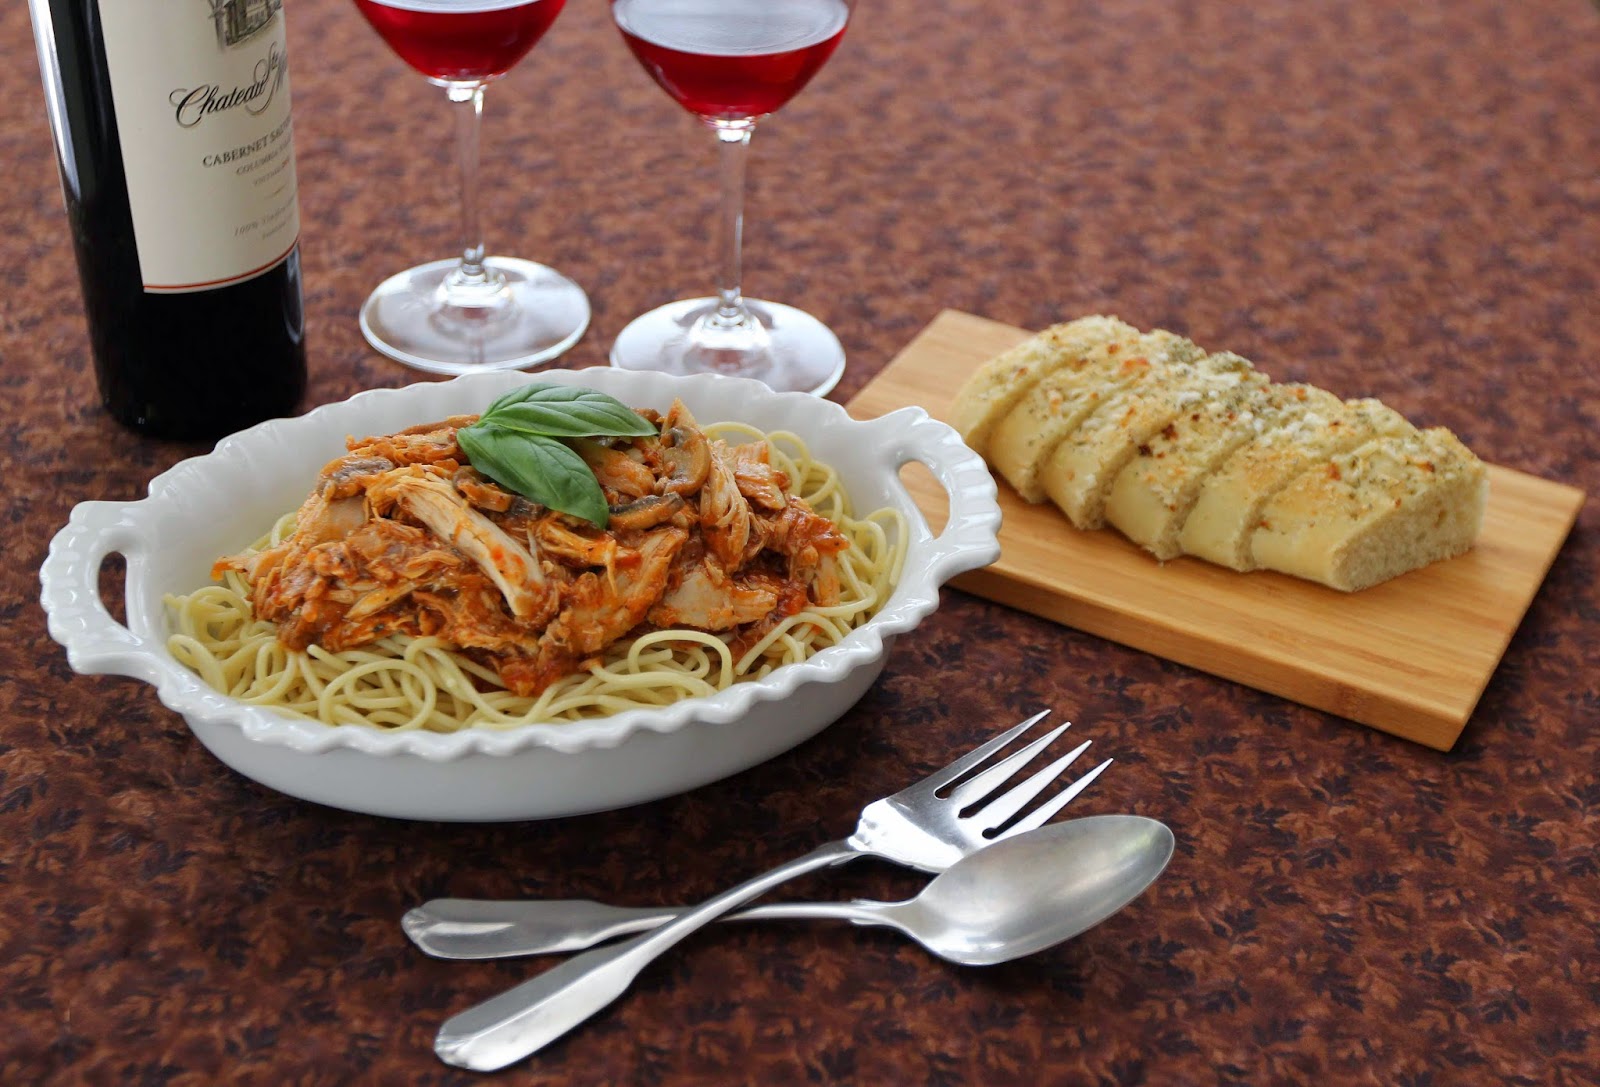
Slow Cooker Chicken Cacciatore


My husband and I love Italian food and chicken cacciatore is one of our favorites. The Hamilton Beach Set & Forget 6 Quart Programmable Slow Cooker is perfect for this dish. It's nice and roomy and when your set time is up, it will automatically switch to "warm", so there are no worries if you can't get to your dish right away. It comes with a handy temperature probe for cooking meats, so you don't have to worry about taking the lid off (which lets all the heat out) just to check your meat temperature. There are clips that lock the lid down, which is great when you have to transport your delicious dish to those holiday gatherings!

Slow Cooker Chicken Cacciatore
by Susan W.

4 chicken leg/thigh quarters
1 Tablespoon extra virgin olive oil (plus more if needed)
5 fresh tomatoes, peeled* and chopped
1 medium onion, coarsely chopped
3 large cloves garlic, minced
8 ounce can tomato paste
2 Tablespoons red wine
3 teaspoons Italian seasoning
1 teaspoon sugar
1 1/2 teaspoons kosher salt, plus more for seasoning chicken
3/4 teaspoons freshly ground black pepper, plus more for seasoning chicken
2 bay leafs
8 ounces mushrooms, sliced
Spaghetti

Rinse and pat dry the chicken leg/thigh quarters. Season lightly with kosher salt and pepper. Heat olive oil over medium-high heat. Brown chicken pieces in olive oil, two minutes on each side (my skillet fit just one at at time.) Transfer chicken to slow cooker and add a little more olive oil to the pan if necessary while continuing to brown all pieces.

In a large bowl, combine peeled, chopped tomatoes, chopped onions, minced garlic, tomato paste, red wine, Italian seasoning, sugar, 1 1/2 teaspoons kosher salt and 3/4 teaspoon freshly ground pepper. Stir well and pour over the chicken in the slow cooker, making sure to get the sauce in between the chicken pieces. Tuck bay leafs into the sauce.

Set slow cooker to "low" and set the timer for 6 hours. When the time is up, add sliced mushrooms, set the timer for another 1 1/2 hours and continue to cook, making sure the slow cooker is still set to the "low" setting. When the timer goes off the second time, the cooker will switch to "warm".

When done, remove chicken meat from the bones (it should be falling off the bone at this point.) Place meat back into the slow cooker, stir and keep cooker on the "warm" setting. Discard bones.

Cook spaghetti according to package directions. Serve chicken over hot spaghetti and don't forget a nice green salad and some great bread!

*To easily peel tomatoes: Make an "x" in the bottom of each tomato with a sharp knife (do not cut too deep, you only need a shallow cut.) Boil a pot of water and have a bowl of ice water standing by. When water is rapidly boiling, place one or two tomatoes at a time in the boiling water and leave in for just 15 seconds. Remove from boiling water and then immediately immerse tomatoes in ice water to stop the cooking process. Continue until all tomatoes are done. Remove from ice water and viola! Skin will peel right off!

Monday, October 13, 2014

Whole Wheat Apple Oat Muffins


I was so excited about our Bob's Red Mill Flour Challenge! I love to bake, so this challenge was right up my alley! I immediately knew that I wanted to use the whole wheat flour in an adapted version of an apple muffin recipe I've made many times, and I was really happy with the results.

I have other products from Bob's Red Mill (I use their flaxseed meal ALL the time), but I had never tried their flours. In this recipe, I used Bob's whole wheat flour and I loved it. I don't buy wheat flour very often, but right away I noticed that the Bob's Red Mill flour is of a much higher quality than what I usually buy at the market.

These muffins make a great breakfast treat, and they're also perfect for a quick afternoon snack. 

Whole Wheat Apple Oat Muffins
by Susan

Muffins:
1 1/4 cups Bob's Red Mill Organic Whole Wheat Flour
1 cup rolled oats
1/2 cup brown sugar, packed
1 teaspoon baking powder
1/2 teaspoon baking soda
1 teaspoon cinnamon
1/2 teaspoon salt
3/4 cup milk
2 eggs
3 Tablespoons canola oil
1/2 teaspoon vanilla
1 apple, peeled and finely diced
Oat topping (recipe below)

Preheat oven to 400°F. Spray a muffin tin with non-stick cooking spray, or line with muffin papers. Set aside.

In a large mixing bowl, combine whole wheat flour, rolled oats, brown sugar, baking powder, baking soda, cinnamon and salt. Set aside. In another mixing bowl, whisk together milk, eggs, canola oil and vanilla. Add in diced apple. Stir wet ingredients into dry ingredients and combine until just moistened. Divide batter among the muffin cups. Set aside and make the topping.

Topping:
1/2 cup rolled oats
2 Tablespoons brown sugar, packed
1/2 heaping teaspoon cinnamon
2 Tablespoons melted butter

Combine all topping ingredients and divide evenly between the tops of the unbaked muffins.

Bake muffins at 400°F for 20 minutes (start checking at 15 minutes), or until a toothpick or cake tester comes out clean. Cool for a few minutes and then transfer muffins to a cooling rack. Enjoy!