Showing posts with label Susan R-H. Show all posts

Wednesday, December 14, 2016

Grilled Shrimp And Pineapple Skewers, With A Warm Coconut “Cocktail” Sauce!


Back in 2013, 37 Cooks started a group discussion about coconut oil. We realized we all had quite a bit to learn about coconut oil and many of the other coconut based products available. We had the opportunity to work with products from Tropical Traditions. We began experimenting and ultimately conquering our fear of cooking with coconut. When I received my jar of Tropical Traditions Coconut Cream Concentrate, I stared at it for several days before I had the courage to remove the lid and sample the coconut cream. I was amazed at the delightful flavor! My immediate thought was to stick with a “Tropical” themed recipe. What pairs well with coconut? Pineapple! I can’t resist grilled shrimp in the summer, so it was an easy decision once I realized how versatile the coconut cream could be. I am confident once you try this delicious recipe for grilled shrimp, you will be ready to start your own coconut journey.

Grilled Shrimp And Pineapple Skewers, With A Warm Coconut “Cocktail” Sauce!
By Susan Ritchie-Hubbard

1 1/2 pounds jumbo shrimp, peeled and deveined, tail on
1 fresh pineapple peeled, cored and cut into at least 1” chunks (reserving any juice)
1/3 cup Tropical Traditions Coconut Cream Concentrate (with a very rich coconut flavor, 1/3 cup is plenty!)
1/4 cup sour cream
1/4 cup good quality mayonnaise
1 Tablespoon sambal oelek
3 Tablespoons pineapple juice (I had enough pineapple juice from preparing the pineapple, but store bought is fine)
1/2 teaspoon sea salt
Metal or bamboo skewers (If using bamboo skewers, soak them in water for at least 30 minutes prior to grilling)

For the warm coconut cream cocktail sauce:
The coconut cream concentrate is just that. Concentrated! I warmed the coconut cream slightly on a low temperature in the microwave. Microwaves vary, but I did 20 seconds at 50% power. This resulted in a creamy consistency. Combine the coconut cream, sour cream, mayonnaise, sambal oelek, pineapple juice and sea salt in a bowl. It will solidify somewhat because of the coconut cream. Cover and refrigerate until you are ready to serve. This sweet and spicy cocktail sauce beautifully showcases the fresh, intense flavor of the coconut cream concentrate!

For the grilled shrimp:
Preheat the grill to high. Medium-high if you have WeberQ. Grilling at a high temperature helps caramelize the pineapple and gives the shrimp a very flavorful char. Alternate the shrimp and pineapple chunks on the skewers (I had enough pineapple to make an additional pineapple skewer). Grill the skewers until the shrimp are barely opaque, approximately 1-2 minutes per side. Transfer the shrimp and pineapple skewers to a clean plate and loosely cover with foil. Gently heat the coconut cream cocktail sauce in a small saucepan (over medium low heat) or in the microwave (at 50 % power), until it melts into a creamy sauce. If using the microwave, stir the coconut cream sauce every 30 seconds.

To serve:
Remove the shrimp and pineapple chucks from the skewers and arrange on a serving plate. (I happened to have some small bamboo cocktail picks, so I put 1 shrimp and 1 pineapple chunk on each pick.) Drizzle the coconut cream cocktail sauce over the shrimp and pineapple. If desired, garnish with additional chopped pineapple. Enjoy!

Thursday, October 13, 2016

Savory Cheese Custard with Fleur de Sel and Parmesan Wafers

When I first heard our latest sponsor, The Spice House, requested a “baking” challenge, I was perplexed. All my fellow 37 cooks, along with family and friends, know I have no talent when it comes to baking. Yes, I am fine roasting vegetables, but my oven is used to store pans. I almost sat this one out. Almost. Then the wheels started turning! I really enjoy savory foods and I also love a good cheese course. Oh wait….this is a baking challenge! After a light meal recently, I surprised my dinner guests with a cheese “course” they will never forget! I served them Savory Cheese Custard with super light Sea Salt and Parmesan Wafers, along with excellent Blueberry Chutney made by my dear friend, Brooke Brickman. What’s better than cheese and fruit?

Savory Cheese Custard

by Susan Ritchie-Hubbard

2 cups heavy cream
1 1/2 teaspoons The Spice House French Broken Leaf Thyme
1 teaspoon The Spice House Lemon Peel Zest
2 large garlic cloves, peeled and smashed
3 large eggs, plus 2 yolks, room temperature
1 teaspoon The Spice House Aleppo Pepper
1/4 teaspoon kosher salt
3 ounces freshly grated Gruyere
1 ounce freshly Parmigiano-Reggiano
Boiling water

First Note: All custards start with two basic ingredients, cream and eggs. From there you can create the ultimate savory or sweet custard, whether you use more eggs, or any other thickening ingredient, like cheese! My first choice was of course cheese. Let your imagination run wild!!

Preheat oven to 300°F. Pour the cream into a medium saucepan. Add the thyme, lemon peel and garlic to the cream. Let the cream mixture come to room temperature. Set the heat to medium and stay close. As soon as the cream mixture begins to “steam” , (you will actually see steam start to rise) remove the pan from the heat. While the cream mixture cools slightly, whisk the eggs, egg yolks, Aleppo pepper and salt in a medium mixing bowl. Strain the cream mixture through a fine mesh strainer into another bowl or large measuring cup. Discard the solids. Very slowly, add the cream to the eggs, whisking constantly. Do not add the cream too quickly or the eggs will begin to cook. Add the Gruyere and Parmigiano-Reggiano, whisking until the cheese is completely melted. Divide the custard between the ramekin size of your choice. I selected individual ramekins, but I have also used party size ramekins. Place the ramekins in a baking dish deep enough to add enough boiling water to cover the ramekins, leaving 3/4” above the water line. Bake for approximately 28 minutes for individual ramekins and a bit longer for larger ramekins. As the custard cools it will firm up, so make sure the custard has a bit of wiggle in the middle when you remove the pan from the oven. I serve this custard at room temperature, but feel free to serve it warm.

Fleur de Sel and Parmesan Wafers
by Susan Ritchie-Hubbard

Eggroll wrappers
Good quality olive oil
The Spice House "Esprit de Sel" (Fleur de Sel)
Parmigiano-Reggiano

Second Note: If you are like me and do not bake, these are the simplest crackers you will ever make and still impress anyone who tries them! I would typically buy a specialty cracker or baguette to serve with this delicious cheese custard. I had to come up with a baked “cracker” so I went with eggroll wrapper wafers. I found them really versatile! You can truly get creative with this ingredient. I know I will definitely use them again!

Preheat oven to 350°F. Line a large baking sheet (s) with parchment paper. Cut the eggroll wrappers into wedges, or alternately, use biscuit and/or cookie cutters to make any shape you desire. Place the wrappers (in my case a single layer) on the lined sheet pan. Lightly brush the wrappers with olive oil. Sprinkle the wrappers with the Fleur de Sel. Using a microplane grater, shave Parmigiano-Reggiano over the wrappers. Bake for 10-12 minutes until the wafers are golden brown. Allow to cool on the pan and serve with the cheese custard. Enjoy!!

Wednesday, August 31, 2016

Shrimp Po’Boy with Molasses Mustard Remoulade

The first time I enjoyed a po’ boy was in New Orleans. I heard many stories about the origin of the sandwich, all very entertaining. One thing is certain. A traditional po’ boy starts with both fried shrimp and fried oysters served on a baguette. A properly “dressed” po’ boy has mayonnaise or remoulade, lettuce, tomato and dill pickle. When we received the delightful Jay D’s Louisiana Molasses Mustard (Jay Ducote competed on The Next Food Network Star) I knew I was going to make my version of a shrimp po’ boy! I opted for a lighter version of the classic po’ boy by grilling shrimp instead of frying. Where a typical remoulade calls for creole mustard, Jay D’s Louisiana Molasses Mustard elevated my remoulade to a whole new level! Jay D’s amazing line of products are hand crafted in Baton Rouge, Louisiana.

Shrimp Po’Boy with Molasses Mustard Remoulade
by Susan Ritchie-Hubbard

For the Shrimp Marinade~
¼ cup vegetable or canola oil
1 teaspoon fresh thyme leaves, lightly chopped
1 teaspoon fresh oregano leaves, lightly chopped
2 garlic cloves, small chop
¼ teaspoon cayenne pepper
½ teaspoon smoked sweet paprika
½ teaspoon kosher salt
¼ teaspoon fresh cracked black pepper
2 pounds large shrimp, peeled, deveined, tails removed

For the Molasses Mustard Remoulade~
½ cup mayonnaise, (I used Hellman’s)
½ cup Jay D’s Louisiana Molasses Mustard1 large celery rib, finely diced
2 scallions, thinly sliced (white and light green parts only)
3 cloves garlic, minced
1 Tablespoon capers, drained and roughly chopped
2 Tablespoons chopped flat leaf parsley
1 teaspoon Worcestershire sauce
½ teaspoon hot sauce (I used Frank’s)
Juice of half a lemon
Kosher salt and fresh cracked black pepper to taste.

For the Po’ Boys~
2 Baguettes, ends removed, cut in half across, sliced lengthwise, but not completely through
Remoulade
Grilled shrimp
Shredded iceberg lettuce
Chopped dill pickle
Sliced garden tomatoes
Hot sauce, optional

Prepare the marinade by combining all ingredients in a large bowl. Add the shrimp and toss to make sure all of the shrimp are completely coated with the marinade. Cover with plastic wrap and refrigerate for at least 2 hours. I always try for about 4 hours. In another bowl, combine all of the ingredients for the remoulade. Cover with plastic wrap and refrigerate. You will end up with about 1½ cups of remoulade. About 45 minutes to an hour before assembling the po’ boy sandwiches, remove the remoulade form the refrigerator and let it come back to room temperature.

Preheat your grill to the highest temperature possible. I like to use metal skewers to grill my shrimp. (If you have wood skewers, make sure you soak them in very hot water for at least 30 minutes before cooking the shrimp.) Skewer the shrimp, making sure they are not crowded on the skewer. When your grill is screaming hot, grill the shrimp until they are just cooked through, approximately 1-2 minutes per side.

Time to assemble the po’ boy! Truthfully, I am not a “bread” person. I love the crust as long as it is super crispy. The inside doughy part? Not so much. When I make this sandwich, I always slice to the lower half and I scoop the top half of the baguette. But, that’s just how I like a sandwich! Spread as much remoulade as you would enjoy on each side of the baguette. Layer the shrimp, shredded lettuce, pickle and tomato. Drizzle with hot sauce if desired. I like that extra bit of heat. I also serve additional remoulade on the side so guests can decide how much they would like. When you taste this incredible remoulade, you will want a little extra too!

Wednesday, August 17, 2016

Korean BBQ Baby Back Ribs

I am used to gathering a large number of ingredients when I make my family’s favorite ribs. This time, I had the pleasure of starting my Korean BBQ sauce with Jay D’s Louisiana Barbeque Sauce! With the first taste, I knew this was going to make my job very easy. This BBQ sauce is loaded with great flavor and a nice kick. In no time, my Asian additions help me create a new tradition in rib making! Jay’s BBQ sauce stood up to the additional ingredients and there was no question the flavor was beyond amazing! What an honor to have Jay D (Jay Ducote competed on The Next Food Network Star) give us a chance to showcase his amazing product! Jay D’s Louisiana Barbeque Sauce is hand crafted in Baton Rouge.

Korean BBQ Baby Back Ribs
by Susan Ritchie-Hubbard

1 12.7 ounce bottle of Jay D’s Louisiana Barbeque Sauce
1/4 cup gochujang (hot pepper paste)
1/4 cup hoisin sauce
1 Tablespoon freshly grated ginger
3 racks of baby back ribs, membranes remove and cut in half
Vegetable oil
Kosher salt, if desired

Mix the first 4 ingredients in a medium glass bowl and let stand at room temperature. Prepare the ribs, cover with plastic wrap and let stand at room temperature for 30 to 40 minutes. Preheat the oven to 325°F. You will need two large rimmed baking sheets. Place each rib half on a double layer of heavy-duty aluminum foil. Pour about 3/4 cup of the barbeque sauce into a small bowl, set aside. Brush each rib half with 1/4 to 1/3 cup of the remaining barbeque sauce. Discard any unused sauce, tightly wrap the foil and place the rib packets on the baking sheets. (As an aside, many years ago, I baked ribs in the oven, but wrapped them in plastic wrap and then in the foil. I saw Emeril Lagasse do it and while the ribs were very tender, we thought the texture and flavor didn’t measure up.) Bake the ribs for 1 3/4 to 2 hours, depending on the thickness of the ribs. Remove the ribs and let stand for about 10 minutes so the packets can be handled.

Preheat a grill to medium-high. Lightly brush the ribs with vegetable oil. This will help prevent sticking. Sprinkle with kosher salt, if desired. Grill the ribs, brushing each side with the additional barbeque sauce. Grill for approximately 2 1/2 to 3 minutes per side. Look for a little grill char and that’s your cue to ring the dinner bell! I like to cut the ribs into 2 rib pieces and serve family style on a large platter.

Monday, June 20, 2016

Shrimp Fra Diavlo

The Chicken Salt Challenge has been very exciting. When I tasted the Red Pepper Chicken Salt, I knew immediately I had to make a Fra Diavlo. It has a good kick. Nothing makes me happier than seafood in a spicy red sauce with a thick pasta! I am a huge fan of shrimp, so I knew I had the right idea. I generally cook to please others, but this time, it was all about me! I did share the results with a few close friends, but I was the first one indulging in a beautiful bowl of Shrimp Fra Diavlo with fresh fettuccini.

Shrimp Fra Diavlo
by Susan Ritchie-Hubbard

2 Tablespoons extra virgin olive oil
3 large peeled garlic clove, roughly chopped
1 pound large shrimp, peeled, deveined, tail shells removed
Red Pepper Chicken Salt, to taste
Fresh cracked black pepper, to taste
1 small sweet onion, small dice
1/2 cup dry white wine
1 28-ounce can San Marzano crushed tomatoes
1 1/2 teaspoons Red Pepper Chicken Salt
1/4 teaspoon fresh cracked black pepper
12 ounces fresh Fettuccini (or dried if you prefer)

In a large deep skillet or Dutch oven, heat the oil and garlic over medium until it just begins to sizzle. Remove from heat. Let it sit while you prep the shrimp. If you have purchased the shrimp prepared, it must be time for a glass of wine while you wait for it to cool and infuse! Make sure to dry the shrimp with paper towels. Season each side with a dusting of the Red Pepper Chicken Salt (it has a handy shaker setting!) and fresh cracked black pepper. Reheat the oil and garlic over medium-high heat. When the oil shimmers and the garlic becomes fragrant, but not starting to brown, add the shrimp in a single layer. Cook the shrimp until they are still a bit translucent, approximately 1-2 minutes per side, depending on the “large” size of your shrimp. Lift the pan away from the heat briefly to transfer the shrimp to a plate. Return the pan to the stove and loosely cover the shrimp with foil. Set aside.

Lower the heat to medium, add onion and sauté until the onion softens and becomes translucent, approximately 4-6 minutes. Add the wine to deglaze the pan, scraping up all the delightful brown bits of goodness! When the wine is almost completely evaporated, add the crushed tomatoes, Red Pepper Chicken Salt and black pepper. It’s time to bring a large pot of salted water to a boil. (If you are using dried pasta, the process will take longer than fresh pasta. So it is important to guage your time accordingly.) When the sauce comes to a boil, reduce to medium low heat. Simmer, stirring occasionally, for approximately 30 minutes, until the sauce has thickened. Remove the pan from the heat, add the shrimp and any juices from the dish to the sauce. Drain the pasta and add to the sauce and toss to completely coat.

To serve:
Divide the Shrimp Fra Diavlo between 4 bowls (or plates) for entrée portions, or 6-8 for appetizers or small plate portions. Garnish with fresh chopped Italian parsley.

**Note ~ My Italian friends believe it is a sacrilege to add grated Parmesan Reggiano to seafood pasta dishes. I am a Scot and I generally do not. But, there are times I just want a little cheese with my seafood pasta! So, if you want cheese, please go for it!!

Friday, June 10, 2016

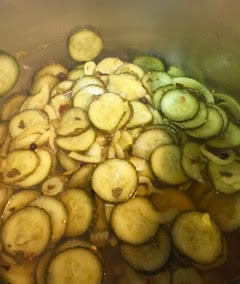
Bread & Butter Pickles

It’s not every day an amazing sponsor sends a true variety of flavors to play with! Chicken Salt now has a front and center position in my spice cabinet. I tasted each of the 6 varieties I received and was immediately drawn to the Turmeric Salt. The salts are all vegan and will work for any style of cuisine. My first thought with the Turmeric Salt was to stick with a vegan recipe. I decided Bread & Butter Pickles would be a great way to feature the Turmeric Salt. Bread & Butter Pickles are a great condiment for so many dishes, not all vegan of course. We love them on burgers and chopped into tuna salad, or just straight out of the jar. The result was incredible!

Bread & Butter Pickles
by Susan Ritchie-Hubbard

5 cups sliced seedless cucumbers (I used a mandolin, 1/4-inch slice)
1 large sweet onion, halved and thinly sliced
1 Tablespoon, plus 1 teaspoon Turmeric Salt
1 1/2 cups crushed ice
1 1/4 cups apple cider vinegar
3/4 cup, plus 2 Tablespoons granular sugar
1/4  teaspoon Turmeric Salt
1/4 teaspoon ground turmeric
2 teaspoons good quality pickling spice (I used Penzey’s)

Combine the cucumber, onion and Turmeric Salt in a large bowl. Add the crushed ice and place a smaller bowl on top weighed down with either kitchen bricks (I have two standing by wrapped in foil, or a gym weight that weighs 5 pounds.) Let stand for 2 1/2 to 3 hours. Transfer the cucumber and onion to a colander and rinse thoroughly. Both the cucumber and onion will have absorbed the turmeric from the salt.

Preheat the oven to 275°F. In a large heavy bottom sauce pan, add the cucumber and onion, vinegar, sugar, Turmeric Salt, turmeric and pickling spice. Over medium heat, bring to just under a boil. As soon as you see it about to boil, remove the pan from the heat.

During the salt “curing” process, the cucumber and onion gave up a lot of their natural liquid. After being bathed in the beautiful simmer, there is a smaller yield. Divide the pickled cucumber and onion between the sterilized jar size of your choice and top with the pickling liquid, leaving 1/2 of head room. My mother did not always use the pressure canning method for foods we would be eating quickly. Place the jars on a rimmed baking sheet and place in the preheated oven for 20 minutes. Remove from the oven and let stand on the stovetop. As the jars begin to cool, you will hear the seal “snap” into place. Once the pickles have completely cooled, refrigerate for 2 weeks and try to be patient!

I will tell you, these pickles will last up to 2 months in the refrigerator, but you will be making more before time is up!

Wednesday, May 4, 2016

Cuban Style Sliders

When my Instant Pot arrived, I sat it in a chair in the kitchen. We stared at each other for days. I am a stainless steel pan and a grill girl. Or so I thought! After reading all the literature and checking out the parts, I started to get excited! I still have memories of my parents using a heavy metal pressure cooker with the hissing disc on top. That thing truly scared me! I would not go near the kitchen if it was on the stove. My goal with this recipe was to use multiple features to get a real feel for the greatness of this product. What would have been a 3-4 hour cooking process was completed in less than half the time. About this recipe: I visit my Dad regularly in the Florida Keys. We love a good “Cubano” and there is a place close to him that makes authentic delicious sandwiches. I wanted to do a party-style slider and this is what wowed the crowd!

Cuban Style Sliders
by Susan Ritchie-Hubbard

For the Mojo Marinade:

1 cup orange juice, fresh squeezed or store bought
Zest of 1 lime
1/2 cup fresh squeezed lime juice, about 3 limes
2 Tablespoons chopped fresh oregano, or 1 Tablespoon dried
1 teaspoon ground cumin
1 teaspoon kosher salt
1/4 teaspoon red pepper flakes
1 1/2 Tablespoons coarsely chopped garlic
2 pound pork shoulder roast, tied
1 Tablespoon canola or vegetable oil

For the Mustard Cheese Sauce:
2 Tablespoons unsalted butter
2 Tablespoons all-purpose flour
1 1/2 cups milk at room temperature, I had 2% milk on hand
8 ounces grated Gruyere cheese
1 1/2 to 2 Tablespoons coarse grain mustard (Grey Poupon has a nice one)

For the Sliders:

Slider rolls, sliced in half, I used potato rolls
Melted butter or canola oil
Bread and Butter pickle slices
1/2 pound very thinly sliced, good quality deli ham, I used Boar’s Head

Make the Mojo marinade by combining the first 8 ingredients is a zip-top plastic bag. Using a paring knife, make 1/2-inch deep slits all over the pork roast, pressing in pieces of the chopped garlic as you move around the roast. If you do not use all of the chopped garlic, place the remaining garlic in the zip-top bag with the rest of the Mojo ingredients. Add the pork roast to the bag, squeezing out all of the air to completely immerse the meat in the marinade. Place the bag in a shallow bowl and refrigerate at least 8 hours. Overnight would be best.

Allow the roast to sit at room temperature for 1 hour before cooking. Remove the roast from the marinade and pat dry with paper towels. Reserve 1 1/2 cups of the marinade. Discard the remainder. Set the Instant Pot to Sauté, normal heat. Add the canola oil. When the pot is hot, add the roast, searing on all sides until lightly browned. Turn the pot off. Add the reserved marinade, cover the pot and set the pot to Manual 70 minutes. NR. Transfer the roast to a plate and cover with foil and allow to cool enough to handle.

Discard the cooking liquid, clean the liner and return to the Instant Pot. Set the pot to Sauté, normal heat. When the pot is hot, add the butter and as it melts add the flour, whisking constantly until the flour cooks, and develops a nutty fragrance. Approximately 3-4 minutes. Add the milk and whisk until the mixture begins to thicken. Turn off the pot. Add the Gruyere and whisk until the cheese melts. Add the mustard and whisk to incorporate. This sauce will be on the thick side. Remove the foil from the pork and shred the meat with 2 forks. Cover with the foil.

Using a grill pan (or skillet) on medium heat, brush the rolls with the butter or oil and grill until the rolls are golden brown.

It’s time to assemble our sliders! The number of sliders will depend on how much deliciousness you want each guest to enjoy. I got a little carried away. On the bottom half of the roll, add a nice layer of the pork, top that with a few pickles, now it is time for the ham. I made a little mound with each slice. Spoon the mustard cheese sauce on top of the ham. Place the other half of the roll on top and secure with a short skewer or solid toothpick.

These sliders have incredible flavor and with the Instant Pot, so easy to make! The Instant Pot really cut down the cooking time and I had only one pot to clean when I was done.

Monday, April 25, 2016

New England Clam “Chowda”

I live in Pennsylvania these days, but I grew up in Kennebunkport Maine. Each region in New England has their own style of clam chowder. Within those regions, each family has their own recipe for clam chowder. My family always argues about who in the family makes the best clam chowder. I have always loved my mother’s version. It is thinner chowder, not the thick “pudding” chowder I have seen where I live now. I can’t eat that! One problem I faced making this chowder for the Instant Pot challenge was meeting the richness of the milk we had delivered when I lived in Maine as a child. But, I figured a bit of a thickener would work, without changing the flavor of the chowder. If you are happy with thinner chowder, just skip it. My other challenge was not having access to my beloved “steamers”, also known as Ipswich clams. Little neck clams got the job done! I was really impressed with the Instant Pot and the cooking options to use one pot to get this wonderful chowder completed!

New England Clam “Chowda”
by Susan Ritchie-Hubbard

6 dozen little neck clams
2 Tablespoons unsalted butter, divided
2 ounces salt pork, finely chopped
2 ounces bacon, finely chopped
1 medium onion, small dice
3 celery stalks, small dice
1/2 cup dry white wine
1 large or 2 small bay leaves
Fresh ground black pepper
2 large russet potatoes, washed peeled and cut into 1/2-inch pieces
Clam broth
2 Tablespoons corn starch (optional)
2 Tablespoons cold water (optional)
1 cup whole milk
1 cup light cream
Salt and pepper to taste
Soup crackers for serving

Clams can release sand when cooked. I put the clams in a bowl, covered them with cold water and gave them a scrub with my hands. This doesn’t necessarily guarantee sand-free clams. Put a steamer basket in the Instant Pot liner, add the clams and pour in 3 1/2 cups water. Cover the pot and set to Steam for 6 minutes. QR. Every clam in the Instant Pot opened! Transfer the clams to a large bowl and strain the clam broth through cheesecloth, or 2 layers of white paper towels into another bowl. Reserve the clam broth. Remove the clams from their shells and place in a small bowl. Add about 1/2 cup of strained clam broth to the clams. Letting the clams rest in the broth will remove any additional sand and keep the clams moist. Clean the liner and return to the Instant Pot.

Set the Instant Pot to Sauté, normal heat. Add 1 Tablespoon of the butter, the salt pork and bacon. Sauté, stirring frequently, until the fat has rendered and the bacon is crispy, approximately 7-9 minutes. Add the onion, celery and white wine. Continue to sauté until the onion is soft and translucent and the wine has almost completely evaporated, about 6-8 minutes. Turn off the Instant Pot. Add the bay leaf, season with pepper and add the potatoes. Pour in the strained clam broth. If there is not enough clam broth to cover the potatoes, add water as needed. Cover the pot. Set Manual pressure for 6 minutes. QR. In a small bowl, whisk the cornstarch and water together to make a “slurry”. (Optional)

The final step! Remove the bay leaf. Set to Sauté, less heat. Return the clams to the pot. Stir in the milk, cream and slurry, (if using). Stir constantly until the chowder thickens. Add the last Tablespoon of butter and stir until melted. Check for seasoning, adding salt and pepper as desired. Ladle the chowder into bowls and top with soup crackers. Serve immediately.

Tuesday, April 12, 2016

Sweet and Spicy Party Mix

We entertain quite a bit and sometimes all I want to put out is a party mix to keep guests happy until dinner is served. There are plenty of party mixes out there. We all know the names. But! General Mills brings the best options for great combinations. General Mills sent the new version of their healthy alternative cereals to 37Cooks to see if we could rise to the challenge. I chose to make my version of a party mix using something sweet and something traditional with a little twist to make your party guests say “Hmmmm”.


Sweet and Spicy Party Mix
by Susan Ritchie-Hubbard
Serves: A Party!

2 cups Chocolate Cheerios cereal
2 cups Golden Grahams cereal
2 cups Wheat Chex cereal
2 cups mini pretzels
1 cup cashews, rough chop
1/4 cup coconut oil
1/2 cup packed light brown sugar
1/2 cup good quality honey
1/2 teaspoon kosher salt
1/8 teaspoon berbere or cayenne pepper (optional)
1/3 - 1/2 cup coconut flakes

Preheat oven to 325°F. Coat a large rimmed baking sheet with non-stick vegetable spray.

Combine the cereal, pretzels and nuts in a large heatproof bowl.

In a medium saucepan, add the coconut oil, brown sugar, honey, salt and berbere (if you want that little secret something to make your party guests say "Hmmmm….."). Over medium-low heat, stir constantly until the brown sugar has completely dissolved. Slowly pour the delightful sweet liquid over the cereal mix, tossing constantly and gently with a large rubber spatula, to coat all the ingredients evenly.

Scrape the coated cereal mix onto the prepared baking sheet and spread it out with the spatula as thin as possible. Please be gentle! You don’t want to crush the mixture. Bake at 325°F for 10 minutes.

Remove the pan from the oven and increase the heat to 350°F. Sprinkle the coconut over the mix and using your spatula, press the coconut into the mix. Return the pan to the oven and bake for another 9-11 minutes, until the coconut starts to turn a beautiful golden brown.

Allow the party mix to cool for about 20 minutes. Use the spatula to release the mix from the pan. Break into bite size pieces. Your party guests will be delighted! You can also prepare this mix and store in an air tight container for up to a week.

Wednesday, March 2, 2016

Field Greens Salad with Trix Encrusted Goat Cheese “Croutons”

There are days when you want a simple salad. And there are days when you want a simple salad with a delightful goat cheese “crouton”! When General Mills offered 37 Cooks their updated healthy cereal selection, I was really impressed! Whole grains, no GMO, lower sugar content. As a busy professional, I often enjoy a salad that includes fruit and protein as my main course for dinner. I thought the new and improved Trix cereal was really fruity and a perfect option to coat my goat cheese “croutons” and make this salad a complete success!


Field Greens Salad with Trix Encrusted Goat Cheese “Croutons”
by Susan Ritchie-Hubbard

Serves: 4-6

Ingredients:
1 cup Trix cereal
1/2 teaspoon kosher salt
1 “pinch” ground cinnamon (the equivalent of 1/8 teaspoon or a bit less)
8 ounces goat cheese, well chilled
Field greens
Thinly sliced cucumber
Thinly sliced red onion
Tomato variety, halved or quartered
Mixed berries (I chose raspberries, blackberries and blueberries)
Vinaigrette of choice (I made a raspberry ginger)

In the bowl of a food processor fitted with the metal blade, add the cereal, salt and cinnamon. Pulse until the mixture is a fine grind. Transfer to a shallow bowl. Cut the chilled goat cheese into equal .5 ounce portions. Goat cheese can break apart, so I cut it and weighed the portions on a kitchen scale, adding pieces as needed. With your fingers, gently form the goat cheese portions into a square “crouton” shape. Toss the goat cheese squares in the Trix mixture, gently pressing the Trix mixture onto the goat cheese to completely coat. If preparing ahead, cover the “croutons” and refrigerate until ready to serve. Assemble the salad and drizzle with your vinaigrette of choice. Place the goat cheese “croutons” on top of the salad and serve. Sometimes simple just works!

Wednesday, February 17, 2016

Roasted Curry Cauliflower

My favorite cookbook isn’t really a “cook book” at all! The Flavor Bible is actually a culinary guide. For example, I receive coupons to try new and different spices from the nationally known spice purveyor, Penzey’s. I recently received a coupon for their new curry. Since curry isn’t a spice I have experience with, I turned to The Flavor Bible to learn about the flavor profile. Once I understood what I would be working with, my first thought was to select a vegetable that would benefit from the flavor of the curry, but not compete with the unique elements of the spice. In the winter months, I really enjoy roasting vegetables and in this case cauliflower was the perfect choice. The results were amazing! The Flavor Bible should be in everyone’s cooking library. It is the perfect resource for cooks who like to use their imagination in the kitchen!

Roasted Curry Cauliflower
by Susan Ritchie-Hubbard
Serves 4-6

1/4 cup good quality olive oil
2 1/2 teaspoons curry powder (I used “The Now Curry” from Penzey’s)
1 teaspoon honey
1 teaspoon light brown sugar
1 1/2 teaspoons freshly squeezed lemon juice
1/2 teaspoon kosher salt
1/2 teaspoon freshly ground pepper
1 medium head cauliflower, cut into florets
2 Tablespoons toasted pine nuts

Put the first 7 ingredients in a small bowl. Whisk to mix completely. Place the cauliflower florets in a large bowl. Slowly add the curry mixture, tossing the cauliflower to coat all the florets. Cover the bowl with plastic wrap and refrigerate for at least 2 hours.

Preheat the oven to 475°F. Spread the cauliflower florets in a single layer on a rimmed baking sheet. Roast for 25-30 minutes until the florets are fork tender and golden brown. In the meantime, toast the pine nuts in a non stick skillet over medium heat until they are fragrant and lightly browned. Sprinkle the pine nuts over the roasted cauliflower and serve immediately.

Wednesday, January 27, 2016

The Blue “Vesper” Martini: Shaken not Stirred

In the 1953 Ian Fleming novel Casino Royale, James Bond ordered the then unnamed Vesper Martini. He requested a dry martini. “Just a moment. Three measures of Gordon’s, one of vodka, and half a measure of Kina Lillet”. Shake it very well until it’s ice-cold, then, add a large thin slice of lemon peel. Got it?” Well, here we are in 2015 and I think it might be time to give that Vesper an update! When I received the b’Lure Butterfly Pea Flower Extract from Wild Hibiscus Flower Company, I knew a Blue “Vesper” was in order. Our generous sponsor also sent along Wild Hibiscus Flowers in Syrup. Talk about a gorgeous cocktail! It’s always nice to have a spectacular garnish. Who needs a lemon peel! I prepared and served this delightful cocktail as we waited for our first course.

The Blue “Vesper” Martini: Shaken not Stirred
by Susan R-H

3 ounces Gin (I chose our local distilled Bluecoat)
1 ounce Vodka, pick your favorite
12-15 drops b’Lure Butterfly Pea Flower Extract
1 Wild Hibiscus Flower with a bit of the syrup, just for the beauty of the garnish

Chill a martini glass. Fill a cocktail shaker with ice. Add the gin, vodka and b’Lure. Shake until really cold! Put a bit of syrup in the glass and top with the Wild Hibiscus Flower, then, gently pour the martini in the glass. It will be pretty and very tasty. I sort of felt like a spy while sipping this. I just wish I had his car……

Tuesday, January 12, 2016

Wild Hibiscus Risotto with Togarashi Seared Sea Scallops

Every holiday season is quite hectic. There are parties with large gatherings from Thanksgiving through the New Year. But as we wind down, there is always a light dinner with good friends to relax and enjoy cocktails along with tapas dishes. This year it will be hosted at my house. Everyone brings his or her favorite dish. There is always a nice variety of tapas dishes and this year I wanted to do something unique and different. When our latest sponsor sent us Wild Hibiscus Flowers in Syrup, I had a feeling I needed to sear some spicy scallops and make a risotto. Who doesn’t want sweet and spicy? I had fun adding some Togarashi to the seared scallops to give them a bit of a kick to complement the beautiful Wild Hibiscus Flower risotto. This dish is beautiful and full of flavor. It is easy to prepare and your guests will be delighted!

Wild Hibiscus Risotto with Togarashi Seared Sea Scallops
by Susan R-H
Serves 6
1 quart filtered water
2 Tablespoons olive oil, plus 1 teaspoon
1 small sweet onion finely diced
2 cups Arborio rice
1/2 cup dry white wine
1/2 teaspoon white pepper
1/2 teaspoon flaked kosher salt
5 Wild Hibiscus Flowers, finely chopped
A small amount of the Hibiscus syrup, if desired
6 large U-10 Sea Scallops, muscle removed, patted dry
1 Tablespoon toasted sesame seeds
Togarashi seasoning (available in Asian markets)
1 Tablespoon butter
1 Tablespoon olive oil
Flaked sea salt

For the Risotto: Bring the water to a boil and reduce heat to allow the water to simmer. In a large skillet, heat the olive oil over medium. When the oil shimmers, add the onion and sauté until the onion is translucent, but not starting to brown. Approximately 3-5 minutes. Add the Arborio rice and stir to coat with the oil and onion. After 2-3 minutes, the rice should start to “toast”. By that I mean the rice will cook slightly and become fragrant. Add the wine, white pepper and salt. Stir to completely coat the rice. Now it is time to add 1/2 cup of water at a time, and stir continuously until all of the water is absorbed. After about 15-18 minutes, taste the risotto for texture. You are looking for the risotto to have an al dente texture, just like pasta. Continue to add small amounts of water until you have this texture. As soon as the risotto reaches al dente, remove from the heat and gently stir in the hibiscus flowers, and if you like a little more sweetness, a bit of the Hibiscus syrup. Loosely cover the pan with foil and set aside.

For the Scallops: Mix the sesame seeds and Togarashi seasoning in a shallow bowl. Togarashi is a pretty spicy Japanese seasoning, and I would recommend tasting before you add too much to the sesame seeds. Heat the butter and olive oil a medium skillet over medium-high heat. Adding oil to butter prevents the butter from burning too quickly. Press one side of each scallop in the sesame seed mixture and place in the skillet seasoned-side down. Sear the scallops until they develop about a 1/4-inch “crust”. About 2-3 minutes. Turn the scallops over and reduce the heat to medium. Continue to cook until the scallops are cooked to your desired temperature. I prefer my scallops to be medium at most. This will take another 3-5 minutes. Place the scallops on a small warm plate and season with flaked sea salt if desired.

To Serve: Divide the risotto between 6 appetizer plates. I selected a medium-sized ring mold to create a beautiful presentation. Top each serving of risotto with a seared scallop and garnish with a slice of a Wild Hibiscus Flower.

Monday, December 7, 2015

The Grapefruit Martini

We have been celebrating the holidays with our great friends for many years. Each year I bring the same thing. Not this year! When I received the Leafcutter Designs Cocktail Dice, I decided to “roll the dice” and see what cocktail I could bring to the party! At first I wasn’t sure how the ingredients would “play” together, but the end result was delightful! Everyone enjoyed the libation and I was thrilled! It isn’t everyday you get to roll the dice and have the perfect result!

The Grapefruit Martini
By Susan R-H

For Each Cocktail You Will Need:

4 ounces of freshly squeezed Ruby Red grapefruit. Your yield will vary on the juice of the grapefruit.
1 1/2 ounces good quality vodka (I chose Grey Goose)
1 1/2 ounces of orange Liquor (I chose Grand Marnier)
1 slice of orange peel

Fill a cocktail shaker with ice. Add all of the ingredients and give it a solid 1 minute shake! Strain into a chilled Martini glass and garnish with the orange peel. This was a very delightful cocktail! It is always an adventure when you “Roll the Dice”.

Tuesday, November 17, 2015

The “Tom Collins”

I came home from work Friday and decided to roll the dice. The Leafcutter Designs Cocktail Dice that is! I couldn’t believe my luck. TWO “Wild” dice!! That means I get to go “Wild” with my cocktail idea. When one of the dice revealed a Collins glass, I decided to go old school. Really? Old school? Well…How about the New Old School! When I was a server in college, so many restaurants made their “signature” Tom Collins using a generic pre-made sour mix and average gin. Maybe the straw elevated the cocktail? I am not too sure about that, but I know I served plenty. I figured I could remain loyal to the basics, but add my spin to this iconic cocktail. Are you ready for the Tom Collins of the next generation? I know my guests were all smiles Saturday night! I guess it could have been the gin…

The “Tom Collins”
By Susan R-H

Simple Syrup ingredients:
1/2 cup sugar
1/2 cup water
The peel of one lemon, I used a potato peeler. Be careful not to include the pith.
One handful of fresh basil leaves and that can be subjective, so if you adore basil (like me) use a big handful.

For each cocktail you will need:
1 1/2 ounces good quality gin, I chose Bombay Sapphire
1 ounce fresh squeezed lemon juice
1/2 ounce basil lemon simple syrup, more or less depending on your sweetness desire
2 ounces carbonated water, I used Perrier

Method:
First, make the basil lemon simple syrup. Combine the sugar, water, lemon peel and basil in a small saucepan. Bring to a boil over medium-high heat, stirring until the sugar is completely dissolved. Remove from the heat and let the simple syrup cool completely. Strain and set aside. You will need to adjust the simple syrup recipe measurements based on the number of cocktails you plan to serve. It is always equal parts of sugar and water.

When it is party time, fill Collins glasses with crushed ice. Add the gin, lemon juice, basil lemon simple syrup and carbonated water. Stir and garnish with a thin slice of lemon wrapped around a basil leaf. Add a straw if you are feeling nostalgic. 

This was a terrific challenge for the 37 Cooks and I believe the Leafcutter Designs Cocktail Dice make a wonderful holiday gift for any of your adventurous family members or friends!

Wednesday, October 28, 2015

Buffalo Shrimp

It’s football season! That means Sunday get-togethers with great friends and family. A football party isn’t a party without plenty of appetizers. We like a large variety of appetizers and they must be “one-hand” friendly. One of my favorite appetizers to make on game day is Buffalo Shrimp. When 37 Cooks announced the Truly Good Foods Challenge, I was really excited to see the amazing selection of nuts they were sending! To my delight, they sent Buffalo Nuts! These nuts pack a spicy punch and I knew they would take my Buffalo Shrimp to a new level!

Buffalo Shrimp
by Susan R-H

8 ounces Truly Good Foods Buffalo Nuts
5 Tablespoons all-purpose flour
1/2 to 1 teaspoon cayenne pepper (if desired)
12 jumbo shrimp, peeled, deveined, with tails on
Peanut or canola oil for frying
Salt
2 ounces Truly Good Foods Buffalo Nuts, chopped for garnish

Place the nuts, flour and cayenne pepper (if using) in the bowl of a food processor fitted with the metal blade. Process until you have a breadcrumb-like texture. Transfer the nut mixture to a large plate and shake to even out the mixture. Moisten the shrimp very lightly with water. I used a spray bottle. Dredge each shrimp with the nut mixture and gently pat to make sure it adheres to the shrimp. Add enough oil to a large skillet to have 1/2 inch. Heat over medium until the oil reaches 330°F. I used an instant-read thermometer.

Cooking 4 shrimp at a time to maintain the oil temperature, add the shrimp to the hot oil. Cook for 1 to 1 1/2 minutes per side. The shrimp will form a “C” when fully cooked. Do not overcook! Remove the shrimp to a paper towel-lined plate. Lightly sprinkle with salt. Repeat with the remaining shrimp. These shrimp will have a flavorful crunchy exterior. Serve with your favorite blue cheese dressing and buffalo sauce. Garnish the finished shrimp with the chopped Buffalo Nuts. These shrimp were the hit of our most recent football party!

Thursday, October 15, 2015

Blackened Pumpkin Seed Encrusted Stuffed Chicken Breasts

As the weather begins to cool off in early fall, I start to get excited about making some of our favorite cold weather dinners. Stuffed chicken breasts are very versatile and I look for new ways to change up the stuffing. When we received the very generous selection of nuts from Truly Good Foods, I knew right then I had to use the Blackened Pumpkin Seeds! “Blackened” makes me think Cajun and Cajun makes me think Andouille sausage. Next was to a select a cheese because every good stuffed chicken breast needs cheese! I needed a little input so I headed over to my favorite cheese expert at the local Whole Foods. After several tastes, I opted for a sheep’s milk cheese. It had a little more zing than the Manchego. I really wanted a cheese that would hold it’s own with the Andouille. I am sure that I made the right choice! The result was incredible and my fellow diners were thrilled with the flavor!!

Blackened Pumpkin Seed Encrusted Stuffed Chicken Breasts
by Susan R-H
Serves 6

1 1/2 cups Truly Good Foods Blackened Pumpkin Seeds
1 teaspoon kosher salt
1 pound fresh Andouille sausage, casings removed
2 cloves garlic finely chopped
5 ounces of organic baby spinach
6 boneless/skinless chicken breasts, pounded to 1/4-inch
2 cups grated Cordobes Mitica Spanish sheep’s milk cheese or Manchego
Kitchen twine to tie the chicken breasts, 3 pieces per breast
2 large eggs
2 Tablespoons unsalted butter, divided
2 Tablespoons canola oil, divided
Salt and Pepper as desired

Place the pumpkin seeds and salt in a food processor and pulse until coarse ground. Set aside. In a large skillet over medium heat, add the Andouille sausage. Sauté, breaking up with a spoon as the sausage browns. When the sausage has almost cooked through, add the garlic and spinach. Mix and remove from the heat. Allow the sausage mixture to cool completely. Divide the sausage mixture between each chicken breast. Then divide the cheese. Fold the breasts over and tie with the kitchen twine. I start with the middle and make sure the stuffing is secure on each side and then tie each end. Beat the eggs and place in a shallow bowl. Put the ground pumpkin seeds on a dinner-sized plate. Coat each breast with egg and roll them in the nut mixture. Pat gently to ensure the breasts are completely covered with the nuts.

Preheat the oven to 400°F. Place a rimmed baking sheet in the oven as it heats.

Wipe out the large skillet, but don’t feel the need to clean it. There will be a bit of flavor left behind! Over medium heat, add 1 Tablespoon of butter and 1 Tablespoon of oil. Add three of the stuffed chicken breasts to the pan and cook until lightly browned on each side. Remove and place on a plate. Add the remaining 1 Tablespoon of butter and 1 Tablespoon of oil. Repeat the process with the remaining three stuffed chicken breasts. Remove the preheated baking sheet and place all of the stuffed chicken beasts on the baking sheet. Return to the oven and bake until the chicken has reached an internal temperature of 165°F. Approximately 20-25 minutes. I use an instant-read thermometer.

Serve this delightful chicken with your favorite vegetables! I chose carrots and beets for this preparation, but anything goes with this dish! The nuts were the STAR!

Monday, August 3, 2015

Baked Ziti

It’s never a bad day when I offer Baked Ziti as a Sunday dinner. When the weather is warm and we want a light Baked Ziti, we accommodate with the amazing Cluck ‘n Moo beef and chicken ground combination. The rich meat flavor comes through with less fat when they add the chicken to the mix. It works beautifully for this quick and easy “slow” cooked meat sauce.

Baked Ziti
by Susan R-H

1 pound ziti, cooked according to package directions
2 Tablespoons olive oil

1 medium onion, medium dice
4 cloves garlic, finely diced
2 teaspoons dried basil
1 teaspoon dried oregano
2 pounds Cluck ‘n Moo Ground
2 32-ounce jars of your favorite Marinara (I prefer Rao’s)
Salt and pepper
2 pounds ricotta cheese
2/3 cup grated Romano cheese
2 eggs lightly beaten
1/4 cup freshly chopped parsley
Salt and pepper
8 ounces grated mozzarella cheese
3/4 cup grated Romano cheese

Cook the ziti according to the package directions to al dente. Drain and rinse well with cold water. This is one time, you do not want the starchy water to stick around. In a Dutch oven or large deep skillet, heat the olive oil at medium heat. Add the onion and cook until translucent, about 5-7 minutes. Add the garlic and cook until fragrant, about 30-45 seconds. Stir in the basil and oregano. Give them a minute to become fragrant. (As much as I love fresh herbs, dried herbs work so much better in this type of preparation.) Increase the heat to medium-high and add the Cluck ‘n Moo. As the meat cooks, break it up to cook through. Add the marinara sauce and bring to a boil. Reduce the heat back to medium and simmer for 30 minutes. Season with salt and pepper to taste. Allow the sauce to cool to room temperature.

In a large bowl, combine the ricotta, grated Romano, eggs, and parsley. Season with salt and pepper. Mix in the ziti. In a 13 x 9 baking dish, ladle 1/2 of the meat sauce. Spoon the ziti/cheese mixture on top of the sauce and press down to cover the dish. Add the rest of the meat sauce, covering the ziti. Mix the mozzarella and Romano cheese and top the ziti and sauce. Bake at 350°F for 30-35 minutes.

We typically serve Baked Ziti with a colorful fresh salad of mixed greens and our favorite Italian vinaigrette, along with buttery baked garlic bread. The options are endless!

Friday, July 17, 2015

Spicy Stuffed Mushrooms

It’s graduation season and that means so many parties! It seems each year the parties extend well into the summer. When we add in the holidays, the party season never ends! I always try to bring a unique appetizer to every event. This year, my favorite appetizer is Spicy Stuffed Mushrooms. I wasn’t sure what I would be bringing to parties until I received the generous shipment of Cluck ‘n Moo Ground! It’s flavorful and also lean, with the combination of ground beef and chicken. These Spicy Stuffed Mushrooms were met with rave reviews and will be a regular at many parties to come!

Spicy Stuffed Mushrooms
by Susan R-H

12 large mushrooms, cleaned, stems removed and finely
chopped. (**See Note)
2 Tablespoons olive oil, plus more for the mushrooms
1.5 pounds Cluck ‘n Moo Ground
1 small onion, finely diced
3-4 cloves garlic, finely minced
1 large egg lightly beaten
3/4 cup panko breadcrumbs
3/4 cup grated Parmesan Reggiano
2 Tablespoons half and half
2 teaspoons crushed red pepper flakes
Salt and freshly ground black pepper
Additional grated Parmesan Reggiano to garnish

In a large skillet, heat the oil over medium heat. Add the Cluck ‘n Moo Ground and cook until the meat is completely browned, breaking it up with a wooden spoon as it cooks. Remove the meat to a large bowl with a slotted spoon, leaving the pan juices in the skillet. Allow the meat to cool to room temperature. 


Add the onion to the pan juices and cook until the onion is caramelized, stirring frequently, about 10-15 minutes. Add the garlic and cook until fragrant, about 30-45 seconds. Add the mushroom stem pieces and continue to cook until the mushroom pieces have browned. Remove the skillet from the heat, allow to cool slightly, and add the onion/garlic/mushroom mix to the bowl with the meat. Add the egg, panko, Parmesan Reggiano, half and half, and crushed red pepper flakes. Mix well and check for seasoning. It should have a nice spicy taste. Season with salt and pepper to taste. 

Rub the mushroom caps with olive oil to thoroughly coat and place on a rimmed baking sheet. Using an ice cream scoop, distribute the stuffing mixture equally between the 12 caps. Gently press the mixture into the caps. Bake at 350°F for approximately 25-30 minutes, until the mushrooms are cooked through and the stuffing has turned golden brown. Top the stuffed mushrooms with additional grated cheese and serve immediately. This is one appetizer that will have your family and friends looking for more!

**Note: There are many opinions about the proper way to clean mushrooms. If Jacques Pepin says it is okay to wash the mushrooms with cold water just as you are preparing to cook them, then that is fine with me!

Friday, February 20, 2015

“Portuguese” Kale Soup

Did you make a New Year resolution to find a few healthy recipes this year? I sure did! Here in the Northeast, we are in the midst of another cold winter. It isn’t looking like we will get the same snowfall we experienced last year, but we are still dealing with below average temps and looking for comfort food to keep us warm. Keeping my New Year resolution in mind along with winter comfort food, I always turn to soup. Soup is warm, filling and satisfying. When I received the soon to be introduced Bilinski’s Organic Kale Balsamic Chicken Sausage, my first thought was to create a “Portuguese” Kale Soup. While the soup is traditionally prepared with linguica sausage and potatoes, my version is light, healthy and full of flavor!

“Portuguese” Kale Soup
by Susan R-H
Serves 6-8

2 Tablespoons extra virgin olive oil
1 medium white onion, halved lengthwise and thinly sliced
4 cloves garlic, finely diced
1/4 teaspoon course sea salt
1/8 teaspoon freshly cracked black pepper
1/4 teaspoon Aleppo pepper (or crushed red pepper flakes)
1 12-ounce package of Bilinski’s Organic Kale Balsamic Chicken Sausage, sliced into 1/4” coins
1/4 cup dry white wine
6 cups unsalted organic chicken stock
2 15.5-ounce cans of organic cannellini beans (white kidney beans), drained but not rinsed
8 ounces organic baby kale

Heat the olive oil until shimmering in a heavy bottomed 6-quart pot or Dutch oven. Add the onion and sauté, stirring frequently until the onions begin to caramelize. Add the garlic and cook for about 30 seconds to release the fragrance, but do not let the garlic start to brown as it will become bitter. Add the salt, black pepper and Aleppo pepper. Now add the sausage and white wine, stirring frequently, allowing the sausage to absorb the flavors of the onion and garlic. Continue stirring until the wine has cooked off. Add the chicken stock and bring to a boil. Add the beans and lower the heat to medium low. Let the soup simmer for 10 minutes. Stir in the baby kale and turn off the heat. Taste and adjust the salt and pepper as needed. Let the soup stand for 5 to 10 minutes. Ladle into bowls and serve with crusty bread or soup crackers.