My daughter and I found Gina Homolka’s blog, Skinnytaste on Pinterest a few years ago. We loved it and were very excited when she published her first cookbook. I had to buy a copy right away and, of course, I had to buy one for my daughter! I love my daughter’s passion for cooking and she has done a great job getting healthy meals together after long days at the office. I admit that I didn’t do as well when she was growing up. We had a ton of after-school activities and our meals suffered because I never really had a good game plan. I didn’t get into the swing of things until after I retired.
Gina takes your favorites and makes them quick, easy, and calorie friendly. From Guiltless Chocolate Chip Pancakes to Thai Coconut Mussels, there is something delicious for all. Some of my favorites are Buttermilk Oven “Fried” Chicken, Cheesy Cauliflower Mash, and Warm Apple Pear Crumble.
 |
| Buttermilk Oven Fried Chicken |
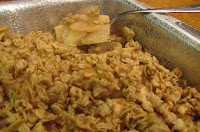 |
| Warm Apple Pear Crumble |
I’m in a cookbook group of 15 people. We each choose a book and then each book rotates to all the members. Skinnytaste was chosen last year and it was huge hit. Some of the participant's favorites were the Curried Chicken Salad, Mongolian Beef and Broccoli, Bangin’ Good Shrimp, and Chicken Cordon Bleu Meatballs. I think you will enjoy this cookbook as much as they did.
I asked my daughter Katie to join this challenge by cooking her favorite dish. She chose the Chicken Marsala on the Lighter Side and Roasted Sesame Green Beans. I think she did a great job, made this Momma very proud! I hope you enjoy it.
De-Lite-Ful Chicken Marsala
2 large (8 ounces each) boneless, skinless chicken breasts
salt
pepper
1/4 cup + 1/4 teaspoon all-purpose flour
1 Tablespoon unsalted butter
2 teaspoons olive oil
3 garlic cloves, minced
1/4 cup finely chopped yellow onion
8 ounces sliced cremini mushrooms
3 ounces mini portobello mushrooms
1/3 cup Marsala wine
1/2 cup 88% fat-free chicken broth
2 Tablespoons chopped fresh parsley
1. Begin by preheating your oven to 200°F.
2. Slice your chicken breast in two pieces, horizontally.
3. Take one chicken breast half, place between two pieces of plastic wrap, and gently pound with a meat mallet until it is about 1/4 inches thick. Repeat with the remaining chicken breast half.
4. Lightly salt and pepper the chicken breast halves.
5. Place the 1/4 cup of flour on a plate and lightly dredge the chicken breasts in the flour, shake off any excess.
6. Combine 1/2 Tablespoon of unsalted butter and 1 teaspoon of olive oil in large non-stick skillet on medium-high heat.
7. When butter has melted, add the chicken breasts to the pan. Cook until golden brown, about 3 minutes per side.
8. Transfer the chicken breasts to baking dish and place in the oven to stay warm.
9. Add the remaining butter and olive oil to the pan, reduce the heat to medium.
10. Add the garlic and onions. Cook for about 2 minutes or until soft and lightly browned.
11. Add the mushrooms, season with salt and pepper, and sauté for about 5 minutes.
12. Sprinkle the remaining 1/4 teaspoon flour over the mushrooms and stir until combined well.
13. Add the wine, the chicken broth, and the parsley, stirring until well incorporated, and sauce begins to thicken, about 2 minutes.
14. Return the chicken to the skillet, reduce heat to low, and cover skillet. Let simmer for 4-5 minutes.
15. Place one chicken breast half on each plate. Divide sauce/mushrooms between the plates. Serve with your favorite side.
As I said above, my daughter served hers with Roasted Sesame Green Beans, also in The Skinnytaste Cookbook. She made one change to that dish. Instead of furikake, she used sesame seeds.
Delicious, quick and easy! A big thanks to my daughter for participating and cooking a great dish for me.
 Our current sponsor is an industry giant - General Mills - who challenged us with creating recipes using some of their new-version cereals that have been updated to include absolutely no artificial flavors and no colors from artificial sources.


