Showing posts with label Entree. Show all posts

Monday, January 16, 2017

Fried Catfish So Good You Will Wanna Slap Ya Mama

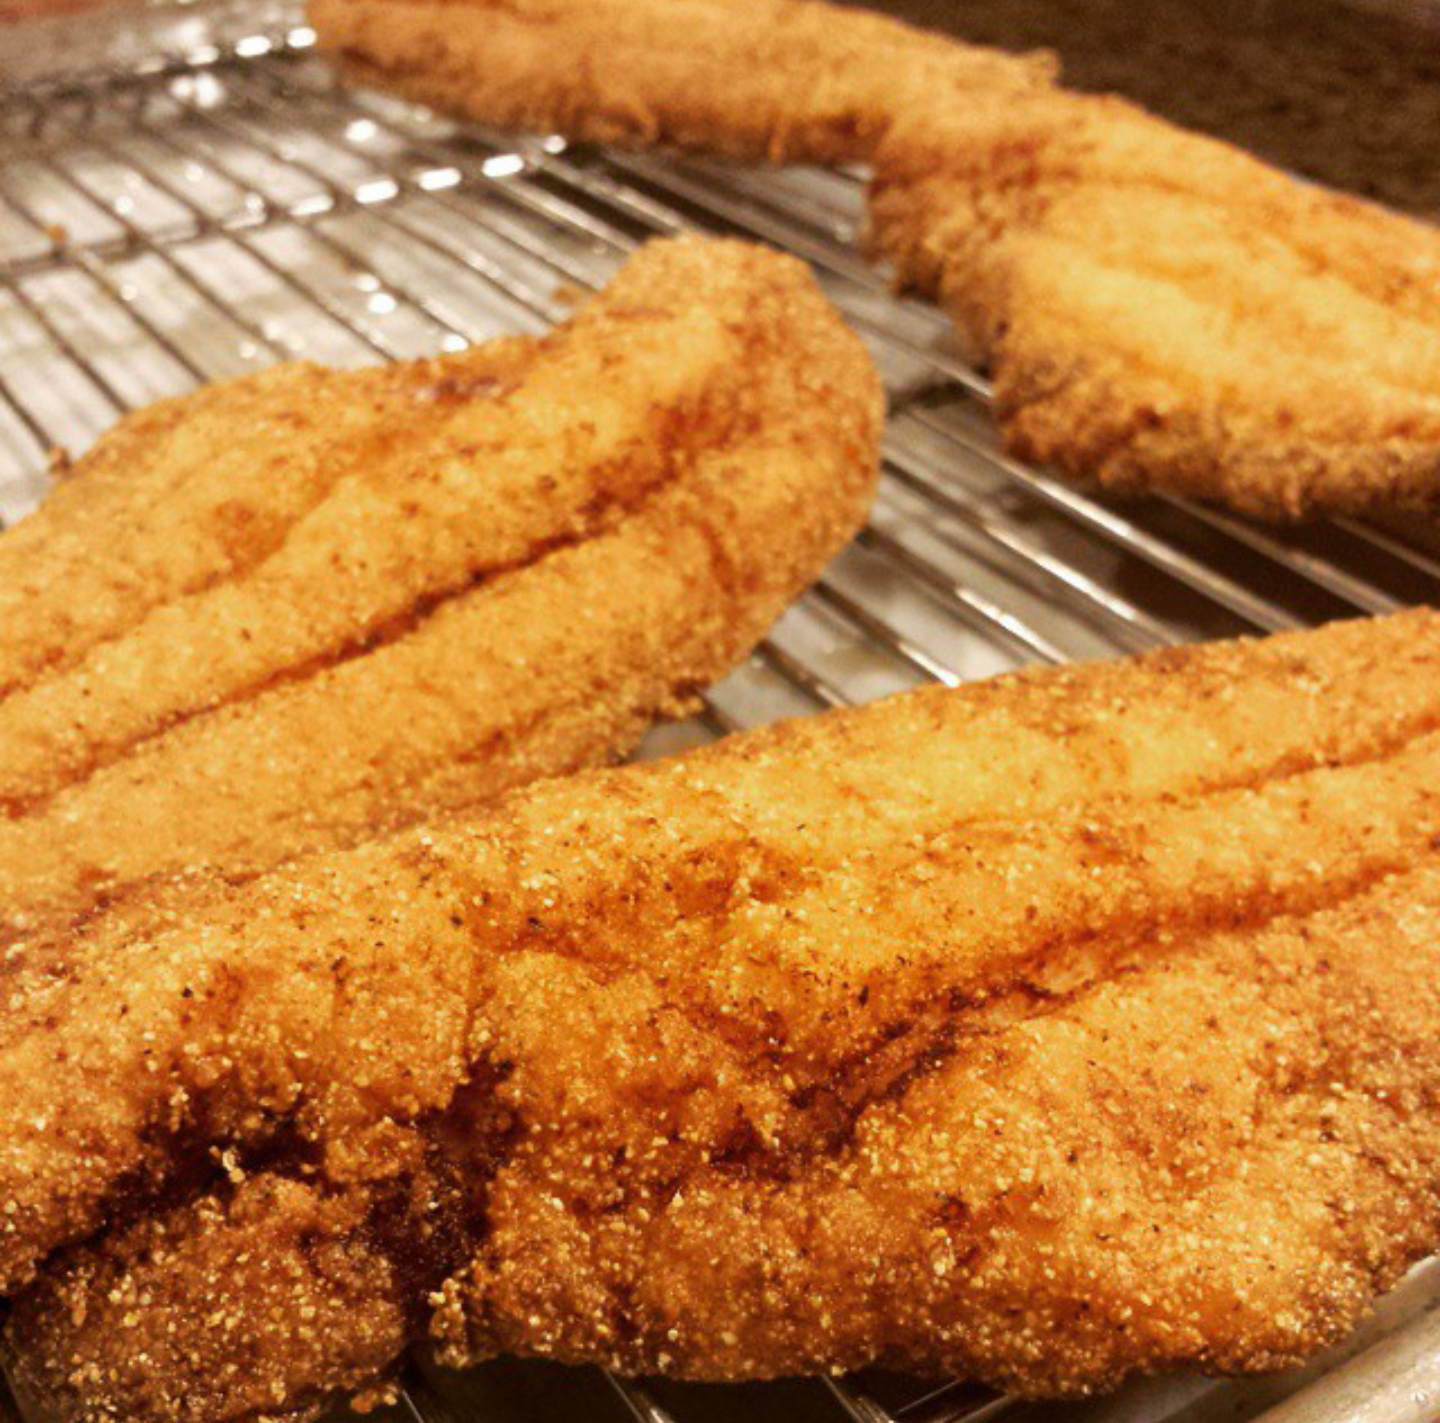
This is one of my favorite dishes that I make though not often enough. It is relatively simple, extremely messy and ridiculously good. You may want to consider frying it outside, I do when I remember.

When we started 37 Cooks with 2 gallons of Slap Ya Mama seasonings I had already fallen in love with the hot seasoning and was using it for everything. For some reason I never replaced the seasoning in my fish batter but when I did, wow! It gave the fish an attitude! It can be used for other fish but Mississippi farm raised catfish is so good!

Fried Catfish So Good You Will Wanna Slap Ya Mama
by Willie Simmons

4 large Mississippi farm raised or fresh caught catfish filets
1 quart buttermilk
2 cups all-purpose flour
1 cup corn meal (fine)
4 Tablespoons Slap Ya Mama Hot
Peanut oil

Start by putting the fish in a gallon zip-top bag or a deep baking pan with the buttermilk and soak for at least 2 hours.

Whisk the flour, corn meal and SYM together and place in a shallow dish.

Use a deep cast iron skillet. Pour in enough oil to cover the thickness of the filet. Preheat the oil to 325°F.

Drag the filets through the flour/corn meal and place on a baking rack for a 5-10 minutes.

Place 1 or 2 filets into the oil, depending on size of skillet. Fry 2-3 minutes on each side, or until crust becomes golden brown. I prefer to fry them a little longer, as I like crispier fish. We usually make more than we can eat and use the filets the next day to made unbelievable po-boy sandwiches. Enjoy!


Monday, December 19, 2016

Slow Cooked Ropa Vieja

I live in Texas. So when the temperatures drop below 80, it's time to pull out the slow cooker to let dinner cook slowly during the day. Why I associate a slow cooker with cooler weather is beyond me. It doesn't heat up the house. Plus, it's a major life saver when we are scrambling to get a healthy dinner on the table after work. I need to work on pulling out my Hamilton Beach Slow Cooker year round!

This recipe calls for many herbs and spices, but they are simple ones that you will have on hand. They create a hearty dish filled with so many layers of flavor. Simply served over a bed of white rice with a side of sautéed plantains makes a perfect Cuban meal.

Slow Cooked Ropa Vieja
By Tonda
Adapted from Authentic Cuban Shredded Beef "Ropa Vieja" Cubana from Just a Pinch

2 medium yellow onions, diced small
1 medium red bell pepper, sliced thin
1 medium yellow bell pepper, sliced thin
1 medium jar of fire roasted red peppers, sliced thin
20 jalapeno stuffed olives
3-4 pounds rump roast
8 cloves of garlic
1 handful curly parsley
6 sprigs cilantro
1 teaspoon dried oregano
1 teaspoon ground cumin
1 teaspoon garlic powder
1 packet Sazon Goya seasoning with Culantro and Achiote
1 teaspoon salt
1/2 teaspoon black pepper
2 Tablespoons apple cider vinegar
2 Tablespoons fresh lime juice
1 teaspoon Worcestershire sauce
1/4 cup white wine
1/4 Cup ketchup
1 small can tomato paste
1/2 cup beef broth
2 large bay leaves

Layer the onions, peppers and olives in the bottom of the slow cooker. Add the roast on top. Add garlic, parsley, cilantro to a small food processor and process until chopped fine. Add oregano, cumin, garlic powder, Goya seasoning, salt pepper, apple cider vinegar, lime juice, Worcestershire, and white wine. Process to blend all of the dry spices with the fresh herbs and garlic. Add ketchup, tomato paste and beef broth. Process again to blend. Pour mixture over the roast. Add 2 bay leaves. Set the Hamilton Beach slow cooker to low for 8 hours. Once the roast is ready, shred the beef in the cooking liquid. Serve over rice.

Enjoy!

Wednesday, December 14, 2016

Grilled Shrimp And Pineapple Skewers, With A Warm Coconut “Cocktail” Sauce!


Back in 2013, 37 Cooks started a group discussion about coconut oil. We realized we all had quite a bit to learn about coconut oil and many of the other coconut based products available. We had the opportunity to work with products from Tropical Traditions. We began experimenting and ultimately conquering our fear of cooking with coconut. When I received my jar of Tropical Traditions Coconut Cream Concentrate, I stared at it for several days before I had the courage to remove the lid and sample the coconut cream. I was amazed at the delightful flavor! My immediate thought was to stick with a “Tropical” themed recipe. What pairs well with coconut? Pineapple! I can’t resist grilled shrimp in the summer, so it was an easy decision once I realized how versatile the coconut cream could be. I am confident once you try this delicious recipe for grilled shrimp, you will be ready to start your own coconut journey.

Grilled Shrimp And Pineapple Skewers, With A Warm Coconut “Cocktail” Sauce!
By Susan Ritchie-Hubbard

1 1/2 pounds jumbo shrimp, peeled and deveined, tail on
1 fresh pineapple peeled, cored and cut into at least 1” chunks (reserving any juice)
1/3 cup Tropical Traditions Coconut Cream Concentrate (with a very rich coconut flavor, 1/3 cup is plenty!)
1/4 cup sour cream
1/4 cup good quality mayonnaise
1 Tablespoon sambal oelek
3 Tablespoons pineapple juice (I had enough pineapple juice from preparing the pineapple, but store bought is fine)
1/2 teaspoon sea salt
Metal or bamboo skewers (If using bamboo skewers, soak them in water for at least 30 minutes prior to grilling)

For the warm coconut cream cocktail sauce:
The coconut cream concentrate is just that. Concentrated! I warmed the coconut cream slightly on a low temperature in the microwave. Microwaves vary, but I did 20 seconds at 50% power. This resulted in a creamy consistency. Combine the coconut cream, sour cream, mayonnaise, sambal oelek, pineapple juice and sea salt in a bowl. It will solidify somewhat because of the coconut cream. Cover and refrigerate until you are ready to serve. This sweet and spicy cocktail sauce beautifully showcases the fresh, intense flavor of the coconut cream concentrate!

For the grilled shrimp:
Preheat the grill to high. Medium-high if you have WeberQ. Grilling at a high temperature helps caramelize the pineapple and gives the shrimp a very flavorful char. Alternate the shrimp and pineapple chunks on the skewers (I had enough pineapple to make an additional pineapple skewer). Grill the skewers until the shrimp are barely opaque, approximately 1-2 minutes per side. Transfer the shrimp and pineapple skewers to a clean plate and loosely cover with foil. Gently heat the coconut cream cocktail sauce in a small saucepan (over medium low heat) or in the microwave (at 50 % power), until it melts into a creamy sauce. If using the microwave, stir the coconut cream sauce every 30 seconds.

To serve:
Remove the shrimp and pineapple chucks from the skewers and arrange on a serving plate. (I happened to have some small bamboo cocktail picks, so I put 1 shrimp and 1 pineapple chunk on each pick.) Drizzle the coconut cream cocktail sauce over the shrimp and pineapple. If desired, garnish with additional chopped pineapple. Enjoy!

Wednesday, December 7, 2016

Steak Kue


My parents owned Gee's Restaurant in Houston, Texas for over 35 years. Opened in 1955, the menu featured dishes that were truly the epitome of Cantonese cuisine: Chicken Chow Mein, Egg Foo Young, Sweet & Sour Pork, Moo Goo Guy Pan, and War Shew Duck. I often wax nostalgic about the restaurant and these dishes, and make my own versions as often as I can. One of the classics on the menu was #66 - Steak Kue. At the restaurant, it called for searing one of our "Club Steaks" (boneless ribeye) on the flat top grill, which was on the "American" side of the kitchen, then carried over to the "Chinese" side of the kitchen. There it where would be cubed and added to a wok full of vegetables, and finished with a quick sauce that included "a Touch of Oyster Sauce."

For my version, I wanted a wok-friendly way to cook the steak, so I simply gave the cubed ribeye a quick flash stir-fry, then cooked all the vegetables, adding the steak back in at the end. The assortment of vegetables can be anything you wish, but the key to this dish is truly that "Touch of Oyster Sauce."

I hope you enjoy this retro recipe as much as I did!

Steak Kue
by Gary Gee
Serves 4

2 pounds boneless beef tenderloin or ribeye, cut into approximate 1" x 2" cubes
Coarse salt
Freshly ground black pepper
2 Tablespoons peanut or vegetable oil
1 teaspoon minced fresh ginger
1 teaspoon minced fresh garlic
2 cups coarsely chopped bok choy
1 large carrot, sliced into coins
1 cup sliced celery
4 stalks asparagus, chopped
4 oz crimini mushrooms, sliced
4 oz water chestnuts, sliced
4 green onions, chopped, plus more for garnish
1 Tablespoon light soy sauce
1 Tablespoon cooking sherry or white wine
1 Tablespoon dark soy sauce
2 Tablespoons oyster sauce
1/2 teaspoon cornstarch, mixed with
1 teaspoon warm water
1 Tablespoon toasted sesame oil

Heat a wok or large skillet over high heat. Season beef with salt and pepper. Add oil to wok, and swirl to coat. When oil begins to smoke, add beef in a single layer. Cook for 30 seconds or until beef begins to release from wok. Turn and cook another 30 seconds, until well-browned. Remove beef from wok, keeping warm on a platter. Leave behind only about 1 tablespoon of oil (add more if needed). Add ginger, garlic, and next 7 ingredients. Toss to combine. Add light soy sauce and sherry, stir, and cover for 1 minute to steam. Return beef and any accumulated juices to the wok, then add dark soy sauce, oyster sauce, and cornstarch slurry. Stir to combine, and cook until sauce forms and thickens, about 1 minute more. Drizzle with sesame oil, remove to a serving platter, garnish with green onions, and serve immediately with steamed white rice.

Tuesday, December 6, 2016

Chicken and Spinach Enchiladas

I’m not sure how “retro” a recipe is from 1986 but I ran into a problem finding my mother’s old recipe books. We recently packed up her house and they are all in a box in storage! So, I rummaged through my own collection and found my old “Southern Living 1986 Annual Recipes” book. It’s full of recipes that call for canned this or jarred that. I picked out a couple of recipes to try and landed on a chicken enchilada recipe. I thought I could surely make it super yummy without using canned cream of chicken soup! I added spinach to the recipe (my 13 year old son protested but I won). I also made a béchamel sauce using chicken stock and heavy cream to substitute for the canned condensed soup. It was a winner winner chicken dinner! Served it with doctored up canned black beans (yes, I did use canned beans). You can take the girl out of the 80’s but you can’t take the 80’s out of the girl!

Chicken and Spinach Enchiladas
by Maryjo
Adapted from the Easy Chicken Enchiladas recipe from Southern Living 1986 Annual Recipes

3 Tablespoons butter
3 Tablespoons flour
2 cups chicken stock (or broth)
1/2 teaspoon garlic powder
3 Tablespoons heavy cream
2 cups chopped cooked chicken
1 cup sour cream
2 cups packed fresh spinach
2 cups shredded Monterey Jack cheese
2 cups shredded sharp cheddar cheese
1 4-ounce can chopped green chiles
1/4 cup chopped onion
1 teaspoon salt
1/2 teaspoon black pepper
1 teaspoon ground cumin
12 fresh corn tortillas
Vegetable oil
1/2 cup shredded sharp cheddar cheese

Preheat oven to 350°F. In a medium saucepan, make a roux by melting the butter over medium high heat. When melted, add the flour, stir around until the flour is coated and continue to stir for about 3 minutes on medium high heat so that the flour taste will be cooked out of the sauce. Add the chicken stock and whisk until thickened, about 5 minutes. Add the garlic powder, stir, and set aside to cool.

In a large bowl, add the chopped cooked chicken, sour cream, spinach, Monterey Jack cheese, cheddar cheese, green chiles, chopped onion, salt, pepper, ground cumin, and the roux. Mix well.

Heat about 3 tablespoons of vegetable oil in a skillet and fry each corn tortilla for 5 seconds on each side (to soften them up). Add a little more oil if it runs low. Place the tortillas on a paper towel to drain.

Spray a 13 x 9 x 2-inch casserole dish with non-stick spray. Put about 1/3 cup of the chicken and spinach filling onto each tortilla, rolling them up and placing each tortilla seam side down in the casserole dish. Note: I had filling left over, which I put into a zip top bag and threw into the freezer for another quick meal another day.

Cover with foil and bake for 20 minutes. Remove foil and add the remaining ½ cup of shredded cheddar cheese. Change the oven from bake to broil and turn up the heat to 450ºF. Bake uncovered for an additional 5 minutes. Serve with sour cream, or pico de gallo, or sliced avocados, or black beans, or all of the above. Olé! 1986 Style!

Monday, December 5, 2016

Herbed Chicken Casserole

In the early 1980's, a friend of mine gave me this recipe. Over the years, this has proven to be my favorite dish for entertaining during the week. The casserole may be made the day ahead, refrigerated and then baked the day it is to be served.

Herbed Chicken Casserole
by Tamela K.

3 chicken breasts, cut in half
1/2 cup butter
Salt and pepper, to taste
3 cups rice, slightly under cooked and drained
1/4 cup chopped green onion
1 can cream of chicken soup
3/4 cup sauterne or white wine
1 5-ounce can sliced water chestnuts, drained
1 3-ounce can mushroom slices with liquid
1/2 teaspoon thyme

Preheat oven to 350°F.

Brown chicken breasts in melted butter on stove top in pan. Season the chicken with salt and pepper.
Place cooked rice in casserole dish with browned chicken on top. Saute the onions until soft in the pan which the chicken was browned. Add soup to the onions and stir until smooth. Slowly add sauterne or wine to onion mixture, stirring well. Add water chestnuts, mushrooms and thyme to the sauce pan.
Pour the mixture over chicken and rice. Cover and bake for an hour, or until tender.

Tuesday, November 29, 2016

Cheese Fondue

When this challenge was posted, my husband and I started talking about what "retro" recipes meant to each of us. For me, I think of Jello salads, bologna, and other American dishes that I am happy to never encounter again. For him, it's all about the classics...sauces, pâté, stuffed meats and veggies, and delectable desserts.

Francoise Bernard is a classic French cookbook author that my husband's Mamie would cook from all the time. We have her oldest copy of Les Recettes Faciles (Easy Recipes) from 1965 that is packed with his Mamie's newspaper and magazine clippings. I pulled this book from our shelf and flipped through it to see what classical French fare was. This book is filled with drool worthy recipes. Although, I did not choose a recipe from this book, it did give me an idea of what to make. Cheese fondue. My husband has perfected his recipe through the years and we always look forward to the weather getting cooler so he can make it. This is a recipe that he typically eyeballs amounts, which means that it turns out a little differently each time, but this time I followed him around for measurements!

Cheese Fondue
by Franck and Tonda
Serves 6

1 pound 12 month aged Gruyere cheese
1 pound Jarlsberg cheese
1 pound Comté cheese
6 cloves garlic
2 Tablespoons butter
1/2 to 3/4 bottle dry white wine such as Apremont from Savoie or Entre Deux Mers (Dry White Bordeaux)
1 1/2 Tablespoons Kirsh
Dash of paprika
1/4 teaspoon white pepper
1/8 teaspoon freshly grated nutmeg
Juice from 1/8 of a large lemon

Cut the cheese into 1/4 to 1/2-inch cubes. Do not shred the cheese. It will turn into a ball when melting it. Cut one clove of garlic in half and rub it on the inside of the cooking pot and fondue pot. Slice one clove of garlic in very thin and place it into the fondue pot. Melt 2 Tablespoons of butter, add four cloves of chopped garlic and sauté. Remove half of the garlic and add approximately 1/4 cup of wine to deglaze the pot. Add about 4 handfuls of cheese. It is important to stir the cheese in an 8 pattern until it melts. Otherwise, it will turn into a big ball in the pan. Alternate adding more wine (approximately 1/4 to 1/2 cup at a time) and cheese (3 to 4 handfuls) and continue until all of the cheese is melted to the consistency that you prefer. Make sure to continuously stir in the 8 pattern. You will use 1/2 to 3/4 bottle of wine. Add 1 1/2 Tablespoons Kirsh and a dash of paprika and stir. Stir in 1/4 teaspoon white pepper along with 1/8 teaspoon freshly grated nutmeg. Finally, stir in the juice from 1/8 of a large lemon. Transfer to the fondue pot.

Enjoy with cubes of baguette. An old French rule is whomever loses their baguette while dipping in the caquelon of cheese has to run around the block naked! Thankfully, it has not been enforced in my years of enjoying this meal.

Monday, November 28, 2016

Beef and Broccoli

Beef and Broccoli is one of the classic American Chinese dishes. It was invented in the 1800's, where immigrants from southern China would often adapt recipes from home and make use of local ingredients in North America. I remember eating this dish when my parents would take our family out for dinner at the local Chinese restaurant. The flavours and textures remain ingrained to memory and it was one of the first few dishes I had to make when I learned to cook Chinese food. I also have a memory of watching this dish being made on the show "Yan Can Cook", as a kid.

Having gained quite a bit of cooking experience since then, I've decided to create a spin on the recipe by applying some modern techniques and ideas to the dish. The idea for preparing the broccoli was inspired by the roasted broccoli at local hipster restaurants, and cooking the steak sous vide seemed like a natural fit. Although it diverges from the original version, it is just as delicious and enjoyable.

Note: We will be using the sous vide method to cook the steaks. Therefore, you will require a zip-top freezer bag, an immersion circulator and a container that is high enough to hold water, such as a medium-sized pot.

Beef and Broccoli
by Douglas

1 pound flank steak
Salt and pepper
Water
1/3 cup tahini
1 clove garlic
2 Tablespoon lemon juice
1 Tablespoon olive oil
1 head broccoli
Vegetable oil
1 Tablespoon light soy sauce
1 Tablespoon oyster sauce
1 Tablespoon butter
Parmesan cheese
Chili oil

If you have a large piece of flank steak, cut it along the grain so that you have pieces as wide as your palm. Start by seasoning the steak generously with salt and pepper, then place steaks into a zip-top freezer bag. Fill the medium-sized pot 3/4 full of water and dip the bag into the water, going no further than the top of the bag. This will push the air out of the bag and maximize the surface area between the meat and the water (also known as the water displacement method). Put the immersion circulator into the water and set the temperature for 125°F (i.e. cooked to rare, and you can increase to 135°F for medium-rare). Let it run for a minimum 45 minutes, or a maximum of 4 hours.

Meanwhile, add the tahini, garlic, lemon juice, and olive oil to a food processor and blend until smooth. Add water if the mixture still looks like a paste, until it has the texture of a smooth dressing. Load the dressing into a plastic squeeze bottle.

Wash broccoli and cut until you have a bunch of florets. Save the stems for another recipe. Place a medium-sized pot filled with water on the stove and set to high heat. Prepare a large bowl of ice and cold water and place next to the pot. Once the water is boiling, add a pinch of salt and a 2 tablespoons of vegetable oil. Drop the broccoli into the boiling water and let it cook for 60-90 seconds. Using a strainer, take the broccoli out of the boiling water and into the bowl of ice water. Once the broccoli has cooled, take them out of the bowl and on to a plate.

Place an aluminum or carbon steel pan on the stove and set to high heat. When the pan is very hot (carbon steel pans will start smoking), add 2 tablespoons of vegetable oil. Add the broccoli and stir briefly. Let it sit for about 30-60 seconds so that the broccoli develops char marks. Remove broccoli from pan and set aside. Wipe pan with a paper towel to remove any broccoli bits.

Once the steaks have cooked for the desired time, take the bags out of the water and shut off the immersion circulator. Remove steaks and pat dry with a paper towel. Place the pan used to cook the broccoli back on the stove on high heat. When the pan is hot, add 2 tablespoons of vegetable oil and place the steaks on the pan. This will create the crust on the outside of the steak. After 1-2 minutes, flip the steaks once, then remove after searing for another 1-2 minutes. Let the steaks rest on a plate and set aside.

Mix soy sauce, oyster sauce together and 1/8 cup of water in a mixing cup and mix together. Using the same pan that was used to cook the steaks, add butter. Once the butter has melted, add the soy sauce mixture to the pan to deglaze. Scrape any bits from the pan and then reduce to the desired consistency.

To plate the dish, place charred broccoli on to one side of a medium sized dish. Drizzle tahini sauce on top using the plastic squeeze bottle. Grate Parmesan cheese on top of broccoli using a micro-plane. Using as spoon, drizzle chili oil on top of the broccoli. Take the steaks to a cutting board and slice steak into thin slices. Place steak on to the plate and fan them out so that you can see the pink center. With a spoon, drizzle the soy/oyster sauce reduction on to the steak.

Tuesday, November 22, 2016

Chicken with Dressing

I just couldn't make up my mind on what retro dish I wanted to redo. To be honest, I never had this back in the 1960's-1980's, so I'm not really sure how it was made. I suspect that maybe there was canned soup and canned chicken involved.

Whenever I make something, I have to ask myself, will Mark eat this? I don't want to waste time or money on something he won't eat for dinner. He is pretty much a meat and potatoes guy, which is somewhat limiting! I was mulling over options in my head, and Chicken and Dressing came to mind. 
For about a year, we had a local woman who had a storefront. She sold oh so good, down home comfort food in single and family portions. She had so many wonderful options. To my dismay, there was a landlord dispute, and she was gone. One of my favorites was her Chicken and Dressing. I never thought she put in enough chicken, but I loved it anyway.

Growing up, my mom always used Pepperidge Farm Herb Seasoned Cubed Stuffing when she cooked our Thanksgiving meal. To this day, I also use it as my base when I make dressing. Mark prefers cornbread dressing, so that’s what I used here. We both loved this. I commented that it was a quick Thanksgiving knock-off meal. When Mark saw the chopped parsley on the top, he said, “Do I have to eat the leaves?” Seriously? 

Mark LOVES gravy, like it’s the sixth food group. I had some chicken gravy in the fridge from another dinner, so that made this just perfect. I'm making a double batch next time. We mowed through this like I was feeding an army.

Chicken with Dressing
by Sharyl W.

4 pounds chicken tenders
8 Tablespoons of butter, divided
4 Tablespoons of olive oil 
1 medium white onion, chopped
1 14-ounce bag of Pepperidge Farm Cornbread Stuffing
1 teaspoon poultry seasoning
3 cups of chicken broth, divided
Salt
Black pepper
3 Tablespoons fresh chopped, flat leaf parsley

Preheat oven to 350°F. 

Salt and pepper the chicken tenders. Heat 4 tablespoons of the butter, and olive oil, in a skillet, over medium high heat. When the oil/butter is hot, cook the chicken tenders until brown, and then turn over to cook the other side. They don't need to be cooked 100%, since they will finish cooking in the oven. Cook the chicken in several batches, so that the chicken isn't overcrowded. 

After all the chicken is cooked, add the chopped onions, and sauté until translucent. 

In a large bowl, add the package of Cornbread Stuffing Mix, poultry seasoning, 4 tablespoons of melted butter, 2 1/2 cups of chicken broth and the sautéed onions. Mix to combine. Chop the chicken into bite-sized pieces. Add the chicken to the dressing mix and combine. 

Brush the bottom and sides of a casserole dish, with melted butter. Spoon the chicken/dressing mix into the casserole dish. Pour the remaining 1/2 cup of chicken broth over the casserole. 

Bake, covered, for 30 minutes. Remove the foil, and bake for another 10 minutes, or until it’s hot. Garnish with fresh chopped parsley. Top individual servings with gravy, for an even moister dressing.

When reheating for leftovers, add more chicken broth to keep the casserole moist. 

Monday, November 21, 2016

Impossible Turkey Taco Pie

Do you remember when Impossible Pies were a big thing?

I do. I loved them. Or, being honest, I loved some of them. The taco pie was my favorite

The Impossible Pies were magical recipes that made their own "crust" as they baked. And they all used Bisquick to make that magical crust.

I was browsing through some old newspaper and magazine clippings I had saved and scanned, and I found a recipe for the Impossible Taco Pie that I liked so much, so I decided to make it again, to see if I still liked it.

But of course I made some changes.

I used turkey instead of beef, and I have to say that I doubt anyone could tell the difference in this recipe. Which is a good thing.

I didn't have any Bisquick in the house the first time I made this, but there are a lot of "make your own Bisquick" recipes online, so I figured I could do that rather than run to the store.

Nope. It didn't work. Not at all. I made it with Bisquick, and it was perfect. So, although that "make your own" recipe is probably a fine substitution for some recipes, it didn't work for this one. Maybe if I fiddled around with it some more, I could work it out, but that doesn't seem like a good use of my time.

Or my ingredients.

So now I have Bisquick. So it's a pretty sure bet I'll be making this again. Or maybe some other version of it. Because, seriously, this is comfort food, in the best possible way.

Panela cheese is interesting. It's a fresh cheese with a mild flavor. It softens when warm, but it doesn't really melt. So you'll end up with soft pockets of cheese in the pie, but they won't melt and get disappear into the pie.

Impossible Turkey Taco Pie
By Donna Currie, Cookistry

1 Tablespoon olive oil
1/2 large onion, diced
1 pound ground turkey
2 Tablespoons chili powder (or to taste)
1/2 teaspoon cumin
1/4 teaspoon garlic powder
1 teaspoon salt (or to taste)
1 fire-roasted red pepper, diced
4 ounces panela cheese, cut in small cubes
3/4 cup Bisquick
1 1/4 cup milk
3 eggs
1 4-ounce can diced Hatch chiles
4 ounces shredded provolone cheese
Diced tomatoes (as needed for garnish)
Diced avocado (as needed for garnish)
Green salsa (for garnish)

Green Salsa

8 medium tomatillos
1 small green pepper, cored and seeded
1 serrano pepper, cored and seeded
1 small bunch cilantro
1/2 teaspoon salt (or to taste)
2 teaspoons lime juice (or to taste)

Heat your oven to 400°F and have a 9-inch pie plate standing by.

To make the taco pie:
Heat the olive oil in a saute pan. Add the onion, turkey, chili powder, cumin, garlic powder, and salt. Cook, stirring as needed, until the turkey and onion is cooked through. Take it off the heat and add the roasted red pepper and the panela cheese.

Add the meat mixture to the pie plate and level it.

Mix the Bisquick, milk, and eggs in a medium bowl. Pour over the meat in the pan. Sprinkle the chiles on top.

Bake at 400°F for 25 minutes. Sprinkle the provolone cheese on top and return the pie to the oven. Bake for an additional 10 minutes, or until a knife inserted into the center of the pie comes out clean.

Let the pie rest for 5-10 minutes for easier slicing.

Garnish with chopped tomatoes, avocados, green salsa

To make the salsa:
Put all the ingredients in a blender, and blend until smooth.

Tuesday, November 15, 2016

Butternut Squash Ravioli with Brown Butter Sage Sauce

Please meet another one of our amazing new cooks, Brandie!

******************************************************************************

I was born and raised in Oklahoma. And ever since I was little, my dad had me doing prep-work for him in the kitchen. I was always the vegetable chopper and the taster. He just worked at a manufacturing plant, but cooking was his passion, and his hero was Emeril Lagasse. Every single day, he had his smoker going, even on holidays. Everyone in the neighborhood hated it, because you would smell like bar-b-que if you walked out of your house if you lived on our street, or even a few streets over.

My dad was always trying new things. Jalapeno jelly rub on a rock salt roast, or chili dog burritos (I did mention it was Oklahoma, right?). I remember once we dug a hole in the back yard to put hot coals in. We wrapped beef, mushrooms, bell peppers and onions in aluminum foil, put it on the coals and buried it for hours. When it was dinner time, we dug it up. I remember not being too impressed with the flavor, but getting to experiment with new ways of cooking was one of the ways I felt most free growing up.

When I was just in elementary school, my veggie of choice was not a vegetable at all, it was mushrooms. I'd take out the stem and stuff the mushroom with different things, cut them up and made a "floating mushroom soup" which was probably just chicken broth and other chopped vegetables with mushrooms floating on top. My dad had wanton wrappers and my sister and I would stuff mushrooms in those too.

As I got older, I was still trying to mature as a cook, though I believe I was using Cajun seasoning on nearly everything. In high school, my sister and I would prepare (what we imagined) were grand lunches for our friends. Some of the dishes were fairly ambitious for only having 40 minutes or so after driving to and from the school. Our biggest success was taco salad, I think. Cooking the shells, meat, heating the beans, chopping the lettuce, tomatoes, and making guacamole was a big feat to us two teens.

In college, I finally created my first really good recipe (that I still use to this day) at 24 years old; almond-crusted brown sugar chicken. I'm probably not the first person to combine these ingredients, but I was very proud of myself for putting a delicious dish together on my own rather than using a recipe. At that point, I was still using lots of frozen and canned ingredients.

Then, 5 and a half years ago, I moved to Portland. I couldn't believe how good even the bar food was here. I realized then the importance of fresh ingredients, and started buying more and more fresh veggies and locally raised meats. Now, the only frozen items I use are peas, and the meat I've purchased or helped my friends process on their farm.

About 3 years ago, I believe, is when I started becoming the home cook I am today. I put a picture of the dinner I made on Facebook, and my cousin (a chef in Oklahoma) told me I needed to work on my plating. "What? Why? I'm just going to eat it". But then, I started looking into plating, and realized what an incredible world I'd been missing out on. I find that when I do a search for whatever dish I'm trying to make and the word "plating", I find re-imagined dishes that inspire me even further. I come across recipes I'd never heard of before like "potatoes pave", and "Veloute".

Here are a few dishes I've made since learning to plate better
My cooking these days is part experimentation, part quilting recipes together. I'm still very much in the learning phase, but I think we should always be in this phase. When I see a dish somewhere, or my husband brings home a new vegetable I haven't cooked with much, I start researching. I look up a variety of things that can be made with whatever the ingredient is. Then, when I decide on a dish I want to make, I look up many variations of the dish. I look for commonalities among the recipes and weave them together, and either pick and choose alternate ingredients from the other recipes, or come up with something on my own.


Butternut Squash Ravioli with Brown Butter Sage Sauce
by Brandie Gaudette
Recipe adapted from Food Network's Roasted Butternut Squash Ravioli with a Sage Brown Butter Sauce by Emeril Lagasse

My husband brought home a butternut squash. He loves anything pumpkin or squashy any time of year, really. He's usually good about waiting until fall, though. I knew he wanted me to make ravioli though, because that's the only thing I've ever really made with butternut squash. This time, though, I did use most of the squash to make a butternut squash soup, but decided to share the ravioli recipe, because it's my favorite of the two. Additionally, this recipe is just for two, so double up if you've got more mouths to feed. My niece loves to help in the kitchen and so do my friends, so this is a good one to do with others as long as they're patient!

Pasta Dough:
3/4 cup of flour
1/4 teaspoon of salt
1 egg
1/2 teaspoon of olive oil

Pasta Filling:
1 butternut squash
Butter
1 shallot, chopped
Freshly grated nutmeg to taste
Salt and pepper to taste
2 Tablespoons of Pecorino
1/2 cup of cream

Brown Butter Sage Sauce:
1/2 cup of salted butter
Fresh sage

Garnish:
Sage leaves
Red peppercorns
Pecorino

Start by preheating your oven to 400°F. Cut the stem off the top of the butternut squash, then cut in half lengthwise. Scoop out the seeds, then lay cut-side up on a slightly greased cookie sheet. Use any amount of softened butter you'd like to cover the cut side of the butternut squash, then sprinkle with salt and pepper. I like to put a dollop of butter in the scooped out part of the squash also. That way, periodically while it's baking, I can dip a brush in the butter, and baste the squash throughout the cook-time. Bake for one hour.

While the squash is baking, you should have plenty of time to make the dough and let it rest. Combine the flour and salt into your mixer with the flat beater attachment. Add the egg, and olive oil, and increase the mixer speed until dough is sticking together well (which should only take a minute). Take the dough out "work the dough" by folding it over and pushing it into itself. Do this until your dough looks consistent and can form a nice, tight ball that "springs" back slightly when you make an indent. Cover your ball with clear wrap and let it rest for at least 30 minutes at room temperature.

Once the squash is soft, take it out of the oven and let cool before scooping the squash out of it's skin and puree. Measure out two cups for the filling and reserve the rest to make a butternut squash soup (like I did!) or add it to a broth to use for butternut squash risotto.

Heat a pan with olive oil, and saute the chopped shallot until translucent and slightly golden (medium heat). If the pan is dry, add more olive oil, or at this step, you can choose to add butter instead. Add the two cups of butternut squash puree and saute until the mixture becomes slightly dry. While sauteing, add salt, pepper. Add in the cream, Pecorino, and nutmeg. At this point, I like to use my immersion blender to make the filling smooth, but it's fine to leave it as is. Make sure the mixture is thick enough that it's not runny. Let mixture cool to room temperature.

Once your mixture is cooled you can start rolling out your pasta. You don't want to roll your pasta out ahead of time because it will dry out if you leave it too long. I like to cut my dough into quarters like so:

I do this so that when I'm done cutting out the raviolis from one quarter, I can take the extra dough and roll it out into the next quarter creating less waste. When you roll out pasta (if you have a pasta machine), you pass the pasta through the largest setting several times folding it in half once before putting it through. You want to make sure your pasta dough is a nice, consistent color and texture before putting it through the thinner settings. I pass mine through all the way down to 7 before cutting the raviolis.

For the raviolis, I use a cookie cutter. There may be easier ways, but I like the look of big, plump raviolis in a bowl. I cut out two circles per ravioli, take one side in my hand, place a tablespoon of filling in the center, dip my finger in water to run around the edge of the bottom circle of pasta, then place another circle on top, pinching the edges together and pushing out any air. You want the edge of the ravioli to be as thin as the center, so make sure you're putting some pressure in when you're pinching the sides together. As long as your dough is still pliable, you shouldn't have a problem. If your dough got dried too much, try using a little more water, and using the tines of a fork to press the outside edge together.

This part of the process is usually the fun part to have help on as it's the most time consuming. I usually like to have 5 or six big raviolis per person.

When you're nearing the finish line for putting the raviolis together, put a pot of water on high to boil (make sure to add salt!). Once the water is boiling, put the raviolis in for no more than 2 minutes. Drain the raviolis.

To make the brown butter sage sauce, put half a stick up butter in a pan on medium heat. Right before the butter starts to brown, add minced sage leaves. Once butter is brown, add in raviolis and delicately move them around in the pan with the butter. Do this for only a few minutes.

Place Raviolis in each bowl delicately, and drizzle a tablespoon or two over the top of each. Crack pink peppercorns over the top, and grate some Pecorino over each bowl.

For the garnish, I also like to fry up a few sage leaves in some olive oil, and salt them immediately after removing them from the pan. Voila! Butternut squash ravioli in brown butter sage sauce!
Wednesday, November 2, 2016

Southwestern Burrito Bowl

Hi readers! We are so happy and excited to announce that we will be introducing you to a few new members of 37 Cooks! First up, please meet Sarah Dyer!

******************************************************************************

I consider myself an accidental cook. Having spent most of my childhood outside, I never really found myself drawn to the kitchen. It wasn't until I was a twenty-something living on my own, realizing that frequent dining out was not fiscally responsible, that I fell in love with food. I stumbled my way through the first year or two, learning everything I could from blogs, cookbooks and the occasional cooking show until I really came into my own. A few salty dinners, last-minute take out, and several smoke alarms later, I can proudly say that I made it through the awkward puberty stage of an accomplished cook.

These days, I spend most of my time cooking, writing, and photographing recipes for my blog, Away From the Box, as well as laughing with (sometimes at) my favorite taste testers: My soon-to-be-husband, Kevin, and our dog Milo.

I wouldn't put my cooking into any particular box (get it?) as I try almost every cuisine or method of cooking at least a few times, but I definitely have a real connection with Latin flavors. I love dishes with root vegetables and a subtle kick of spice.

To me, photographing food is just as much fun as making it, so you'll often see me playing with lots of color (if you couldn't already tell by my hair)! My dishes always strive to be as much of a showpiece as they are delicious. The recipe below is not only gorgeous, but also inspired by one of the very first meals I ever mastered in the kitchen. I hope you enjoy it!

Southwestern Burrito Bowl
by Sarah D.
Blogging at Away From the Box
Inspired by Cake & Allie's Southwestern Egg Rolls with Avocado Ranch
Yields 4 hearty bowls

For the Rice:
1/8 cup vegetable or canola oil
1 cup uncooked long grain white rice
4 ounces tomato sauce
1/2 teaspoon cumin
1 teaspoon garlic salt
1/2 teaspoon oregano
2 cups chicken or vegetable broth

For the Toppings:
2 Tablespoons canola or vegetable oil
1 yellow onion, sliced into rings
Black beans, cooked, rinsed and drained
2 roma tomatoes, diced
Corn, steamed and drained
Carrots, diced, steamed and drained
Spinach, chopped, steamed and squeezed dry with a paper towel
Red cabbage, chopped roughly
1 jalapeno, sliced thinly into rounds
1 avocado
Sour cream or plain Greek yogurt (optional)

Place the oil and uncooked rice in a medium skillet over medium heat and saute, stirring occasionally, for about 5 minutes until the rice turns white.

Add the tomato sauce, cumin, garlic salt, oregano and broth to the skillet and stir until combined. Reduce heat to a simmer and cook, covered with a heavy lid, for about 15 minutes. Do not remove the lid.

After the 15 minutes, remove from heat and let sit for another 5 minutes. Uncover and fluff with a fork. The rice should be dry and not gummy (unless the lid was lifted) and can be made ahead of time if needed.

While the rice is cooking, heat the canola or vegetable oil in a small skillet over medium high heat. Toss in the onions, making sure to coat each piece in oil.

Cook for about 20 minutes, stirring or tossing often with a pair of tongs. The onions should be soft and translucent, slightly browned and smelling sweet. You can continue cooking for a deeper caramelization or stop now, as they should finish around the time the rice does.

For easy preparation, use the steamable frozen bags of vegetables for the corn, carrots, spinach and black beans. Using canned or cooking from fresh is also an option, but takes more time.

In a bowl, layer about 1/2 cup of rice, the sautéed onions, black beans, tomatoes, corn, carrots, spinach, red cabbage and jalapeno to your tastes. Remove the pit from the avocado and make a cross hatch pattern in the flesh, then scoop onto the top of the bowls, leaving the skin behind. Drizzle with sour cream or plain Greek yogurt and enjoy!

Tuesday, November 1, 2016

Danish Meatballs


When I was little, my mom had a set of 18 McCall's cookbooks. I adored thumbing through each and every one. I loved the pictures, especially in the cookie, cake and dessert books. That same set of books is mine now. They're like old friends. They're tattered and worn, but I still love thumbing through them.

When I was in junior high school, my mom went back to work. I suddenly found myself in charge of making dinner one or two nights a week, but I had very little cooking experience. One of my first cooking attempts was Danish Meatballs from volume 6 of that old McCall's set...the "Book of Marvelous Meats". It seemed like an easy enough recipe at the time, but I quickly found out that my lack of cooking expertise was a bit of a problem. Browning meatballs in a skillet turned out to be much harder than I anticipated. The meatballs fell apart, so I scrambled the hamburger mixture together instead. The gravy ended up as a lumpy, doughy, salty mess. And I served this disastrous meal to my poor parents. My dad, I'm sure not wanting to hurt my feelings, managed to eat this awful concoction, but my mom just couldn't do it, and who could blame her? I remember how upset I was that I had made such a terrible meal, but now it's a story that makes my mom and I laugh when it comes up.

Fast forward to present day. I'm happy to report that I am a much better cook than back then (fortunately for my husband). I still can't fry a meatball in a skillet worth a darn (hey, we all have our issues), but baking meatballs works out just fine and dandy.

When our Retro Recipe Redo challenge came up, I decided it was time to redeem myself. So I made that old Danish Meatball recipe and it turned out great. This is what I would call a "comfort food" recipe, especially when served along with some good ol' mashed potatoes and a veggie.

Danish Meatballs
by Susan W.
Adapted from McCall's Book of Marvelous Meats (1965)
Makes approximately 18 meatballs

For the meatballs:
2 pounds ground chuck
1/3 cup finely chopped Italian parsley
1 cup finely chopped onion
1 1/2 teaspoons kosher salt
3/4 teaspoon ground black pepper
1/2 teaspoon mace (nutmeg is a good substitute)
3/4 cup all-purpose flour, divided
3/4 cup milk
1 egg
2 Tablespoons butter

For the sauce:
2 teaspoons beef flavored Better Than Bouillon (equal to 2 cubes regular bouillon)
2 Tablespoons drippings from meatballs
2 Tablespoons all-purpose flour
2 cups boiling water
Salt and pepper to taste

2 Tablespoons finely chopped Italian parsley for garnish.

For the meatballs:
In a large bowl, combine together the ground chuck, Italian parsley, chopped onion, salt, pepper, mace (or nutmeg) and 1/4 cup of the flour. Add the milk and egg and mix well. Refrigerate for one hour.

One the mixture has chilled, preheat your oven to 375°F. Form the meat mixture into 18 equal sized meatballs. Roll each meatball in the remaining 1/2 cup of flour and set aside on a plate.

On a large baking sheet lined with foil, place the 2 Tablespoons of butter and put into the preheated oven to melt. Once the butter has melted, remove the baking sheet from the oven. Distribute melted butter evenly and place the meatballs on the baking sheet, spacing them evenly. Bake meatballs for 35 minutes, or until done, turning once halfway through. When they are done, remove to a heat-proof dish and keep warm.

For the sauce:
In a bowl, stir together the Better Than Bouillon, 2 Tablespoons of the meatball drippings, and the flour. Gradually whisk in 2 cups of boiling water. Pour into a saucepan and heat until smooth and thickened. Add salt and pepper to taste. The Better Than Bouillon (or regular bouillon also, for that matter) already tends to be a bit salty, so be careful how much extra salt you add.

Spoon some of the sauce over the meatballs, sprinkle on some parsley for garnish and have the remaining sauce on the table for spooning over the meatballs or even over mashed potatoes!


Thursday, September 8, 2016

Savory Chicken & Goat Cheese Tart

Whether you’re making sweet or savory tarts, there are so many delicious options to enjoy. And, when my kids are home for family dinner on Sunday, this is often their request. Tarts are relatively easy to make, but much easier when you have a couple of extra hands around, as we often do during our family dinners. Hope you enjoy them as much as we do!

Savory Chicken & Goat Cheese Tart
by Lori Churchill
Serves 6

Pastry Dough - Adapted from my mom’s Savory Pastry Dough Recipe:

1 cup King Arthur whole wheat flour
1 cup quinoa flour
1 cup unsalted butter - cold
1 teaspoon salt
1 Tablespoon sugar
1/4 cup plus 2 Tablespoons - ice water

Filling:

1 red onion - medium
2-3 Tablespoons butter
Salt and pepper
1 tomato - medium
2 chicken breasts
2 Tablespoons Better Than Bouillon - Chicken Paste
2 Tablespoons parsley
1 Tablespoon basil
1/2 teaspoon black pepper
6 Tablespoons goat cheese
Jay D's Louisiana Molasses Mustard
6 tart pans - 4.5 inches wide by 3.75 inches deep

Begin by adding your dry ingredients to a food processor and quickly pulse a couple of times to mix together. Pour approximately 1 cup of water in another bowl, add ice and allow to chill. Cut butter into 1/2-inch pats, then quarters. Butter should be kept cold until use and handled as little as possible. Add butter to flour mixture in food processor and pulse until it’s about the consistency of very course bread crumbs. Add 1/4 cup water plus 2 Tablespoons and gently pulse until dough comes together. Utah is a very dry climate, so depending on where you live, you may not need the additional 2 Tablespoons of water. Divide dough into 6 even pieces, wrap in plastic wrap and flatten like a small disc, then chill for at least 30 minutes.

Slice onion into 1/4-inch rings, then slice rings in half. Slowly caramelize in butter, adding salt and pepper to taste

Slice tomatoes into 1/4-inch thick slices. You’ll need one slice for each tart. Place them on a cookie sheet with parchment paper and lightly sprinkle with salt to draw the juices out. Set aside for 30 to 45 minutes or while your chicken breasts are slowly cooking.

Place chicken breast in a sauce pan and add just enough water to cover by about an inch. Add chicken bouillon paste, parsley, basil and pepper. Bring to a boil then reduce heat and cook slowly until chicken is easily shredded with a fork. Remove from sauce pan, let cool then shred chicken and add 1/2 cup of Jay D’s Molasses Mustard, mix well.  Divide the chicken filling into six equal portions and set aside. Save the remaining broth for small pot of soup later in the week.

Assemble Tarts:

Brush each tart pan with butter. One by one, roll out the individual dough rounds to 2 inches larger than the base of your tart pan. Place each dough round in a tart pan, making sure not to handle the dough too much. Once all six tart pans have the dough in them, brush the bottom area of the dough with 1 teaspoon of Jay D’s Molasses Mustard Sauce. Add 2 tablespoons of caramelized onions, 1 slice of tomato, one portion of shredded chicken, and 1 tablespoon of goat cheese crumbled over the top. Fold the sides of the dough over the filling, making five folded edges. Add a sprinkle of pepper.

Place the tarts on a cookie sheet in a 375°F oven for 45 minutes or until golden brown. Then place on a cooling rack until you can easily remove the tarts from their pan.

Enjoy!

Tuesday, September 6, 2016

Shish Kebabs with Beef Marinade

With barbecue season in full swing. Jay D's barbecue sauce is a welcome addition to barbecue season. This marinade will make the cheapest cuts tender. You will want to make a double batch of the sauce, as one batch was not enough to marinade and serve with the cooked kebabs

Shish Kebabs with Beef Marinade
by Nancy Follwell
Recipe adapted from my mom

1 pound steak cubes (I used top round)
1 yellow pepper, large chunks
1 yellow onion, large chunks
10 shish kebab skewers

Soak skewers in cold water while making the marinade (recipe follows). Drain the beef cubes from the marinade and alternate beef, peppers and onions on the skewers.. Before placing on the grill, baste both sides with more marinade. Grill kebabs until done to your liking. Serve kebabs with warmed Steak Marinade.

Steak Marinade

1/2 cup Jay D's Louisiana Barbecue Sauce
1/2 cup ketchup
1/2 cup water
1 teaspoon salt
1 teaspoon pepper
2 teaspoons sugar
2 teaspoons vinegar
2 teaspoons Worcestershire sauce
2 teaspoons oil

Make double batch of marinade. Add ingredients to a small pot and heat to boiling. Let cool to warm and pour over the meat (do not pour the boiling Steak Marinade over the beef or it will cook the meat).  Let rest for several hours, overnight is best. Drain meat and add remaining marinade to a small pot, heat and serve with the cooked kebabs.

Monday, September 5, 2016

Pulled Pork and Peach Quesadillas with Jay D's Louisiana Molasses Mustard

As soon as I tasted Jay D's Louisiana Molasses Mustard I though of Sid's smoked butt and Ruston peaches. I'm not sure if the weather has delayed the peach crop or if my memory of peaches in June is crazy. I drove through Ruston last weekend just hoping to see peaches for sale, no such luck. The ones I found in my favorite grocery store were still just fine. This recipe was really done to my taste and can be adjusted as you like. I'm keeping my eyes open for Ruston peaches and ordering some more of Jay's sauces. My boys are all thrilled because they had all been threatened if they touched them before I got my recipe done.

I started with a pork butt Sid smoked overnight. He rubbed it down with his favorite rub and smoked it 14 hours at 250°F. I reserved one pound to use for this recipe.

Pulled Pork and Peach Quesadillas with Jay D's Louisiana Molasses Mustard
by Melissa Cook

1 pound of pulled pork
1 1/2 peach, sliced 1/4-inch thick
Jay D's Louisiana Molasses Mustard - 1/3 cup plus 3 Tablespoons and 3 teaspoons, divided
6 corn tortillas
1 cup Cojita cheese, crumbled
1/3 cup Crema Mexicana
Purple onion, diced small
Cilantro
Lime wedges

While the smoker is still warm, toss the peach slices in 3 Tablespoons of Jay D's Louisiana Molasses Mustard. Place them in the smoker for 20 minutes. Shred the pork and toss it in 1/3 cup of the Molasses Mustard. Once the peaches are warm, dice them and add them to the pork. Mix 1/3 cup Crema Mexican and 3 teaspoons of the Molasses Mustard. Reserve to garnish.

Heat a cast iron skillet over medium heat and place a corn tortilla in it. Sprinkle a layer of Cojita cheese on the tortilla, place the peach and pork mixture over it and top it with a second corn tortilla. Once the cheese begins to melt and the tortilla becomes golden brown, flip the quesadilla and cook until cheese is melted and both sides are golden brown.

Cut in triangles and garnish with Crema, cilantro and purple onions.

Wednesday, August 31, 2016

Shrimp Po’Boy with Molasses Mustard Remoulade

The first time I enjoyed a po’ boy was in New Orleans. I heard many stories about the origin of the sandwich, all very entertaining. One thing is certain. A traditional po’ boy starts with both fried shrimp and fried oysters served on a baguette. A properly “dressed” po’ boy has mayonnaise or remoulade, lettuce, tomato and dill pickle. When we received the delightful Jay D’s Louisiana Molasses Mustard (Jay Ducote competed on The Next Food Network Star) I knew I was going to make my version of a shrimp po’ boy! I opted for a lighter version of the classic po’ boy by grilling shrimp instead of frying. Where a typical remoulade calls for creole mustard, Jay D’s Louisiana Molasses Mustard elevated my remoulade to a whole new level! Jay D’s amazing line of products are hand crafted in Baton Rouge, Louisiana.

Shrimp Po’Boy with Molasses Mustard Remoulade
by Susan Ritchie-Hubbard

For the Shrimp Marinade~
¼ cup vegetable or canola oil
1 teaspoon fresh thyme leaves, lightly chopped
1 teaspoon fresh oregano leaves, lightly chopped
2 garlic cloves, small chop
¼ teaspoon cayenne pepper
½ teaspoon smoked sweet paprika
½ teaspoon kosher salt
¼ teaspoon fresh cracked black pepper
2 pounds large shrimp, peeled, deveined, tails removed

For the Molasses Mustard Remoulade~
½ cup mayonnaise, (I used Hellman’s)
½ cup Jay D’s Louisiana Molasses Mustard1 large celery rib, finely diced
2 scallions, thinly sliced (white and light green parts only)
3 cloves garlic, minced
1 Tablespoon capers, drained and roughly chopped
2 Tablespoons chopped flat leaf parsley
1 teaspoon Worcestershire sauce
½ teaspoon hot sauce (I used Frank’s)
Juice of half a lemon
Kosher salt and fresh cracked black pepper to taste.

For the Po’ Boys~
2 Baguettes, ends removed, cut in half across, sliced lengthwise, but not completely through
Remoulade
Grilled shrimp
Shredded iceberg lettuce
Chopped dill pickle
Sliced garden tomatoes
Hot sauce, optional

Prepare the marinade by combining all ingredients in a large bowl. Add the shrimp and toss to make sure all of the shrimp are completely coated with the marinade. Cover with plastic wrap and refrigerate for at least 2 hours. I always try for about 4 hours. In another bowl, combine all of the ingredients for the remoulade. Cover with plastic wrap and refrigerate. You will end up with about 1½ cups of remoulade. About 45 minutes to an hour before assembling the po’ boy sandwiches, remove the remoulade form the refrigerator and let it come back to room temperature.

Preheat your grill to the highest temperature possible. I like to use metal skewers to grill my shrimp. (If you have wood skewers, make sure you soak them in very hot water for at least 30 minutes before cooking the shrimp.) Skewer the shrimp, making sure they are not crowded on the skewer. When your grill is screaming hot, grill the shrimp until they are just cooked through, approximately 1-2 minutes per side.

Time to assemble the po’ boy! Truthfully, I am not a “bread” person. I love the crust as long as it is super crispy. The inside doughy part? Not so much. When I make this sandwich, I always slice to the lower half and I scoop the top half of the baguette. But, that’s just how I like a sandwich! Spread as much remoulade as you would enjoy on each side of the baguette. Layer the shrimp, shredded lettuce, pickle and tomato. Drizzle with hot sauce if desired. I like that extra bit of heat. I also serve additional remoulade on the side so guests can decide how much they would like. When you taste this incredible remoulade, you will want a little extra too!

Tuesday, August 30, 2016

BBQ Beef Short Rib Steamed Buns

BBQ Beef Short Rib Steamed Buns
by Sarah Kwan of earthlydelightsblog.com
Makes 8 medium buns or 12 small buns

Steamed Buns

1 1/2 cups flour
1 1/2 tsp baking powder
1 teaspoon sugar
1 teaspoon instant yeast
1/2 cup lukewarm water
1 teaspoon canola or vegetable oil

Whisk together the flour, baking powder, sugar and yeast in a bowl. Make a small well in the center.

Mix together water and oil, then pour slowly into the flour, whisking it in and working in the flour slowly.

Knead the dough gently until it's evenly textured and smooth. If the dough sticks to your hands, spread a tiny bit of oil on them to prevent sticking

Place the dough into a lightly oiled boil and cover with cling wrap. Let rise about 45 minutes in a warm place, until the dough is approximately doubled in size.

(Note: At this point, you can refrigerate the dough until you are ready to make the buns.)

Cut the dough into 8 pieces for medium buns or 12 pieces for small buns.

Form each piece into a ball, then roll out into a circle about 1/4" thick, or slightly thinner.

Brush each piece of rolled out dough with oil on one side - this will make it easy to open the bun after it's steamed - then fold it in half and place it on a piece of parchment paper.

Set aside and let rise for about 20-30 minutes, then steam in a bamboo steamer or shallow pan over boiling water for 7-8 minutes.

When cooked, move the buns on their parchment paper to a cooling rack to prevent water from gathering beneath the bun and making it soggy (you can skip this if you're using the bamboo steamer, as the slats in the steamer will naturally prevent this).

If not using right away, you can freeze the steamed buns and reheat them by steaming them for a few minutes.

BBQ Beef Short Ribs

2 pounds beef short ribs
2 tablespoons paprika
1 tablespoon brown sugar
1 teaspoon kosher salt
3/4 teaspoon cayenne pepper
1/2 teaspoon cumin
1 teaspoon garlic powder
1/2 teaspoon ground black pepper
1/4 teaspoon ground cinnamon
1/4 teaspoon ground allspice
Jay D's Louisiana Barbecue Sauce

Mix together the dry ingredients and rub over the ribs (or use a favorite dry rub of your own). Cover and let sit in the refrigerator overnight.

Preheat the oven to 350°F, then roast, covered, on the middle rack for 2 hours.

Turn on the grill and set to medium heat, then grill the ribs until warmed through and lightly crispy on the edges, flipping and brushing every 4-5 minutes or so with Jay D's Louisiana Barbecue Sauce (total grilling time about 20 minutes).

Let cool for about 5 minutes, then tear into small chunks with a fork, removing the bones.

Stir in 1/4 cup of Jay D's Louisiana Barbecue Sauce.

To assemble:

Steamed buns
BBQ beef short ribs
Slivers of red onion
Cilantro leaves
Julienned cucumber
Fresh corn kernels (cut from 1 corn cob)

Place a few slivers of red onion in a bun, then top with a few cilantro leaves. Pile in some of the beef short ribs, the top with julienned cucumber and corn kernels. Serve with more Jay D's Louisiana Barbecue Sauce on the side.

Thursday, August 25, 2016

BBQ Pulled Corned Beef Sandwich

Pork and chicken are the most popular pulled meat for sandwiches, but why not use another type? Corned beef is rarely used outside of St. Patrick’s Day in the United States and I think that needs to change. It is a protein that I really enjoy, so I knew that I was going to use it as my protein with Jay's BBQ sauce. It was a perfect choice with the tangy BBQ sauce.

BBQ Pulled Corned Beef Sandwich
by Lindsay blogging at Kitchen Musings Today
Serves 4-6

2 -2 1/2 pounds corned beef
1 1/2 cups apple juice
1 1/2 cups Jay D's Louisiana Barbecue Sauce, more for serving
Prepared coleslaw, optional
Burger buns

Place rinsed corned beef and included spices and apple juice into your slow cooker. Add enough water to cover the corned beef. Cook on low heat 8-10 hours until tender. Remove from your slow cooker, discard fat, and shred.

Place shredded corned beef in a saucepan over low heat and add 1 1/2 cups of Jay D’s Louisiana Barbecue Sauce and stir to coat the meat. If it is not completely coated add more BBQ sauce.

Toast the buns, pile high with corned beef, drizzle with BBQ sauce and top with coleslaw.