Showing posts with label Woo. Show all posts

Friday, June 3, 2016

Galbi Jjim aka Korean Soy Braised Short Ribs for a school night

This is a quick weeknight version of a traditional Korean dish called kalbi jjim, aka beef short ribs braised in soy sauce. The traditional recipe usually involves preparing the dish a day in advance to allow the flavors to meld and is frequently seen at large celebratory gatherings. Well, I love it and think people should be able to enjoy this type of meal any day of the week...even a school night with nothing to celebrate beyond enjoying a good meal. The Instant Pot is kind of a no-brainer tool for helping to achieve that kind of meal when you're short on time and energy.

Galbi Jjim aka Korean Soy Braised Short Ribs
by Woo

3/4 cup soy sauce
1/8 cup dry sherry
1/2 cup chicken stock (homemade, or if using store bought stock use a low or no salt version)
2 Tablespoons sesame oil (I used Kadoya brand, widely available, toasty, not too dark)
4 Tablespoons organic light brown sugar (some versions of this dish are much sweeter, adjust to your preference, but don't completely eliminate the sugar, it is needed to balance the soy sauce)
2.25 pounds boneless short ribs, trimmed of excess fat, cut into large pieces (2" - 3" chunks)
1/2 medium onion, peeled and chopped
1-inch sized piece of ginger, peeled, and finely chopped
1 medium Asian pear peeled, cored and chopped
5 large cloves of garlic, peeled and chopped
4 waxy potatoes. peeled and cubed, set aside
2 large carrots, washed, peeled and cut into 1.5" sections, set aside
1/2 medium onion peeled and chopped, set aside
1/4 teaspoon of ground black pepper
1/4 teaspoon crushed red pepper flakes (optional)
1/2 Tablespoon corn starch
Sliced green onions (optional)
Toasted sesame seeds (optional)

Add all ingredients for the braising liquid into the Instant Pot liner. Stir to dissolve the sugar. Add the beef, first portion of onion, ginger, pear, and garlic to the liquid in the Instant Pot. Give it a stir to evenly distribute all the different components. Make sure the lid is seated properly. I love the easy locking mechanism. Set on the pre-programmed Stew/Meat setting and let it do its thing. This is when you should be starting some rice in your rice cooker or on the stove. After about 25 minutes, the Instant Pot will beep to tell you it's done. Quick Release. If desired, strain and degrease the broth using a gravy separator, or gently push aside the chunks of meat and just skim off the excess fat from the top. The onion, garlic, and pear will have disintegrated into the braising liquid. If you like a slightly thicker sauce, reserve about 1/4 cup of the braising liquid to dissolve some corn starch and keep the remainder of the cooking liquid in the Instant Pot.

Add the vegetables you've set aside: Potatoes, carrots, onion, cook 5 minutes low pressure (and the black pepper and crushed red pepper flakes, if using). Meanwhile, dissolve 1/2 Tablespoon of corn starch in the reserved 1/4 cup of the braising liquid. After five minutes, Quick Release.
Set on Saute, high heat and add the reserved 1/4 cup of liquid with the dissolved cornstarch and bring up to a fast simmer until thickened slightly...this is not supposed to be a thick sauce, but it should have a little body and coat the meat and vegetables. Hit the Cancel button to turn off the heat. Put the lid back on to allow everything to calm down and allow the flavors to become integrated. Garnish with slices of green onions for a pop of freshness and color and a sprinkle of toasted sesame seeds. Optional but really nice. Serve with rice and kimchi.

Now go finish your homework  ;)

Monday, December 21, 2015

Ham and Pea Risotto with Swiss Chard

My approach to cooking is to find inspiration all around me. Cookbooks, magazines, TV shows, what’s in the fridge, what’s on sale, what’s in season, what IS the season, all are sources of inspiration. Now I have a new source of inspiration. The Recipe Dice from Leafcutter Designs. The little glass jar is about the size of my spice jars and fits perfectly in my spice drawer.

Yesterday, I finally had some time off and no commitments other than to do what I want. And I wanted to cook. I opened up the spice drawer and saw the Recipe Dice and thought, “well, let’s give ‘em a roll.” I’m sure they came with suggestions on how to use them, but of course I promptly misplaced them. Simply put, these are dice. One just needs to roll them.

This roll turned up pork, rice, Parmesan cheese, Swiss chard, bell peppers, squash, Brussels sprouts, garlic, rutabaga, lemon, and mint. I checked my fridge to see what I had: A big chunk of ham, various bits of cheeses, Swiss chard…okay this was promising. I check my pantry and find Arborio rice…in my head an idea is coming together. I eliminate a few veggies and dial into what my brain and my stomach are telling me. I’m thinking risotto. With ham. And peas. And lots of cheese, not just Parmesan. I think I need the Swiss chard as a foil for the richness of the risotto. Now, I’m zipping around the kitchen thinking about risotto. I’m also feeling quite pleased with myself for having made several quarts of chicken stock a few weeks earlier and stashed it in the freezer. Yes. This dish was meant to be.

Ham and Pea Risotto with Swiss Chard
by Woo

Two bunches of Swiss chard (I used rainbow chard, so colorful)
3-4 large cloves of garlic, sliced
2 Tablespoons of extra virgin olive oil
Pinch of crushed red pepper flakes (or two pinches)
Salt
Lemon wedge

Before starting the risotto, prep the chard. Chop, wash, and drain the chard. Set aside. Peel 3-4 large cloves of garlic and slice. In a large skillet add two Tablespoons of extra virgin olive oil, the garlic, two big pinches of crushed red pepper flakes. Heat the large skillet containing the olive oil and garlic. When the garlic is just starting to color, add the majority of the chard, salt, layer the remaining chard, salt. Using tongs, turn or stir the chard to cook evenly and quickly sauté. Remove from heat. Set aside. Just before the risotto is finished, reheat briefly, squeeze a little lemon juice over the chard or sprinkle a touch of red wine vinegar.

1/4 cup extra virgin olive oil
3/4 cup of finely chopped onion
1 heaping cup Arborio rice
1/2 cup dry white wine
6 cups of homemade chicken broth (more or less), simmering
1 cup of diced fully cooked smoked ham
1 cup of sweet baby peas (I used frozen)
Half a small log of goat cheese
3 Tablespoons of cream cheese
2 Tablespoons Parmesan cheese
4 Tablespoons butter
Salt and white pepper to taste

Heat the olive oil in a heavy saucepan over medium heat. Add the finely chopped onion and cook until almost melted in texture and golden. Stirring as needed. This took me about 10 minutes. Add the Arborio rice and stir to coat in the olive oil and get the rice grains slightly toasted about a minute or two. Increase the heat a tad. Add the white wine. Stir constantly. When the wine is half absorbed add a cup of the simmering chicken broth. It should just cover the rice. Stir, stir, stir. When the broth has absorbed into the rice, add another ladle and stir. (Fire the chard. Heat the large skillet containing the olive oil and garlic. When the garlic is just starting to color, add the majority of the chard, salt, layer the remaining chard, salt. Using tongs, turn or stir the chard to cook evenly. Don’t forget to stir the risotto! Remove chard from heat. Set aside. Just before serving squeeze a little lemon juice over the chard or sprinkle a touch of red wine vinegar.) Repeat until the rice is almost ready, add the ham and peas, and one more ladle of broth. Stir. Add the cheeses. Stir until incorporated. Adjust seasoning. Add butter and stir well. Use a little more broth to adjust the consistency. I like a risotto that “relaxes” into the bowl or plate instead of piling up like a hill. Serve the ham and pea risotto with a big tangled mess of the sautéed chard on top. The chard adds texture and a brightness to the rich risotto. Trust me on this pairing. It works.

Tuesday, October 27, 2015

Thai Buffalo Peanut Sauce over Zoodle Salad

Man, these Buffalo Nuts by Truly Good Foods are AWESOME! My husband was in agony because I let him have a sample and then told him he couldn’t have anymore. LOL! I’m mean! I made this recipe for him today and I think he’s going to forgive me. So, if you can resist eating the Buffalo Nuts by the fistful, try this recipe!

Thai Buffalo Peanut Sauce over Zoodle Salad
by Woo

1 1/4 cup Truly Good Foods Buffalo Nuts, divided
13.5 ounce can of coconut milk
2 Tablespoon of fish sauce
1 Tablespoon of soy sauce
Zest of half a lime
Juice of half a lime
1 large garlic clove, smashed and minced
3 slices of peeled, fresh ginger (about the size of a quarter), smashed and minced
3 Tablespoons of agave nectar (or brown sugar)
1 teaspoon of sesame oil
Sambal olek to taste (optional)

1 small zucchini
1 yellow squash
Handful of red and gold cherry tomatoes
6 sugar snap peas
1 green onion, thinly sliced
Mix of fresh tender herbs: mint, cilantro, basil

Chop 1/4 cup of the Buffalo Nuts and set aside. Place the remaining cup of nuts into a blender with the rest of the ingredients up through the sesame oil. Blend on high until smooth. I used a Vitamix and it took about three to four minutes. Adjust seasoning with salt and pepper. I thought this had a pleasant amount of heat. If you like it spicier, add the sambal olek to taste.

I used a spiral cutter to shred the squash into “noodles” or “Zoodles”. Halve or quarter the cherry tomatoes, slice the sugar snap peas on the bias, slice the green onion, and toss everything into a big bowl. Add about 1/2 cup of Thai Buffalo Peanut Sauce and gently toss to coat. Garnish with the remaining chopped peanuts. Chiffonade a few leaves of each of the herbs and sprinkle over the salad.

Wednesday, October 7, 2015

Blackened Pumpkin Seed Romesco with *Grilled Vegetables

Romesco is traditionally made with almonds, but with all the drought issues in California and knowing how much water the California almond industry uses, I’ve looked for alternative nuts and seeds in recipes. I decided to try Truly Good Foods Blackened Pumpkin Seeds in place of the almonds in a classic Romesco sauce. It’s a great substitute and I didn’t miss the almonds at all.

Romesco is a versatile sauce/condiment from Spain that is usually served at room temperature. It is great on grilled/sautéed fish, grilled chicken, grilled or steamed vegetables, and even on sandwiches! It is essentially ground almonds, roasted red bell peppers, olive oil, a bit of stale bread, some tomato, maybe a bit of chili pepper, a touch of garlic. I’ve seen it without tomato, but always with peppers, bread and almonds. Here’s my rebel version without the water-hogging almonds.

Blackened Pumpkin Seed Romesco with *Grilled Vegetables

by Woo

3 ripe tomatoes--roasted, peeled, seeded, save any liquid
1 head of garlic--roasted, pulp mashed
1 large red bell pepper (2 if small)--roasted/peeled/seeded
3/4 cup of Truly Good Foods Blackened Pumpkin Seeds
1 slice of stale bread--torn and toasted
1/8 teaspoon ground Ancho chile powder
1/4 cup of extra virgin olive oil
2 Tablespoons of sherry vinegar (or to taste)
2-4 dashes of Worcestershire (sooo not traditional)
Salt and pepper to taste

Combine first six ingredients in a food processor, pulse to combine, then process for 2 minutes. With the machine running, drizzle the olive oil and add the sherry vinegar one Tablespoon at a time. Turn off machine and taste. Adjust seasoning with a few dashes of Worcesterhsire, additional vinegar, salt and pepper. If the mixture is too thick, add a touch of water, one Tablespoon at a time.

Yields a little more than 2 cups.

*Grilled Vegetables--I used a mix of zucchini, yellow squash, asparagus, baby bellas, and shishito peppers. Brush with olive oil, season with salt and pepper. Grill over medium heat.

P.S. Don’t forget, it’s awesome on grilled fish!

Thursday, August 6, 2015

Mediterranean Burgers

I live in Indianapolis and I was trying to track down some really good feta. My search took me to a shop that advertised itself online as specializing in Greek and Mediterranean items. I meandered around the shop, a little overwhelmed by the array of spices, cheeses (6 brands of feta!), pickles, contraptions. I took the shop owner’s recommendation and brought home a Bulgarian feta. I know. Bulgarian feta? What? But I’m really glad I put my faith in the shop owner. This feta is so creamy, slightly tangy and just enough brine. It slices and cubes beautifully for OCD people and yet crumbles just as easily.

Sorry, this is a long tangential story to say that I’m really into the wide array of flavors coming from the countries surrounding the Mediterranean and its lesser seas. All too often, when I think of Mediterranean flavors, I think “Greece” or “Italy” maybe “Spain” and kinda stop, but of course there are the North African countries (hello, Morocco!), Middle Eastern countries, and then the landmass loops back around to the East European countries. When I look at the food and dominant flavors, I don't see distinct borders. I see the Mediterranean flowing into the Aegean or the Ionian into the Adriatic. I see more commonality and fewer differences. I’m not getting into the politics of the varying conflicts in our world and I’m not naïve enough to think that having one giant dinner party would solve our world’s problems (though that would be kinda awesome), but I do think it’s important to remember our commonality across cultures and borders and how it all flows.

With that in mind, I developed this recipe while on a Greek food kick and happened to shop at a Mediterranean store which opened my eyes to the wide range of flavors and condiments of the region while noting the similarities from one culture to the next. If I’ve inspired you to explore the flavors that I’m writing about, then I’ve accomplished something today.

Mediterranean Burgers
by Woo

1 small zucchini, grated, sprinkled with 1/4 teaspoon salt
1/3 cup finely diced onion
1/4 cup chopped flat leaf parsley
10 large mint leaves, chopped
1/2 teaspoon harissa (substitute sambal olek or other chili paste, but try to find the harissa)
1/2 teaspoon ground cumin
1/4 teaspoon smoked paprika
1/4 teaspoon ground allspice
1/4 teaspoon ground coriander
1 1/2 pounds of Cluck 'n Moo Ground
2 ounces of feta, crumbled
Salt and pepper to taste

The grated and salted zucchini will release some water. Squeeze the excess water from the zucchini wrapped in paper towels or a cloth. Add to a large mixing bowl along with the onion, parsley, mint, and harissa. Toss gently to distribute the harissa. Sprinkle the dried spices evenly over all. Toss to combine. Add the Cluck 'n Moo Ground and crumbled feta and combine gently using both hands. I know, it’s raw meat, but I think you get the best results from mixing by hand. Try not to over work the mixture. Form 6 patties and keep covered in refrigerator until ready to cook. Season with a bit of salt and pepper before cooking.

Preheat a large heavy-bottom skillet, swirl a bit of oil and add the burgers. Do not crowd the pan. Cook for 3-4 minutes on medium/medium-high, flip, cover and cook for another 4-5 minutes on medium. Remove the lid for the last two minutes of cooking. Adjust the heat and times as needed to cook through (internal temperature should be 165°F.)

Serve with tomato and cucumber salad, garnish with crumbled feta, tzatziki, with or without buns (we went the lettuce wrap route, good, but messy!) and more harissa!

Wednesday, March 18, 2015

One Pan Dinner: Roasted Root Vegetables with Bilinski's Kale Balsamic Chicken Sausage

Hunter and I have resolved to be more conscious of how we live and that includes what we eat. He's quit smoking, we're working out and we are eating cleaner. Roasting vegetables is an easy way to eat clean. It's dead simple and is a technique that works for a myriad of veggies. Bonus, you get dinner on the table without spending a lot of time standing at the stove. I usually roast more than I need for one meal, because I can always use leftover roasted vegetables in salads, soups or frittatas. Sometimes I will have half an onion, a bit of fennel bulb, random cauliflower pieces, whatever, I just roast it all together. So don’t feel bound by the combination of vegetables I used, feel free to use whatever you have that needs eating. Adding any Bilinski's Chicken Sausage to a pan of roasting vegetables couldn't be easier.

One Pan Dinner: Roasted Root Vegetables with Bilinski's Kale Balsamic Chicken Sausage
by Woo

1 carrot
1 parsnip, woody centers removed as needed
1 small sweet potato
A quarter of a rutabaga (I know, who has a quarter of a rutabaga? I did and I have no explanation)
1 small fresh fennel bulb, sliced into wedges (or half a big one, or none if you don’t like fennel)
Half a small onion, sliced into wedges
5 cloves garlic, peeled and sliced in half (don't worry, it caramelizes)
3 Tablespoons olive oil, divided
Kosher salt and pepper to taste
Pinch of crushed red pepper flakes
Bilinski's Kale Balsamic Chicken Sausage
1 Tablespoon balsamic vinegar (I used Trader Joe’s Aged Balsamic. If you have balsamic reduction or saba, it would be a great substitute.)

Preheat oven to 450°F. Line a rimmed sheet pan with parchment paper.

Peel the carrot, parsnip, sweet potato and rutabaga. Slice into uniform chunks so they cook at the same rate. Remember, the smaller the dice the faster they will cook. I kept mine about an inch thick. Slice the fennel bulb and onion into wedges so that the wedges are still connected at the base. Mound all the vegetables and the garlic onto the parchment-lined baking sheet and drizzle with about 2 Tablespoons of the olive oil. Using your hands, toss to coat evenly, spread out the vegetables in a single layer. Use plenty of olive oil to ensure that everything cooks evenly and gets nicely golden without drying out. Season with kosher salt, freshly ground pepper, a pinch of crushed red pepper flakes.

Bake for 15 minutes. Meanwhile, slice the Bilinski's Kale Balsamic Chicken Sausage and toss with a little olive oil. Once the vegetables have roasted about 15 minutes, add the sausage and roast an additional 10-15 minutes until the sausage is heated through and the vegetables are tender and golden brown along the edges. Remove from oven and drizzle with a splash of balsamic vinegar and a little more olive oil. I served a little salad of kale, radicchio, dried cranberries and pumpkin seeds with this.

Thursday, July 24, 2014

Three Sisters Hush Puppies

Did y'all know Indiana is famous for its corn? No? Well, it's true. We get amazing sweet corn at the farmer's markets every summer. Maybe it's so good because it's so fresh. Maybe it's the soil and climate. Or maybe it's the people who grow it. I don't know. I do know I buy fresh corn practically every week and I will add fresh corn to any dish that I want to add a bit of texture and sweetness. These hush puppies originally call for the corn to be cooked prior to adding to the batter, but Indiana sweet corn is so good fresh that I just cut the kernels right off the cob and into the batter. (If your fresh corn isn't delicious raw, consider moving to Indiana and be my neighbor!)  

Three Sisters Hush Puppies
by Woo

1 1/2 cups of cornmeal
1/2 cup of all-purpose flour
2 1/4 teaspoons baking powder
1 teaspoons salt
1 teaspoons ground black pepper
2 eggs
1 cup buttermilk
1/4 cup diced yellow onion
1/2 cup cooked black beans
1/2 cup fresh whole corn kernels cut from the cob
1/2 cup grated zucchini
1 fresh jalapeno, finely diced (optional)
6 cups peanut oil for frying.

Preheat deep fryer to 360°F. In a medium mixing bowl, whisk together all the dry ingredients. In a small bowl, beat the two eggs and add the buttermilk, mixing well. Add the egg mixture to the dry ingredients and mix until well blended. Stir in the onion, beans, corn, zucchini, and jalapeno until well distributed throughout the batter.

Using a small cookie scoop, gently slide a scoop of batter into the hot oil. The hush puppy will puff and begin floating within one minute. Flip the hush puppy so it cooks and browns evenly. Allow to cook for about 5 minutes. Drain on paper towels. Serve immediately.

The cookbook author recommends serving these with her recipe for Roasted Crema on page 54. I think that would be an excellent sauce for these hush puppies.  

Tuesday, June 17, 2014

Cajun-Asian Fried Rice

We all have "those days" and sometimes "those weeks" where nothing you planned goes according to plan. Sometimes those days are so hectic that even figuring out what to eat is a challenge. Paradoxically, those days are usually the days that you need the food to comfort you, as well as sustain you. One of my go-to meals during those times is fried rice topped with a fried egg. What is more comforting than the luxuriousness of a runny yolk soaking into a big bowl of carbs? I throw in whatever vegetables I have and a bit of meat and something for spice, top it with a fried egg or two, and I can usually find my happy place again. So, I guess it wasn't all bad this past week because I got to eat this fried rice twice!

I like how the smokiness of the bacon mixes with the aromatic sesame oil. The Jambalaya mix has a great slow heat that creeps up on you and the kimchi adds a bit of heat, too. I definitely recommend topping with a runny egg, but if you don't like runny yolks then try filling an omelet with this fried rice.

Wednesday, February 26, 2014

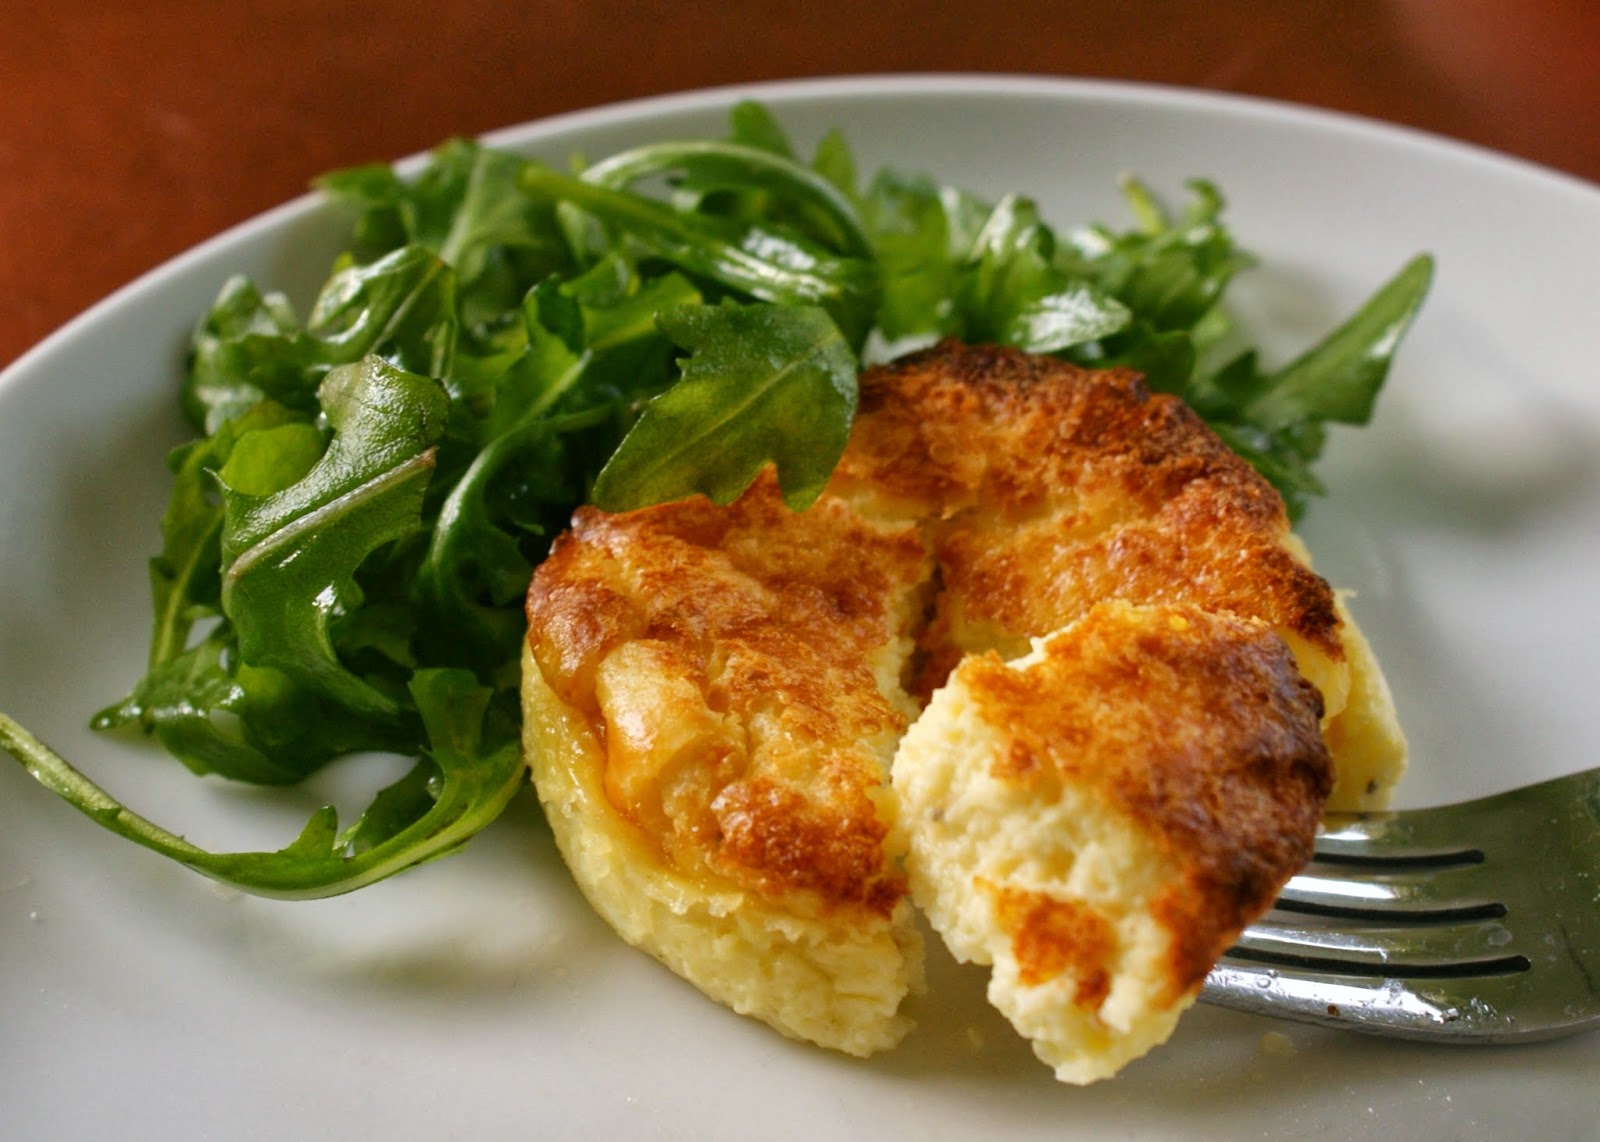
Parmesan Sformato - Italian Cheese "Flan" or "Souffle"

My husband and I traveled to Italy last year. We went to Venice, Lake Como, Tuscan hill towns, Bologna, Florence, Pisa, Cinque Terre. We ate amazing food; drank great wine; practiced what little Italian we know; marveled over the architecture and scenery; and tried to absorb centuries of history and culture. It was awesome. We are looking forward to the day we can return to do a Southern tour of Italy!

Wednesday, February 5, 2014

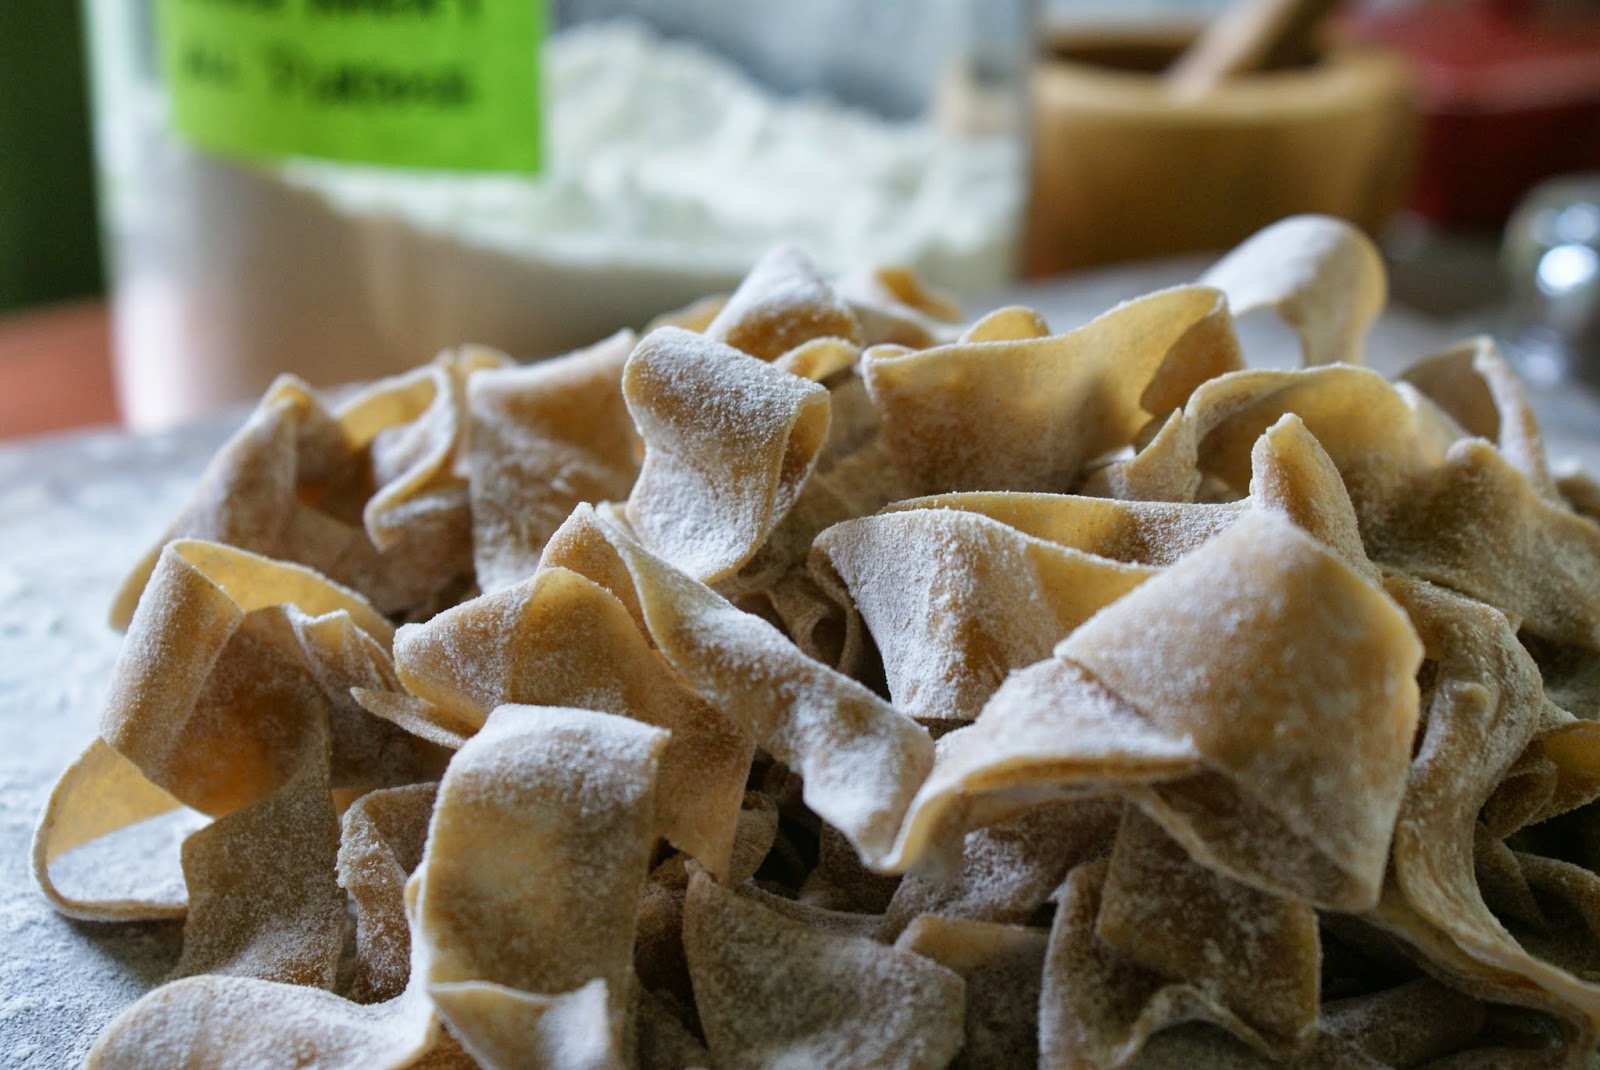
Porcini Pappardell​e Dough

You know how you just love certain foods from the very first moment you taste it? I fell in love with porcini mushrooms the very first time I had it a loooooong time ago at a fancy schmancy restaurant in Miami. It wasn't even my entree. My BFF's cousin ordered it and I just had a taste and I'll never ever forget it. To me, porcini mushrooms have the mushroomiest flavor of any mushroom. They reach out and grab you by the shoulders and yell, "THIS IS A MUSHROOM!" Powdered porcini takes that flavor and intensifies it by, oh, roughly a hundredfold. You can always make your own porcini powder from dried porcini, or buy it powdered. The Spice House powdered porcini mushroom is finely ground and is easily incorporated into sauces or whatever else you're inspired to make...like porcini pasta dough!


Portobella and Porcini Cream Sauce

Mushrooms and cream are a classic match. Combine them with handmade pasta and you have an instant comfort dish. As the winter blues settle over the MidWest, I find myself indulging in rich, creamy, carby dishes. This sauce is fabulous paired with anything from pasta or rice to chicken or beef.


Friday, December 27, 2013

Zucchini and Goat Cheese Tart

This dish is beautiful and would make a lovely addition to your special New Year's Eve dinner. - 37 Cooks


Zucchini and Goat Cheese Tart
by Woo

serves 2 generously or 4 lightly

1 sheet of puff pastry (I used Pepperidge Farm, thawed and unfolded)
1 medium zucchini with a nice uniform shape 
1 medium yellow squash with a uniform shape
1 small onion, finely diced
1 clove of garlic, finely minced
1 sprig of fresh thyme
4 ounces goat cheese, softened
1/4 cup ricotta cheese
1 Tablespoon finely grated Parmesan cheese
1 egg, beaten, for glazing
olive oil for sauté
salt and pepper to taste (seriously season everything as you go)

Wednesday, June 5, 2013

Two Salads by Woo

Olive oil is a staple in my kitchen.  I use it so often I thought coming up with a recipe for Sciabica would be a piece of cake.  Olive oil cake… then my fellow 37 Cooks starting posting their recipes and I realized there’s going to be a few olive oil cakes.  Maybe I should do something else.  Ice cream goes with cake…but my ice cream maker is still sitting on the shelf at Costco.  I hemmed and hawed and cooked every day and used olive oil every day.  (Oops, I lied.  We went out one night and the menu inspired another recipe.  More on that later.)  But nothing seemed worthy of a recipe post.  I mean, if you use it every day, it isn’t special enough.  WRONG! 
I realized that’s exactly what makes olive oil so wonderful.  Its versatility is exactly the reason it’s special.  So, I decided I would just write about the very next thing I made.  

Arugula was looking fabulous at my grocery store.  Not the baby arugula in the clear plastic box, but a big bunch of mature arugula with dirt clinging to the fleshy stems.  The spicy fragrance hit me as soon as I touched it.  I knew it would be a salad dressed with nothing but olive oil, salt & pepper, and ribbons of parmesan cheese.  It is the simplest of salads and one of those “greater than the sum of its parts” dealios.

Friday, May 24, 2013

Lavender Berry Gin Fizz and More...

Sciabica’s Lavender infused olive oil smells glorious. Secondly, it’s a lovely scented moisturizer. Thirdly, it is surprising how many flavors work well with lavender. Lavender is not just floral. It has citrus, herbal, and white pepper notes, too. It is marvelously complex. I found myself adding a few drops to almost anything, just to see what it was like. Like the Lavender Blackberry Vinaigrette. I just made a normal vinaigrette, added a little blackberry puree, and a little lavender olive oil to taste. Here’s a few other things I tried:

Friday, May 3, 2013

Meet Woo!

I'm Korean American, grew up in the South, and married a Southern boy who wooed me with barbecue. We are currently living in the Midwest with our two dogs.

My favorite food is fried chicken with a bunch of sides...and a dish of kimchi. Try it. Otherwise, serve it with Champagne. No, really. Champagne is also good with barbecue. Again, not joking. Aside from fried chicken, my food preferences run the gamut from global to local; from haute cuisine to peasant food; from

Monday, September 10, 2012

Zucchini and Goat Cheese Tart


Zucchini and Goat Cheese Tart
by Woo Brower

I love zucchini.  Silky sautéed, sweet and smoky grilled, grated into muffins or breads, simmered or gratineed, I love zucchini.  This summer I’ve been in love with zucchini ribbons.  Thinly sliced and salted, the raw ribbons become pliant and tender.  I’ve been adding them to salads.  I’ve been wrapping them around cheese fillings.  One of my friends uses zucchini ribbons in place of pasta.  Actually she’s the one who got me hooked on raw zucchini ribbons (yeah, you Mandy). 

Today I decided to make a squash tart.  Well, I should say I decided to make a tart because I found a foil wrapped packet in the freezer which turned out to be a lonely sheet of puff pastry.  AND because my friends in 37 Cooks have been engaged in a pie challenge.  I love pies.  A Dutch apple pie is my absolute favorite pie, but it’s not apple season yet. And I’d rather use something seasonal.  And knock out a meal while I’m at it.  So a savory tart came to mind.  Plus, I like the word “tart.”  It’s a noun, an adjective, and a verb!  Hussy, trollop, ho.  Sour, sharp, acidic, attitude.  Get gussied up, flirt about and around.  Wait, sorry, what was I saying?  Oh yeah, the tart:

1 small onion
splash of balsamic vinegar (about a TBS or two)
2 cloves of garlic finely minced, divided
1 medium zucchini with a nice uniform shape
     sliced into ribbons on a mandoline
1 medium yellow squash with a uniform shape
     sliced into ribbons on a mandoline
1 sprig of fresh thyme
1/3 cup of ricotta cheese
1/4 cup goat cheese
1 TBS finely grated parmesan cheese
1 egg lightly beaten
1 sheet of puff pastry (Pepperidge Farm)
olive oil for sauté
salt and pepper to taste

Slice onion and sauté with a little olive oil and garlic over medium heat.  Allow onion to caramelize, season with salt and pepper.  Deglaze with a splash of balsamic vinegar.  Continue to cook until vinegar is reduced and onions are evenly glazed.  Remove onions from heat and set aside to cool.

On a clean, lint free kitchen towel or large, clean cutting board, lay out the ribbons of squash in a single layer.  Lightly sprinkle with kosher salt.  Set aside for 30 minutes to allow salt to draw moisture from the squash.  After 30 minutes blot up the moisture with paper towels or clean cloth.  I needed 5 ribbons of zucchini and 6 ribbons of yellow squash to make the lattice top.  The number of ribbons you’ll need will depend on the squash size and shape. 

With the remaining squash and zucchini, finely dice or slice into matchsticks, sauté with olive oil and garlic, season with a pinch of fresh thyme and a bit of ground pepper.  Remember it’s already been salted so taste before adding additional salt.  Set aside to cool.

Beat 1 egg and set aside about 1 TBS of egg.  To the remaining egg, stir in ricotta and goat cheese until well combined.  Add a pinch or two of fresh thyme, season with salt and pepper.  Set aside.

To the set aside 1 TBS of egg mix in 1 tsp of water.  This is the glue and the glaze for the tart shell.

Spread the goat cheese mixture into the cooled tart shell.  I had a tad of filling left.  I was really tempted to make it all fit, but refrained since I had no idea what would happen.  Add a layer of caramelized onions and sautéed squash.  (Again, I had a bit of both left over so I planned on throwing the leftover filling into an omelet or frittata.)  Weave the squash lattice top.  Trim ends to fit.  The squash ribbons will shrink slightly during the baking so do not trim too perfectly.  I did the weaving ahead of time with the best shaped ribbons, set aside during the rest of the prep, and transferred the top with a large spatula.

Bake entire tart at 350 for 25-30 minutes.  Shield crust edges with foil strips for the first 15 minutes then remove to allow edges to get golden brown.  Remove to wire rack to cool. 

Serve with a few drops of port reduction, red wine syrup, or balsamic reduction. 
Pair with a green salad for an elegant and delicious lunch or light dinner.
Serves 2


Friday, June 29, 2012

SYM Spicy Glazed Chicken and SYM Maque Choux by Wooux


Slap Ya Mama Spicy Glazed Chicken
by Woo Brower 

Marinade:
2 Tablespoons Slap Ya Mama Hot Cajun Seasoning (this stuff is HOT, start with 1 Tablespoon and go from there, don't be a hero!  LOL)
1 teaspoon smoked paprika
3 cloves (largish) smashed, I mean, finely minced garlic
1/4 cup white wine
1/4 cup olive oil
juice and zest of 1/2 an orange (navel)
3 Tablespoons honey
1/2 of a chicken, bone in, skin on (about 2.5 to 3 pounds)


Slap Ya Mama Glaze 
(original inspiration from Pike Place Market Cookbook, Apricot Sweet & Sour Sauce)

1/3 cup of apricot jam (I KNOW, but it's my new thing)
1 Tablespoon of the reserved marinade (if you forget to reserve it, use 1/2 teaspoon or less of the HOT)
1 Tablespoon whole grain mustard (I used Maille)
Juice of the other half of that orange
teeny tiny dribble of sesame oil (like a scant 1/4 teaspoon?)

Mix all the marinade ingredients (except the chicken) together in a bowl or a gallon ziploc bag. Taste it.  Mostly it tasted really hot to me.  Which is why I decided to create a glaze.

SET ASIDE 1 Tablespoon OF THE MARINADE in a small mixing bowl.

Add chicken and coat well.  Allow to marinate for at least 2 hours.

While the chicken marinates, mix up all the ingredients for the glaze in a small bowl. Set aside and let the flavors meld.

Set up the grill for indirect heat (necessary for the bone-in cuts, less important for boneless)
Around 300-325 degrees, add chicken bone side down (skin side up). 
(My bone-in, skin-on chicken breast and thigh/leg quarter took about 50-55 minutes on indirect heat, 
with average temps around 325, plus let it sit for about 10 minutes with the grill off.)

About 15 minutes before the chicken is done, flip and brush on the glaze on the bone-in side.
Allow it to set, about 5 minutes or so. Flip and brush on the glaze on the skin side.  The skin should already be crisp (fat rendered out, but not burned, with a little bit of char on edges and grill marks) before glazing.  Brush on about three or four light layers of the glaze.  Allow each layer to set for a couple of minutes before brushing the next.  

Turn off the heat, cover the grill and let it sit for 5-10 minutes.Remove from grill,  allow it to rest while you plate and take pictures.

Cook's note: The hot blend is HOT!  I should have added it to the recipe last, tasting as I went.
I think using 1 Tablespoon of HOT and 1 Tablespoon of NOT would work well in the marinade. The apricot jam does temper the heat quite a bit, but the heat does come through. I recommend cooling sides like potato salad or the maque choux or cole slaw or grilled sweet corn or a cold corn salad. I used indirect heat because I like the skin to adequately cook and crisp up rather than just burn.


Slap Ya Mama Maque Choux
by Woo Brower

3 slices applewood smoked bacon, chopped/diced/sliced however you like your bacon pieces
4 cloves garlic, finely minced
1 medium onion, finely diced, about a cup
1 celery stalk, finely diced
1/2 cup of diced bell pepper (I used mostly red and a bit of green)
1 jalapeño, cored, seeded, and finely diced 
4 ears fresh sweet corn, shucked, kernels sliced off, milk scraped from the cobs, set aside milk, (discard cobs or throw it in the freezer and save for stock for corn chowder)
 4 scallions, thinly sliced
1 leafy stem of fresh thyme
1 bay leaf
1/4-1/3 cup of heavy cream 

In a large (10") saute pan or skillet cook the bacon til crisp, remove from pan, drain on paper towel, set aside. In the same pan with the leftover bacon drippings, on medium heat, add the onion, saute for 2-3 minutes until translucent. Add celery, bell peppers, bay leaf, thyme, and 2 tsp SYM.  Saute 2-3 minutes. Add cut corn and jalapeno.  Saute 2-3 minutes. Add reserved corn milk and the heavy cream as needed for desired consistency. Cook 5 minutes, add green onions. Allow to simmer 10-15 minutes depending on how you like your corn.  Adjust seasoning. Serve immediately. Serves 4 as a side dish. 

Cook's note:  Between the bacon and the SYM seasoning, I did not need additional salt. 
If you don't want to use bacon...what the hell am I saying.  Never mind.  Of course you'll use bacon ;)