Thursday, May 28, 2015

Chocolate Cayenne Ice Cream Sandwiches - A Sweet Treat with a Touch of Heat!


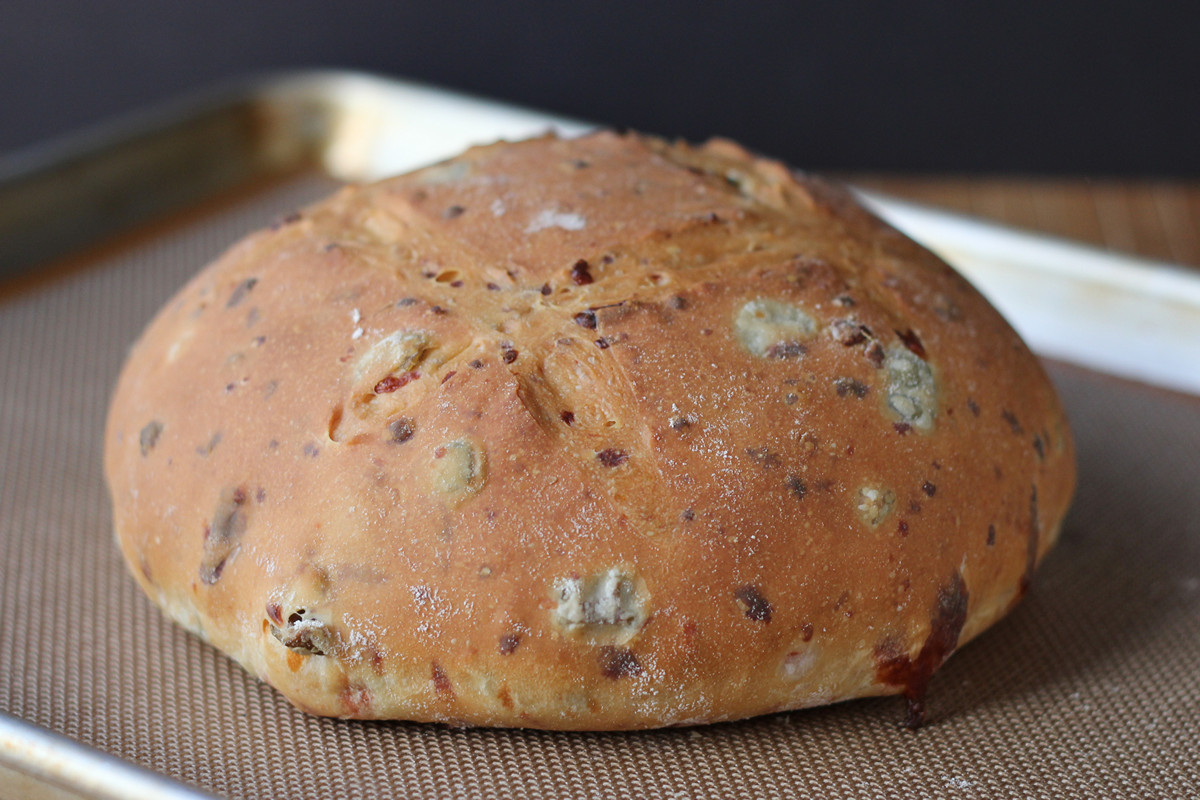
I have a dear friend who spoils me rotten with her cayenne-infused goodies. Cheddar "biscuits", caramels, etc. But one of my favorite bites ever are her chocolate cayenne cookies. As she's a semi- professional baker (makes gift baskets at Christmas, Easter and so on), she's very hush-hush about her recipes. So, I ventured out on my own (okay, I did have some help from a friend who is a WAY better baker than I am), did some research and stumbled upon a brownie cookie recipe. I simply added some cayenne and played around with the cooking time and method. I must say that these cookies rock! All three people that sampled them loved them fresh out of the oven. The ice cream is just a bonus. Great for a backyard BBQ or a movie night at home. They do take a couple of days to make, but absolutely nothing about them is difficult. That's mainly due to using the Mrs. Anderson's Bread Crisping Mat, from Harold Imports Company. After baking the cookies and letting them cool, they came right off of the mat, no worries. I was very impressed (and yes, that's my own opinion, nobody told me to say that!) I'm not a huge "baker", but I am excited about this mat. I honestly see myself using it soon to turn out the thin, crisp cookies (hello, toffee bits) that I adore. These cookies are awesome, as is the mat. Add in the ice cream, and you've got a nice sweet treat with a little hint of heat! Cheers!

Chocolate Cayenne Ice Cream Sandwiches
by Chris
Adapted from the recipe "Easy Brownie Mix Cookies" from Allrecipes.com
Makes about 30 cookies, or 15 sandwiches

1 Ghirardelli Double Chocolate Brownie box mix (18.3 ounces)
2 ounces (I used a kitchen scale to measure it out) plus 1/4 cup all-purpose flour (combining the two is fine)
1/2 teaspoon cayenne pepper
1/4 cup vegetable oil
2 large eggs, room temperature
3 Tablespoons water
1 cup Ghirardelli mini chocolate chips
Cooking spray (PAM) or a spray olive oil
Extra flour for forming cookies
French Vanilla ice cream, about 15 Tablespoons (to make 15 sandwiches. If making less, plan on one Tablespoon per sandwich)

* I used my Kitchen Aid stand mixer, but these could easily be made using either a hand mixer or good old basic stirring. I would use a sturdy spoon or a large fork, not a whisk, as the batter ends up being pretty thick and it would be difficult to get it all off of a whisk.

In a stand mixer, using the paddle attachment, combine the brownie mix, all of the flour, and the cayenne pepper on the lowest speed (#1) for about 30 seconds, just enough to incorporate all ingredients. Add the oil, eggs, and water. Mix at a slightly higher speed (#2) for one minute or until everything is well-blended. Add the chocolate chips and gently (on #1) blend into batter for about 30 seconds. Do not over mix. Scrape the paddle attachment in order to remove any remaining dough. Cover the bowl with Saran Wrap and place in the refrigerator to chill overnight.

When you are ready to bake the cookies, preheat the oven to either 325°F with convection (this is the method I used) or 350°F without. Remove the dough/batter from the refrigerator and let it sit out while the oven heats, about 15-20 minutes. At this point, you will need a non-stick spray (PAM or a spray olive oil), a small ice cream scoop or a Tablespoon (to measure the dough out), and a medium-sized coffee cup or drinking glass (to press the cookies). Spray both the scoop and the bottom of the cup/glass with your non-stick spray (I resprayed both after every 3-4 cookies throughout the baking process.) You will also need a small bowl of flour (about 1/2 cup) to use on your hands when forming the cookies (I coated my hands in flour after each 3-4 cookies as well.) Place your Mrs. Anderson's Bread Crisping Mat on a cookie sheet to fit. Using the oiled scoop/spoon, measure out about one Tablespoon of batter and roll into a ball using your floured hands. Place on the Crisping Mat. You will be able to fit 6 cookies on one sheet without issue. Once you have 6 balls of dough, use the oiled cup/glass to gently press the cookies flat. You may need to flatten them a bit more using the palm of your hand. Make sure that they are fairly even in size if you plan on making ice cream sandwiches (one of my taste testers was not able to eat ice cream, so he sampled the cookies alone. They are awesome either with or without the ice cream.) When your cookies are ready, place into the heated oven. Be sure to cover the batter and leave it in the refrigerator between batches (if it is not cool enough it will get sticky and icky!) Bake for 8-10 minutes (8 was perfect in my oven at 325°F with convection, but your oven may be a tad different.) After cooking, remove cookies from oven and let sit to cool for at least 10 minutes. When cooled through, use a plastic spatula to gently take cookies off of the mat. Let them sit on the counter, uncovered, for at least one hour. During this time they will harden up quite well.

When ready to assemble the sandwiches, pull your ice cream (I love them with French Vanilla, but you could totally do whatever appeals to you) out of the freezer and let it soften for 15-20 minutes. While waiting, go ahead and pull off enough squares of Saran Wrap to wrap your sandwiches in (you could leave some cookies just to nibble on), and match your cookies up according to size. When ice cream is softened, place a scant Tablespoon on one cookie, and top with another similar-sized cookie to make a sandwich. Press down lightly to insure that the ice cream is spread out evenly, but don't let the ice cream spread out over the edges of the cookies. Wrap tightly in the Saran Wrap, and place in the freezer to harden, at least 2 hours.

Wednesday, May 27, 2015

Roasted Spicy Asian Shrimp


Mrs. Anderson’s Non-Stick Silicone Baking Mat from Harold Imports Co. is the perfect addition to your cooking and baking supply cabinet. Not only invaluable for baking cookies, pastries, breads and other sweets, the mat is also terrific for savory items. These shrimp plumped up and cooked evenly in no time at all. With a non-stick surface, cleanup was easy! Make these delicious shrimp as a tasty appetizer for your next party, or as a zesty main dish.

Roasted Spicy Asian Shrimp
by Gary
Serves 4; 6 as appetizer course

1 pound medium shrimp (20-25 count), peeled, deveined, tails left intact
1 Tablespoon peanut oil
1 Tablespoon toasted sesame oil
1 Tablespoon Chinese black bean paste*
1 teaspoon sambal oelek*
1 teaspoon rice cooking wine
1 teaspoon ketchup
1 clove garlic, run through a press
1 teaspoon coarse salt
1 teaspoon Szechwan peppercorns, crushed with a mortar

Preheat oven to 425°F. Place Mrs. Anderson’s Non-Stick Silicone Baking Mat in a rimmed baking sheet. Place baking sheet in oven.

Rinse shrimp with cold water; drain and pat dry. Set aside.

In a large bowl, whisk together remaining ingredients. Add shrimp, and toss to combine. Cover and marinate in refrigerator for 30 minutes.

Remove shrimp from marinade and place on heated baking mat. Discard marinade. Roast at 425°F for 4 minutes. Turn shrimp over and continue cooking until shrimp are just cooked through and slightly browned, about 3-4 minutes more. Remove from mat and serve immediately.


*Found jarred at most Asian markets

Tuesday, May 26, 2015

Chocolate Chip Scones

My daughter's favourite, anything with chocolate. I made these just in time for my husband's business trip and visit with our kids. The Mrs. Anderson's baking mat from the Harold Import Company made baking and cleanup a breeze.

Chocolate Chip Scones
by Nancy
Adapted from Stacie Husmann

2 cups all-purpose flour
1 Tablespoon baking powder
1/2 teaspoon salt
1/4 cup plus 3 Tablespoons sugar, divided
3/4 cup chocolate chips, semi-sweet
1 1/4 cup heavy whipping cream
3 Tablespoons unsalted butter, melted

Preheat oven to 425°F. Sift together flour, baking powder, salt and 1/4 cup sugar. Add chocolate chips and stir gently. Pour in heavy cream and mix together with a fork until sticky and crumbly. On a floured surface, knead dough 10 times. Place dough on a Mrs. Anderson's Non-Stick Silicone Baking Mat and shape into a 9-inch disk. Brush with melted butter and sprinkle with 3 Tablespoons sugar. Cut into 12 pie shaped wedges and bake 15-17 minutes.

Monday, May 25, 2015

Baked Crawfish Pies

The Mrs. Anderson's Bread Crisping Mat from Harold Import Company is a great bread baking mat. This bread crisping mat did just what it's meant to do. The bottom of the pies were crisp and delicious! This is a great recipe! You can use crawfish, crab meat, or shrimp!

Baked Crawfish Pies
by Luke
Inspired by Little Crawfish Pies

4 Tablespoons olive oil
3/4 cup yellow onion, chopped
1/2 cup green bell pepper, chopped
1/2 cup chopped celery
3 Tablespoons Slap Ya Mama Cajun Seasoning
1 pound of crawfish tails
1 Tablespoon minced garlic
1/2 cup chopped green onions
1 large egg
2 Tablespoons milk
1 box Pepperidge Farm Puff Pastry
2 Tablespoons Slap Ya Mama Cajun Seasoning, to garnish

Heat olive oil in a large skillet. Add onions, bell pepper and celery, saute for 4 minutes. Add 3 Tablespoons of seasoning to crawfish tails and cook for 4 minutes. Now, add garlic and green onions and cook for 2 minutes.

Remove skillet from warm burner and pour mixture into a bowl to cool.

In a small bowl, whisk egg and milk together to make egg wash, set aside.

Preheat oven to 375°F. Cut pastries into 3- to 4-inch squares and add 2 Tablespoons of crawfish mixture onto the middle of each pastry. Then fold one end over the other and use egg wash to seal the ends. Place pastries onto Mrs. Anderson's Baking Bread Crisping Mat and set on cookie sheet. Once all of the pies are made and placed onto the mat, place the sheet in the oven for 15 minutes. After 15 minutes, garnish pastries with remaining seasoning and serve!

Thursday, May 21, 2015

Green Olive & Pimento Bread with a Hint of Cheese

It should be pretty obvious that I like baking bread, so when I got a chance to work with a crisping mat from Harold Import Company, you'd better believe I put it through its paces.

The surface of the mat is nonstick, so there's no need for cornmeal under the dough. The mat is actually a very fine mesh, so there are holes that allow air circulation under the baking bread. It's really a great idea.

Even if the bread is a little sticky - like a sweet bread that might ooze sugary stuff - or a cheesy bread like the one I made for this challenge - the bread doesn't stick and the mat is easy to clean. It's dishwasher safe, but things like this are awkward in my dishwasher, so I've only washed it by hand.

If you bake a lot of bread, pastries, cookies, or other baked goods where a crisp, non-soggy bottom is preferred, I suggest you give one of these mats a try. And although I haven't tried it, it should be pretty awesome for reheating things like pizza, where you really do want a non-soggy bottom.

I made a round, free-form loaf studded with bits of green olives (and the pimento stuffing) with a little bit of cheese for added flavor.

Since I used a white cheese, it's not visible inside the bread, but you can see flecks of browned cheese bits where it was close to the surface of the dough. The finished bread is rich and savory, with little bits of salty green olive and sweet pimento.

Green Olive & Pimento Bread with a Hint of Cheese
by Donna

1 cup lukewarm water
2 1/4 teaspoons active dry yeast
1 Tablespoon sugar
2 1/2 cups (11 1/4 ounces) bread flour
1 teaspoon salt
2 Tablespoons olive oil
2 ounces shredded cheese
16 pimento-stuffed well-drained green olives, sliced or roughly chopped

Combine the water, yeast, sugar, bread flour, salt and olive oil in the bowl of your stand mixer fitted with the dough hook. Knead until the dough is smooth and elastic.

Add the cheese and olives and mix until well-combined.

Cover the mixer bowl and set aside until the dough has doubled in size, about an hour.

When the dough has risen, flour your work surface, place the crisping mat on a baking sheet, and heat the oven to 350°F.

Knead the dough briefly, then form it into a tight ball. Place it on the prepared baking sheet and cover with plastic wrap. Or, what I did was use the empty mixing bowl as a cover. Set aside until the dough has doubled in size and if you gently poke the dough with a finger, it leaves an indent or slowly fills in rather than bouncing back quickly.

Slash the dough as desired and bake at 350°F until nicely browned, about 45 minutes.

Let the bread cool completely on a rack before slicing.

I received two baking mats at no cost to me from Harold Import Company.

Wednesday, May 20, 2015

Almond Cranberry White Chocolate Cookies

Cookies. Who doesn't love a great, homemade cookie?! Over the years, I have made dozens of types of rolled dough, drop and bar varieties. I usually make 6 or more types around the holidays and ship them out across the country to my family and friends. The trick is usually trying to find ones that can make the trek in one piece and stay fresh.

I came across this recipe from Nature's Eats last winter. Normally, my husband and son make some disagreeable face whenever I mention anything with coconut in them. But, they actually loved these! Score one for mom!

These are easy to make, and stay fresh for days in an airtight container. I found with the Mrs. Anderson's Sweet Baking Mat from Harold Import Company that they brown nicely and they even keep their height (this is something I've been challenged with living in high altitude the past 10+ years.)

So, I highly recommended these for your picky eaters. You may even convert them to coconut after all.

Almond Cranberry White Chocolate Cookies
by Holly
adapted from Nature's Eats: Almond with Cranberry and Coconut Cookies

1 1/4 cups blanched almond flour
1/4 cup dried cranberries
1/2 cup finely shredded (angel) coconut
1/4 cup white chocolate chips
1/2 teaspoon baking powder
1/4 teaspoon sea salt
1/3 cup packed light brown sugar
1 large egg
3 Tablespoons melted and slightly cooled coconut oil
1/2 teaspoon pure vanilla extract

Heat oven to 375°F. Place a Mrs. Anderson's Sweet Baking Mat inside a standard baking sheet.

In a medium bowl, combine the flour, cranberries, coconut, white chocolate chips, baking powder, sea salt and brown sugar. In a small bowl, whisk the egg until light and frothy. Gradually add the coconut oil and vanilla. Add the wet ingredients to the dry ingredients until thoroughly incorporated. Place bowl in freezer for 15 minutes to help set the mixture.

Remove dough from freezer and form twelve 1-1 1/4" balls, evenly space onto the baking sheet. Bake cookies on middle rack, about 10-12 minutes or lightly browned. Let cool on the baking sheet for a minute and remove to a rack to completely cool before eating.

Harold Import Company:
-Facebook: https://www.facebook.com/HaroldImportCompany
-Twitter: https://twitter.com/HaroldImportCo
-Pinterest: https://www.pinterest.com/HaroldImport/
-YouTube: https://www.youtube.com/user/HaroldImportCompany

Tuesday, May 19, 2015

Roasted Green Chile Tortilla Stacks

When I was a child, my mom had a quick and simple dinner that she sometimes served to us kids as a special treat. It was nothing more than a ground beef, soup and green chile mixture piled on top of a tortilla, topped with cheese and broiled until crisp. She didn't make it often, but oh, how we loved it! I had been thinking about cooking it up myself recently, so when I was offered the chance to try out the Mrs. Anderson's Baking Mat from the Harold Import Company, I decided that this would be the perfect time to play around and put my own spin on an old childhood favorite! I did search around online a bit to see if anyone else out there was familiar with this dish and I didn't really find much. I did find one recipe that I liked, which added a layer of beans and made these "stacks" a little more filling. So, I combined the online recipe with my mom's old recipe and made some changes of my own. The result is a tasty updated Tortilla Stack. It can be served as an appetizer or a main course, and it's pretty fun to make!

Roasted Green Chile Tortilla Stacks
by Chris
(Serves 8 as a main course, many more as an appetizer)
Adapted from "Spicy Tortilla Stack" by Countdown Grocery

3 cups cooked and diced/shredded chicken (a rotisserie chicken works well)
2 Tablespoons olive oil
1 packet Sazon seasoning
1 cup diced green chiles (I used Hatches that I had frozen, but canned will work as well)
1 cup sweet yellow onion, diced
4 Tablespoons cream of celery soup, undiluted (from one 10.5 oz can)
2 16-ounce cans refried black beans (or 3-3 1/2 cups, if making your own)
1 teaspoon garlic salt (or to taste)
1 teaspoon cumin (or to taste)
2 teaspoons hot sauce, such as Tabasco (or to taste)
16 flour tortillas, fajita size (6.5")
1 bag Monterey jack cheese, shredded (12-16 ounces)
About 1/4 cup of a tart vinaigrette (I simply used a store-bought lime vinaigrette)
Sriracha, for drizzling
About 1/2 cup of sour cream mixed w/Sriracha (to taste)
Extra sour cream (plain) and sliced black olives, for serving (optional but recommended)

Place the diced chicken in a gallon-sized zip-top bag. Add the 2 Tablespoons of olive oil and the packet of Sazon. Mix well, using your hands. Remove as much air as possible, turn to coat, and place in the refrigerator until ready to use (this can be done ahead of time, up to 24 hours before cooking.)

Drain as much liquid as possible from the chiles. I strained mine in a small mesh sieve and then blotted with paper towels. When fairly dry, set aside with the diced onion. Set out the marinated chicken, if it is in the refrigerator. Let it come to room temperature.

Preheat the oven to 375°F and place onions and peppers on the Roasting Mat. Roast for 5 minutes. At 5 minutes, use a spatula to stir the mixture and continue roasting for 5 minutes more (10 minutes total.)

When the peppers and onions are done, scrape off of the mat and set aside to cool. Leave the oven on at 375°F. Wipe the mat with a damp towel, in order to remove any blackened bits. Place the chicken on the mat, spread into a single layer, and put into the oven for 5 minutes. Again, stir with a spatula and cook for 5 minutes more (10 minutes total.) Set aside to cool. Wipe the mat clean.

Combine the onion and chile mixture with the cooled chicken and add the soup. This should resemble a chicken salad in texture. Set aside.

Combine the beans, garlic salt, cumin and hot sauce in a separate bowl. Again, set aside.

To assemble the tortilla stacks, simply place one tortilla onto a plate (Be sure to spread each layer almost to the edge, but do leave a small section uncovered, as this will make them easier to handle and eat!) Top the tortilla with about 2 Tablespoons of black beans and 1 Tablespoon of cheese. Place another tortilla on top of the bean and cheese layer, and add about 3 Tablespoons of the chicken mixture. Top with more cheese if desired. Drizzle with the vinaigrette and a little Sriracha. Repeat until you have made as many stacks as you want. Heat the oven to 350°F, using the convection setting if possible. Bake on a Mrs. Anderson's Baking Mat from Harold Import Company for 10 minutes. Add more cheese if wanted. Dollop with Sriracha sour cream and top with olives. Let sit 5 minutes before cutting and serving.

Cut into wedges and serve with extra sour cream on the side, if desired.

Monday, May 18, 2015

Bacon Wrapped Sausage Rolls

When this challenge came to us from Harold Import Company I was wondering, "What can I do with these Mrs. Anderson's Baking Mats?" I'm not much of a baker, but I was thinking, baking and bacon...

These days everything is wrapped in bacon. Bacon is delicious and pork is just my thing. So, I was thinking how about we incorporate bacon and the sushi rolling technique to make a very flavorful dish. Then I thought, well, I do not have a sushi mat, so I grabbed a clean kitchen towel and some Cling Wrap and this is what I came up with.

This works well whenever it is too hot and humid to stay outside and BBQ.

Bacon Wrapped Sausage Rolls
by Luke

6 slices bacon
1 pound ground sausage
1 large jalapeno, seeded and sliced
1 cup diced pepper jack cheese

Preheat oven to 400°F.

If you have a sushi mat, use it for this recipe. If not, then grab a heavy kitchen towel and some Cling Wrap. Lay the towel down, then place plastic wrap on top. Place each slice of bacon side by side, add ground sausage and flatten across the slices of bacon evenly. Add cheese and jalapeno slices.

Carefully grab the closest end of the towel and plastic wrap and start rolling so that the bacon rolls into the sausage mixture. Once rolled, apply pressure to the roll so that it stays together.

Place Mrs. Anderson's Baking Sheet on a cookie sheet and transfer the roll onto it. Cook in oven for 1 hour or until internal temperature reaches 160°F. Once the roll is cooked, put the oven on broil and broil the bacon until you get the crispy bacon you love.

Remove from oven and let it sit for 5-10 minutes, then slice and enjoy​​.

Thursday, May 14, 2015

Crusty Flat Bread

I was happy to receive the Mrs. Anderson's Baking Mats from Harold Import Company. The bread crisping mat kept the bread crisp and soft inside. I would definitely use it again.

Crusty Flat Bread
by Nancy
Adapted from Annabel Langbein

Dough:
1 1/2 cups warm (not hot) water
1 1/2 teaspoons dry yeast granules
1 cup packed mashed potatoes (no butter or milk added)
1/4 cup extra virgin olive oil
3 1/2 - 4 1/2 cups bread flour
2 teaspoons salt

Topping:
2 Tablespoons garlic-infused olive oil
2 teaspoons fresh rosemary leaves
1/2 teaspoon sea salt

Attach dough blade attachment to your mixer. Add water to the mixing bowl and sprinkle the yeast over the water.  Let stand for 2 minutes. Mix in the mashed potatoes and olive oil. Stir in 3 1/2 cups flour until the dough comes away from the sides of the bowl, using additional flour if needed.

Turn the dough onto a floured surface and using lightly oiled fingers, knead bread 30 times and place the dough in an oiled bowl. Cover with a clean towel and place in a warm place for 3-4 hours, or until doubled in size.

When you are ready to bake, preheat your oven to 425°F. Turn out the risen dough onto a lightly floured surface, divide the dough in half and shape each half into a ball. Roughly flatten one onto your Mrs. Anderson's Non-Stick Bread Crisping Mat, pressing the dough out into an oval shape roughly 10 x 8 inches. Using your fingers, press dimples into the dough, then drizzle the garlic olive oil on top of the loaf and sprinkle with the rosemary and sea salt.

Bake for 20-25 minutes until golden. When cooked, the bread will sound hollow.

Repeat with the other dough ball or place in an oiled bowl, cover with a clean towel and keep in the fridge for up to 2 days, till ready to be baked. It also freezes well. Thaw before pressing out and baking.

Wednesday, May 13, 2015

Not Your Mama's Meatloaf and Taters

I was so happy to receive the Mrs. Anderson's baking mats from Harold Import Company. They so generously let us sample two different ones, a full-sized baking mat and a bread crisping mat. I decided to use both of them and compose a delicious evening meal for you to recreate.

Who doesn't like Meatloaf and Taters? We are doing three different stuffed Mini Meatloaves and a Squished Red Tater, with a bit of a twist on each one. They are easily adaptable to anything you want to add or subtract.

I am going to just start with a basic meatloaf recipe, because you will be adding other things later. And please feel free to use your favorite recipe. I also recommend using ground chuck. I do suggest making your loaf base the day before and letting it sit in a bowl overnight in the refrigerator. One reason is that a lot of the fat will adhere to your bowl and second is that the seasoning and bread crumbs will have time to mingle. I will also let my potatoes soak overnight to get rid of any dirt that may be on them. I don't want to scrub reds because the skin is so thin.

Not Your Mama's Meatloaf and Taters
by Traci
Adapted from the many stuff meatloaf recipes I've seen on TV

Meatloaf:
1 1/2 pounds ground chuck
1 small onion, chopped
2 teaspoons salt
1 teaspoon pepper
1 1/2 teaspoons garlic powder
1/2 cup unseasoned bread crumbs
2 eggs
1 full-sized Mrs. Anderson's Silicone Baking Mat
1 large cookie sheet

I like to add all the ingredients together. The more you mix, the more you break up the chuck, so don't overmix. Later you will make the loaves one at a time.

Cover and let it sit in the refrigerator, preferably overnight, but at least for an hour.

Place the mixture onto a cutting board and divide into six medium egg shapes. Slit each down the middle with a knife and use your finger to open up a pocket. Proceed to stuff with your favorite fillings.


My Fillings (I just cubed the cheese):
Gruyere/Mushrooms
Mozzarella/Tomato Paste (seasoned)
Cheddar/Bacon Bits

Seal loaves back up and place on the baking mat. Cook at 325°F until done.

Squished Red Taters

4 medium taters ( I used red, but you can certainly use yellow)
1 softened stick of butter
1 cup sour cream
1/2 cup chopped green onion
3 Tablespoons bacon bits
1 Mrs. Anderson's Bread Crisping Mat
1 large cookie sheet

In a large pot, boil the potatoes until a knife inserts and comes out easily. Drain and slice in half. Allow them to cool.

On a cutting board, place skin-side down and start to smash with a fork, forming a round shape. Transfer to your crisping mat. Top with a pat of butter.

Put into a 325°F oven until the bottoms are crisp and the edges are browned. I like to put a bit more butter, a dollop of sour cream, green onion and bacon bits. Proceed to top to your specifications. These are terrific hot or room temperature.

I highly recommend checking out Harold Import Company. They not only have these amazing mats, but a wide array of goods that are fantastic!!!

Tuesday, May 12, 2015

Grilled Pineapple Pavlovas

I love Pavlovas! Crispy on the outside and gooey in the middle, Pavlovas are delicious topped with a variety of creams and fruits. Using the Mrs. Anderson's Baking Mat, they baked evenly and lightly browned in all of the right places.

Pavlovas are delightful and can be topped with a variety of creams and fruits. The possibilities are endless. I love the Caribbean, so I decided to go with tropical flavors and spices. Don’t let the recipe intimidate you. There are many steps, but each step is short and simple. The hardest part is the waiting. This dessert is a showstopper and will wow you friends and family. The meringues, pineapple curd and grilled pineapple can all be made a day or two ahead. Enjoy.

Grilled Pineapple Pavlovas
by Tracy

Meringues:
Equipment:
Mrs Anderson's Baking Mat from Harold Imports

4 large egg whites
1/2 teaspoon cream of tarter
1/8 teaspoon salt
1 cup sugar
1 teaspoon vanilla
1 teaspoon white vinegar or lemon juice
2 teaspoons cornstarch

Preheat oven to 300°F. Place the Mrs. Anderson's Baking Mat on a baking sheet.

Using and electric mixer fitted with the whisk attachment, whisk together the egg whites, cream of tarter and salt. Whisk until soft peaks form. With the whisk running, gradually add the sugar, one Tablespoon at a time. Whisk until stiff peaks form and the mixture is glossy. Whisk in the vanilla, vinegar and cornstarch until incorporated. Make 6 circles onto the baking mat, using approximately 1/2 cup of the egg whites per circle. The meringues should be about 3/4 inch high and about 2 1/2 inches round. Make sure that the circles are about 1 inch apart. Bake at 300°F for 25-30 minutes (meringue should be set and just beginning to change color.) Turn off the oven, open the door slightly and let the meringues cool completely. When completely cooled, remove the meringues from oven. Using a metal spatula, gently remove the meringues from the mat. Meringues will keep in an airtight container for up to 1 week.

Pineapple Curd:
1/2 cup sugar
1 Tablespoon cornstarch
Pinch of salt
1 cup pineapple juice
2 Tablespoons lemon Juice
3 large eggs
2 Tablespoons butter

In a medium saucepan, combine the first 6 ingredients. Whisking constantly, bring mixture to a boil. Reduce heat and simmer for approximately 1 minute. Remove from heat and stir in butter. Place in a bowl and cover with plastic wrap, placing the wrap directly onto the curd so a film does not form. Chill the curd overnight. Curd will keep in the refrigerator for up to one week.

Grilled Pineapple:
6 fresh pineapple rings, peeled and cored (about 1 medium pineapple)
3 Tablespoons brown sugar
1 teaspoon ground cinnamon
1/2 teaspoon ground ginger

Place the pineapple rings in a sealable plastic bag. In a small bowl, mix together brown sugar, cinnamon and ginger. Sprinkle over the pineapple rings. Make sure the rings are covered with the mixture. Seal the bag and let marinate in the refrigerator 1-4 hours, or overnight. Heat grill. Grill pineapple rings on medium-high heat for 4-5 minutes on each side, until grill marks form and pineapple is heated through. Set aside and let cool. When pineapple is cooled, chop into small bite-sized pieces.

Nutmeg Whipped Cream:
1 cup heavy whipping cream, chilled
1 teaspoon freshly grated nutmeg

With an electric mixer, beat together the cream, nutmeg and sugar until stiff peaks form.
Make this just before serving Pavlovas.

Garnish:
6 Tablespoons unsweetened shredded coconut, toasted
3 Tablespoons lightly salted cashews, toasted and chopped
Zest of 1 lemon
Zest of 1 lime
Zest of 1 orange

Assembly of Pavlovas:
Place one meringue on a serving dish, top with 2 heaping Tablespoons pineapple curd. Then add 1/6th of the chopped, grilled pineapple. Sprinkle 1 Tablespoon of toasted coconut and top with a hefty dollop of nutmeg whipped cream. Add 1/2 Tablespoon of the cashews and sprinkle lemon, lime and orange zest over the top. Serve immediately.

Monday, May 11, 2015

Harold Import Company Challenge

37 Cooks was very pleased to partner with Harold Import Company, a family-owned and operated business specializing in gourmet kitchen supplies since 1957.

The company is based in Lakewood, New Jersey, and manufactures and sells a variety of products for professional and home kitchens.

You might not recognize the Harold Import Company name, but you might know many of their other brand names.

For this challenge, our cooks received two different silicone baking mats from Mrs. Anderson's Baking. The first mat was an all-purpose silicone mat for baking cookies, breads, meats, or pretty much anything you'd put in the oven, and that might stick to a baking sheet.

The second mat was a silicone mat made with a fine mesh that's made specifically for baking bread. The mesh allows air to flow under the bread, resulting in a crisp bottom crust. It's also ideal for reheating pizza or other baked goods when you want to keep the bottom from becoming soft or soggy.

The cooks were challenged to use one of the two mats - and as usual, they did a spectacular job.

Thanks to Harold Import Company for supporting our cooks!

Tuesday, May 5, 2015

Jalapeno Pineapple Daiquiri

When the "It's Five O'Clock Somewhere" challenge was presented, the ideas started flowing. Thinking back, I remembered making Jalapeno Pineapple Daiquiris at a family beach vacation in 2013. I heard about this recipe when a Facebook friend on a cooking board posted about it. So, cheers to Kenny G.! Since I’m the only one in the house drinking these, I had enough extra to fill 2 pint mason jars for later. I put them in the freezer for another day and since there is alcohol, they won’t freeze solid. Cheers to me!


Jalapeno Pineapple Daiquiri
by Sharyl
Adapted from Food Network's Pineapple-Jalapeno Daiquiris

1/4 to 1/2 of a fresh jalapeno pepper
2 12-ounce bags frozen pineapple
3/4 cup rum
2-3 Tablespoons sugar (I used 2)
Juice of 1 lime
1 1/2 cups ice

Slice and seed the jalapeno. I used 1/2 of the jalapeno. Add all ingredients, except the ice, to the blender and mix. Add the ice and blend smooth. If it is too thick, add a little water or a little more rum. Makes 4 servings. Garnish with lime or jalapeno. This recipe can easily be doubled and then divided into mason jars and put in the freezer for enjoying later. Freeze for up to 1 month.

Monday, May 4, 2015

“Root” Float

Root is an 80-proof “spirit” whose formula is based on what eventually became root beer. When I first tried it, I was worried it was going to taste like root beer soda syrup, but thankfully I was wrong. It’s not nearly as sweet and while it definitely has an overall distinct root beer vibe, you can really taste all of the individual flavors that come together to create that classic flavor.

Although I don’t normally like overly sweet drinks (either alcoholic or not), I just couldn't resist the temptation to make a root beer float out of the Root. It’s a win-win: You get to feel like a kid while drinking a gigantic, fizzy, ice cream-laden treat with the added bonus of an adult, boozy-warm surprise.

“Root” Float
by Jennifer

2 scoops vanilla ice cream
2 ounces Root
1 ounce Bailey's Irish Cream
Plain seltzer
1 photobombing cat, optional

Place ice cream in a tall glass. Add Root and Irish Cream. Fill glass to top with seltzer.

Enjoy!