Chicken Pot Pie
by Susan Cramer
adapted from the Betty Crocker cookbook
makes 6 servings
1/3 cup margarine, butter or chicken fat
1/3 cup all-purpose flour
1/3 cup chopped onion
1/2 teaspoon salt
1/4 teaspoon pepper
1 3/4 cup chicken or turkey broth
2/3 cup milk
2 cups cut-up cooked chicken or turkey
1 package (10 ounces) frozen peas and carrots
Celery Seed Pastry (below)
[My notes on these ingredients: I omit the onion; husband is allergic, sadly. But it still tastes really good. For the veggies, I have used a bigger package, like 16 ounces or so – it just makes more filling and there’s still enough of the gravy to go around. Oftentimes I go more on the chicken, too.]
Heat margarine over low heat until melted. Blend in the flour, onion, salt and pepper. Cook over low heat, stirring constantly, until the mixture is smooth and bubbly; remove from the heat. Stir in broth and milk. Bring to a boil, stirring constantly. Boil and stir for 1 minute. Stir in the chicken and frozen vegetables; reserve.
Prepare Celery Seed Pastry. Roll 2/3 of pastry into 13-inch square on a lightly floured cloth-covered board. Ease the pastry into a square pan, 9 x 9 x 2 inches; pour chicken filling into the pastry-lined pan. Roll remaining dough into an 11-inch square; place over the filling. Roll the edges under; flute. Cut slits in the center to allow steam to escape. Bake uncovered in 425°F oven, until crust is brown, 30 to 35 minutes.
Celery Seed Pastry:
2/3 cup plus 2 Tablespoons shortening, or 2/3 cup lard
2 cups all-purpose flour
2 teaspoons celery seed
1 teaspoon salt
4 to 5 Tablespoons water
Cut the shortening into the flour, celery seed and salt until particles are the size of small peas. Sprinkle in water, 1 Tablespoon at a time, tossing with fork until all the flour is moistened and the pastry almost cleans the side of a bowl (1 to 2 teaspoons water can be added if necessary). Gather the pastry into a ball.
My notes on the pastry: When I made it today, I omitted the celery seed, but I LOVE it with celery seed. It just gives it a little extra something. I often use a round pie pan – I have a big one, it seems bigger than normal, and if I use a square pan, that one seems bigger, maybe 10 x 10, too. So I usually make that recipe for the pastry times 1.5 so half again - instead of 2 cups flour, I use 3 cups flour, etc. And with me using extra chicken and veggies, a bigger pie is perfect. I would also rather have to trim off a little extra pastry than to not have enough to make a nice pie. It looks ugly when I try to stretch it too far.
For all my pastry making, I use shortening for the fat. A couple of us in my family have trouble with butter in the pastry for some reason (I mean gastric distress kind of trouble, lol) so I use shortening. I prefer butter if possible for everything, but the only time I use shortening is for pastry and biscuits. Did you see the movie The Help? And the part about Crisco? That cracked me up because my mother went through one of those big cans EVERY week when I was growing up. Almost everything was fried. But we weren't unhealthy or overweight, so I’m not sure what all that means…but where was I?
Oh yeah. I first measure my dry ingredients into my bowl and I use a whisk to mix them up - whisk is a good tip for mixing dry ingredients for any baking recipe. Then I cut in the shortening using my pastry cutter. It works pretty well, but you can also use two knives (table knives are fine). I pretty much follow the recipe - when the particles are about the size of small peas I stop. Better to stop a little early than go too long with pastry. It doesn't like to be handled overly much or it gets tough. Remember that. Tough pastry is not flaky or delicate.
Then it’s time to add the water. I use ice water, meaning I have a cup with ice cubes and water in it and I measure my water right out of that cup. Cold water is important. And if you use butter instead of shortening, cold butter is important.
I add one Tablespoon of water at a time and use a fork to toss it around. It doesn't seem to be doing much those first couple of Tablespoons, but just do it one at a time – add water, toss around, add water, toss around. I think the reason it’s not exact on the amount is because it can vary due to the humidity when you make it. If that’s not the reason, it sounds good, right?
Then when it just starts to come together, you stop adding water and gather it up in a ball. You want it to stick together, not be too crumbly, but not too moist, either. With practice, you get better at knowing when to stop adding water.
Then I sprinkle some flour on my counter (my very clean counter, of course). Sometimes I use a pastry cloth that I have, but the counter works fine and cleans up fine. I have some of that Corian counter stuff. My last house had granite and I rolled out some dough right on it and it stained my counter. I was not happy. The Corian doesn't stain so I like that, even though it’s not as pretty as the granite.
I do divide up the dough about like the recipe says - around 2/3 of it for the bottom crust and 1/3 for the top crust. Then I take the 2/3 part and form it into a big fat disc shape on the floured counter, sprinkle a little flour on top of it and then I get my French rolling pin and start rolling it out. I absolutely love my French pin - I know I've told you this before - but I think it does a much better job for me than my standard rolling pin. Something about how it “eases” out the circle - it’s magic! When I get it a couple inches or so bigger across than my pan is wide, I transfer it into the pan. Usually, I just fold the dough lightly in half and pick it up and unfold it. If it tears a bit, that’s okay - you can dip your finger in water then mend it up pretty well.
At this point the edges are hanging down all around and I put in the filling. Leave it and get your 1/3 part of dough and roll it out, maybe an inch or so wider than the pan. You can fold that one over and put it on top and unfold it over the filling. Then it’s time to seal it up. It looks best if you make your top crust roll over the bottom crust and fold under by the edge of the pan, so all the top is just a seamless piece of dough. Does that make sense? You know, there are probably people on the Internet making pie crust and can explain it a whole lot better than me. Ha ha! If you have too much dough, you can pinch some off. Sometimes I have too much in some spots and too little in others, so I’ll move some over and sort of mend it together where I need it. Just remember not to handle it too much. The more of that you do, the tougher it gets. It would be better to have an imperfect but flaky, delicate crust than to have a cosmetically perfect crust that’s tough - in my opinion.
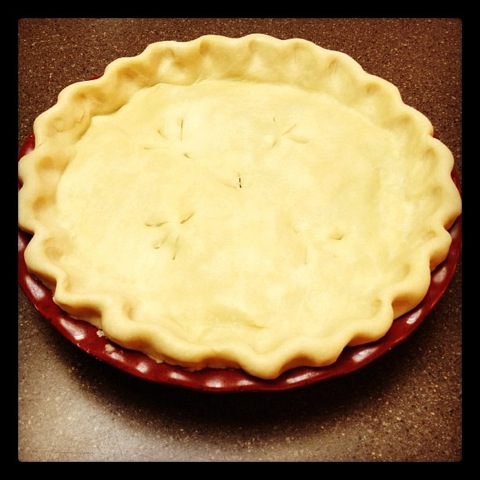
Then you should vent your crust before you bake by making some cuts with a knife. My mom made hen tracks in her chicken pot pie and so do I. You can also vent pies by using those little cookie cutters and then you can use the pieces you cut out to decorate the top of your pie. Lots of cute things people do.
I usually get some strips of aluminum foil and form them around the edge of my pies before I put them in the oven to keep the edges from getting overly brown. I have some of those pie guards but they really only fit one pie size, so they don’t work for everything. Then when there’s about 10 minutes left in baking I take them off so the edges can brown.
See Susan's original post here.
walmart survey
ReplyDeletecvs health survey
dollar general survey
whataburger survey
home depot survey